
Capturing Regions Consecutively
Use this method to capture consecutive rectangular regions of your computer screen. You can draw a rectangle over any area of your computer screen and capture that region. That image is then loaded into the Capture Editor, while the capture region rectangle and the task bar remain on the screen. This lets you relocate and resize the next capture region, as well as manipulate the onscreen content that you want to capture in between consecutive captures without having to select the option to capture a region each time. This method is useful when you want to capture only a specific area in multiple applications or in different areas on the screen.
[Menu Proxy — Headings — Online — Depth3 ]
How to Capture Consecutive Regions
- Open the window(s) with regions that you want to capture and/or arrange your desktop as needed. When you initiate a region capture, the Capture application will be minimized, allowing you to capture a region for whatever is directly behind it. After each capture, you can rearrange your desktop as needed.
- (Optional) From the Edit ribbon, click the Select profile drop-down and choose a profile.
Note Whenever you capture an image, you do so using a profile (which is a collection of settings that are applied to the image in advance). You can use the default profile ("MyProfile") provided for you in Capture (which uses basic settings that you may not even notice), or you can create and use your own profiles. This is a good way to save time and keep your captured images consistent.
- Select File > Capture > Capture Regions Consecutively or Edit > Capture > Capture Regions Consecutively.
-
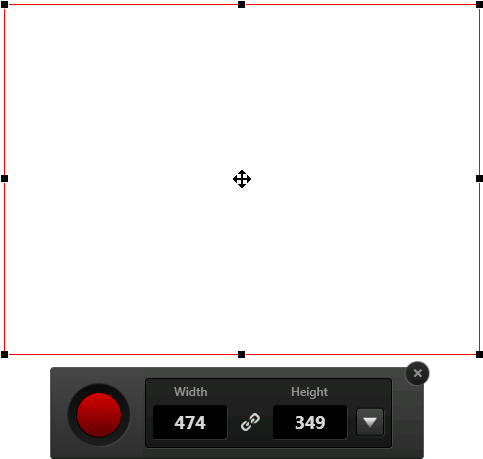
(Optional) Adjust the capture region by doing one of the following. As you move the cursor, the task bar displays the vertical and horizontal position of the cursor (in pixels) on the screen.
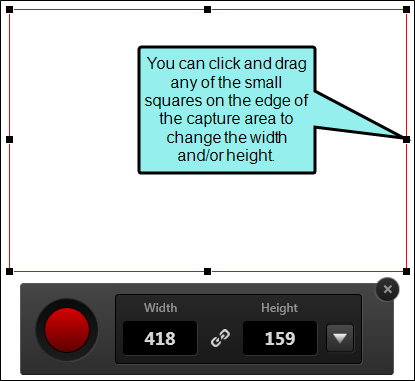
Drag Edge
You can resize the capture area manually by clicking any of the handles (small squares) around the edge of the rectangle and dragging them to resize the width and/or height.

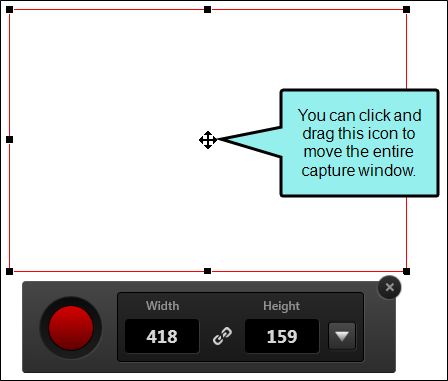
Move Entire Capture Area
You can move the entire capture area by clicking the size-all icon in the center of the area
 and dragging the area to a new location on your screen.
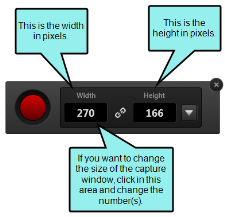
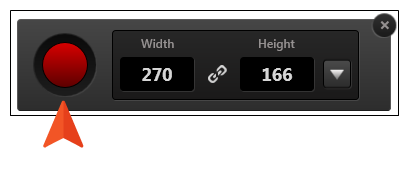
Type Width or Height
You can click in the number fields in the task bar to manually change the width and/or height of the capture window in pixels.
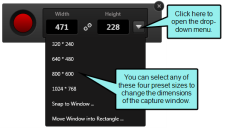
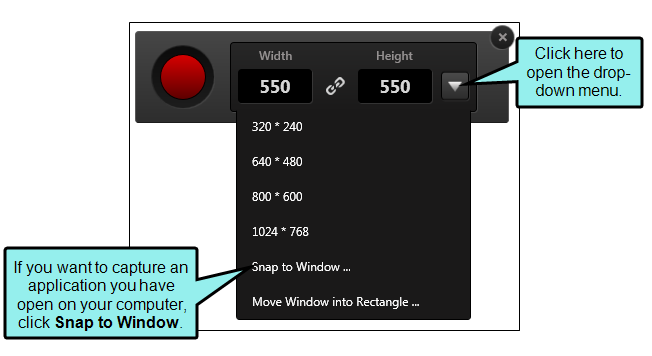
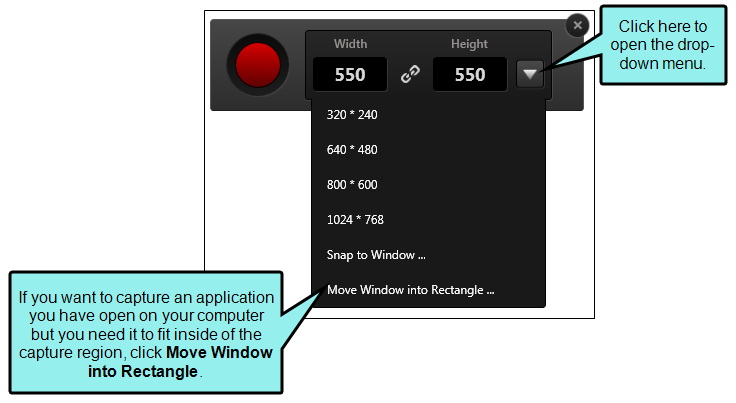
Select Capture Size
You can click the drop-down arrow and select a preset size for the capture window.
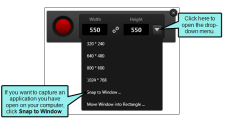
Select an Application
You can click the down arrow and select Snap to Window to choose an application to capture. This option will capture the application at its current size.
Note Capture will ignore applications that have been minimized. If you want these applications to appear as selections in the Select Window dialog, ensure they are open and have not been minimized.
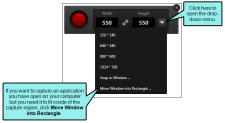
Select Move Window Into Rectangle
You can click the down arrow and select Move Window into Rectangle to choose an application to capture. This option will minimize the application window to fit into the capture area you drew.
Note Capture will ignore applications that have been minimized. If you want these applications to appear as selections in the Select Window dialog, ensure they are open and have not been minimized.
-
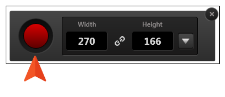
To capture the region, click the red capture button on the task bar.
The image is captured and loaded into the Capture Editor. The rectangle with a red border and the task bar remain onscreen so that you can capture another region.
- Rearrange your desktop as necessary, then repeat steps 4 and 5 to capture more regions. When you have finished capturing all the regions that you need, click the X on the upper right corner of the task bar to maximize the Capture Editor and view the captured regions.
The Capture Editor is minimized and a rectangle with a red border appears on your screen, along with a task bar.
Note If Capture does not minimize, you probably do not have the "Hide on Capture" feature selected in the Options dialog.


What’s Next?
After you capture or open an image, it displays in the Capture Editor. You can then do the following:
- Edit If you want to enhance the image before saving it, you can perform tasks such as drawing shapes, creating effects, adding callouts, cropping, etc. See Editing Images.
- Save If you do not want to make any enhancements to the captured image, you can simply save it. See Saving an Image.