
Recapturing Images
After you capture an image, you can re-create the capture for that image. When you select this feature, the same method used to capture the image previously is repeated. The new image replaces the old image.
[Menu Proxy — Headings — Online — Depth3 ]
Example
Example
You have captured a software window, placed all of your callouts perfectly, and are ready to insert the image into a project. Then, the software interface changes because of a misleading icon label, and now your image is incorrect. To recapture the background image without having to redo all of your callouts, you perform a recapture. Now your background image is correct, and your callouts remain in place.
How to Recapture an Image
- Capture an image and make sure it is the active element in the Capture interface.
-
Select Edit > Recapture.
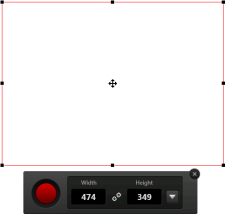
A rectangular box with a red border appears at the same location where you performed the previous capture.
-
(Optional) Adjust the capture region by doing one of the following. As you move the cursor, the task bar displays the vertical and horizontal position of the cursor (in pixels) on the screen.
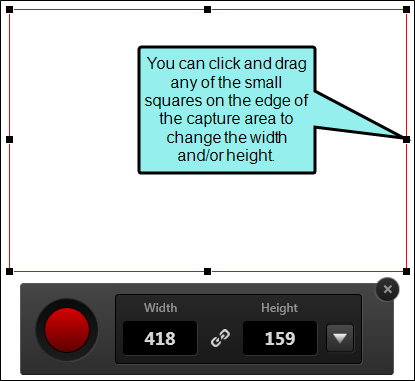
Drag Edge
You can resize the capture area manually by clicking any of the handles (small squares) around the edge of the rectangle and dragging them to resize the width and/or height.

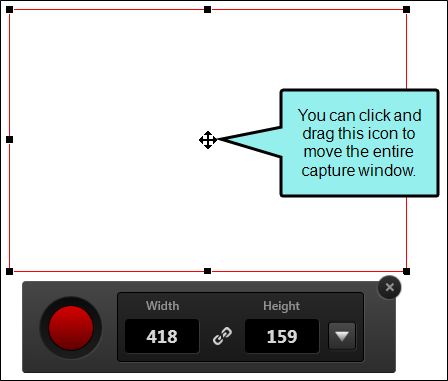
Move Entire Capture Area
You can move the entire capture area by clicking the size-all icon in the center of the area
 and dragging the area to a new location on your screen.
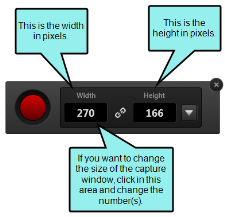
Type Width or Height
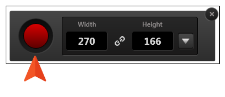
You can click in the number fields in the task bar to manually change the width and/or height of the capture window in pixels.
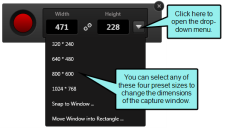
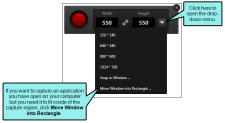
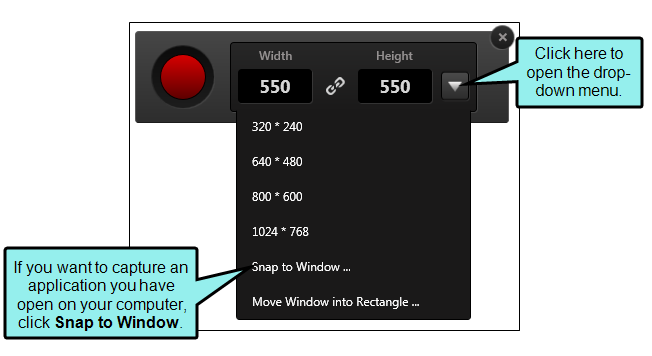
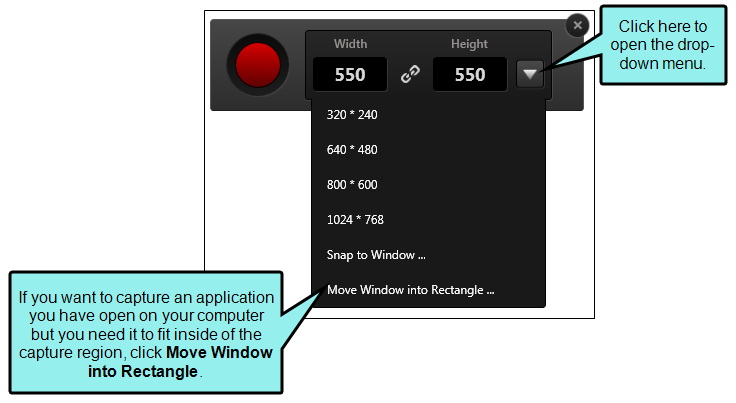
Select Capture Size
You can click the drop-down arrow and select a preset size for the capture window.
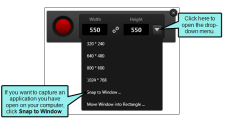
Select an Application
You can click the down arrow and select Snap to Window to choose an application to capture. This option will capture the application at its current size.
Note Capture will ignore applications that have been minimized. If you want these applications to appear as selections in the Select Window dialog, ensure they are open and have not been minimized.
Select Move Window Into Rectangle
You can click the down arrow and select Move Window into Rectangle to choose an application to capture. This option will minimize the application window to fit into the capture area you drew.
Note Capture will ignore applications that have been minimized. If you want these applications to appear as selections in the Select Window dialog, ensure they are open and have not been minimized.
-
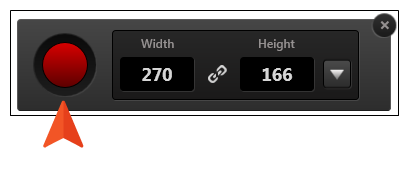
Click the red capture button. The image is recaptured and displays in the Capture Editor.


Note If you do not want to replace the old image, but simply want to create a new image using the same method and settings as the active image, use the File > Capture > Capture Last Capture option instead. See Recapturing the Last Capture.
What’s Next?
After you capture or open an image, it displays in the Capture Editor. You can then do the following:
- Edit If you want to enhance the image before saving it, you can perform tasks such as drawing shapes, creating effects, adding callouts, cropping, etc. See Editing Images.
- Save If you do not want to make any enhancements to the captured image, you can simply save it. See Saving an Image.