The pointer portion of a bubble callout can be curved, and you can adjust the amount of curve used. In addition, you can make changes to the base of the pointer and specify which edge of the bubble shape holds the pointer.
[Menu Proxy — Headings — Online — Depth3 ]

How to Adjust the Pointer on a Bubble Callout
- Open an image that has a bubble callout, and double-click it.
-
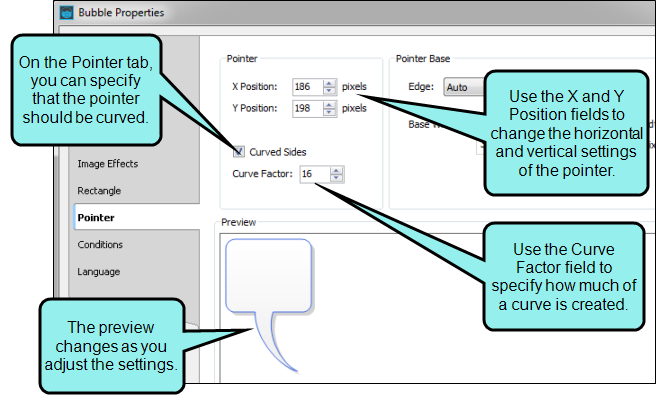
In the properties dialog, select the Pointer tab, and modify the curve, edge position, or base of the pointer. As you make changes, watch the Preview area at the bottom of the tab to see the results.
Add Curve
- Click Curved Sides.
- To adjust the amount of curve, change the number in the Curve Factor field. The higher the number, the greater the curve. You can enter negative numbers too.
- You can change the numbers in the X Position and Y Position fields to alter the distance of the pointer horizontally and vertically. You can enter negative numbers too.
Modify the Edge Position
Click in the Edge field and select the side of the bubble where you want the pointer to be shown (Left, Right, Top, Bottom).
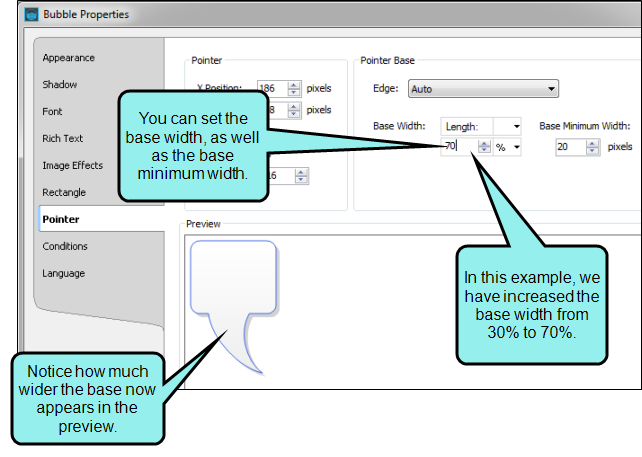
Modify the Base
- To change the base width, in the Base Width field enter a number and select a unit of measurement.
-
To set the minimum width for the base, in the Base Minimum Width field enter a number of pixels. This lets you specify the smallest width of the base allowed, in case the bubble is resized.
Example
You set the "Base Minimum Width" to 10 pixels and you set the "Base Width" to 30%. In this case, the base will be 30% of the bubble width at all times, unless the bubble is resized so much that the base would fall below 10 pixels. If that were to happen, the 10-pixel threshold would kick in and the 30% specification would be ignored.
- Click OK.
- Click
 to save your work.
Example
Example
When you first draw a bubble callout, it might look something like this:

After double-clicking on the shape, the Bubble Properties dialog opens. You can select the Pointer tab and make the necessary changes in the Pointer section.
Now let's say you want to change the width of the pointer base. In that case, simply adjust the Base Width and/or Base Minimum Width fields.
Note A very useful tool when working with objects is a palette, which lets you store objects for future use. For example, if you are including callouts with some
What's Next?
If necessary, you can continue editing the image (e.g., adding objects, effects, a callout; cropping the image; resizing the image). Otherwise, you can finalize the image by saving it. See Editing Images.