Inserting Captured Regions as Image Objects
You can capture a region on your screen and insert the image as an object. Like other objects, this image resides in its own layer on the main image.
[Menu Proxy — Headings — Online — Depth3 ]

How to Insert a Captured Region as an Image Object
- Open the image in the Capture Editor.
-
Select Edit > Insert Screenshot > Captured Region. Capture minimizes and intersecting red “crosshairs” are displayed on your computer screen.
Note If Capture does not minimize, you probably do not have the "Hide on Capture" feature selected in the Options dialog.
- Move your cursor to the location where you would like to begin the captured region (e.g., the upper-left corner of the prospective region). As you move the cursor, a small window displays the vertical and horizontal position of the cursor (in pixels) on the screen.
-
Click the left mouse button and drag to draw a rectangle, releasing the button when you are satisfied with the region (identified by red borders and a small window displaying the size of the rectangle in pixels).
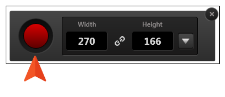
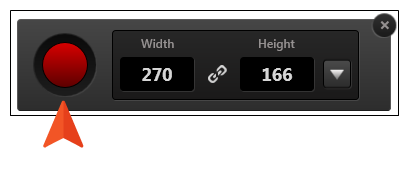
As soon as you release the mouse button, the task bar opens, allowing you to adjust the size of the region before capturing it.
-
Click the red capture button. The image is captured and inserted into the main image as an object.
-
To move the image object, hover over it until the cursor displays as an arrow
 . Then click and drag the object to a new location on the main image.
Note If you have dragged the object outside the current boundaries of the image, padding is automatically added to compensate for the space needed. Double-click the image (not the image object) to open the File Properties dialog. Then, on the Appearance tab, use the fields in the Background section as necessary.
- Click
 to save your work.
Note A very useful tool when working with objects is a palette, which lets you store objects for future use. For example, if you are including callouts with some
Note In addition to the main image file, Capture creates an XML-based file with a .props extension. This file holds all of the property information (including object layer information). Therefore, the objects are not merged into the image, which means that you can easily change the object information later without having to start over from scratch. It also means that the XML files can be opened and modified with third-party tools. This is especially useful if you need to localize the callouts in your images (e.g., have them translated into other languages).
What's Next?
You may want to edit the properties of the image object. For example, you can add a torn edge effect to the object. You can do this by double-clicking the object and setting the values in the properties dialog. See Editing Image Objects.
You can also continue editing the image (e.g., adding objects, effects, a border, a callout; cropping the image; resizing the image). Otherwise, you can finalize the image by saving it. See Editing Images and Saving an Image.