
After you add a shape to an image, you can adjust its rectangle settings to meet your needs. You can determine the position and size of that rectangle, as well as how much of a curve is applied to its corners. You can also determine if the rectangle will automatically resize to fit any text inside the object.
[Menu Proxy — Headings — Online — Depth3 ]
How to Set the Rectangle Properties for an Object
- Open an image that has a shape or effect added to it.
- Double-click the object.
- In the properties dialog, select the Rectangle tab and adjust the settings.
- X Position Set the position of the object on the "X" axis (left and right) on the object. You can also drag the object on the image and this number will change automatically.
- Y Position Set the position of the object on the "Y" axis (up and down) on the object. You can also drag the object on the image and this number will change automatically.
- Width Set the width of the rectangular edges of the object. You can also drag the object on the image and this number will change automatically.
- Height Set the height of the rectangular edges of the object. You can also drag the object on the image and this number will change automatically.
- Corner Radius Set the amount of curve for the rectangular edges of the object. The higher the number, the more curve will be applied to the edges.
Auto-size to fit text Automatically adjust the width and height of the rectangle to fit any text inside the object. If you edit the text, the rectangle size changes automatically to make the object larger or smaller.
Note If you enter text that is too long to fit inside the object and Auto-size to fit text is disabled, you will see a red plus
 where the text is cut off. This lets you know that you need to manually resize the shape to fit the text. Click the plus to see the text in its entirety.
 Note If Auto-size to fit text is enabled, you cannot manually resize the shape, because the shape's size is determined by the amount of text in the rectangle. If you want to resize the shape, you can disable this option and then make your changes. You can also leave the setting enabled and add padding around the text to create the illusion of a larger shape.
Example
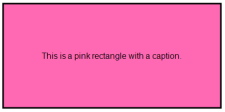
Let's say you add text to a rectangle shape. However, the rectangle you drew is much too large for the text you added.
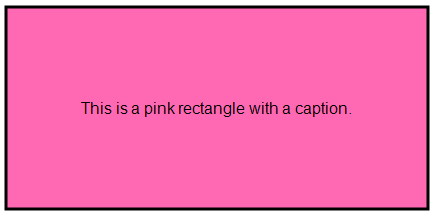
You manually resize the rectangle so the caption fits. However, later you make changes to the caption. Now, the rectangle you drew is too small, and your caption is cut off. Notice the red
, which indicates that there is more text that doesn't appear in the rectangle. If you click the , you can read the rest of the caption.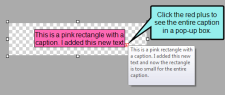
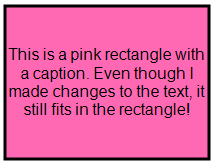
To fix this, you enable Auto-size to fit text. The rectangle automatically resizes to fit the

- Click OK.
- Click
 to save your work.

Note A very useful tool when working with objects is a palette, which lets you store objects for future use. For example, if you are including callouts with some
What’s Next?
If necessary, you can continue editing the image (e.g., adding objects, effects, a border, a callout; cropping the image; resizing the image). Otherwise, you can finalize the image by saving it. See Editing Images.