


You can pin your favorite fonts so they will appear at the top of the list. This makes them easier to find later. Pinned fonts appear in a group that you can expand or collapse. This is a way to limit the list of fonts to those that you use the most and hide from view those that you do not use.
[Menu Proxy — Headings — Online — Depth3 ]
How to Pin Fonts From the Font Properties Dialog
- Open the document or topic.
- Do one of the following, depending on the part of the user interface you are using:
Ribbon Select Home >
 (at the bottom of the Font section).
- Keyboard Shortcut Press CTRL+SHIFT+B.
- Right-Click Right-click on the selected text and from the context menu choose Font. Select the Font tab.
The Font Properties dialog opens.
-
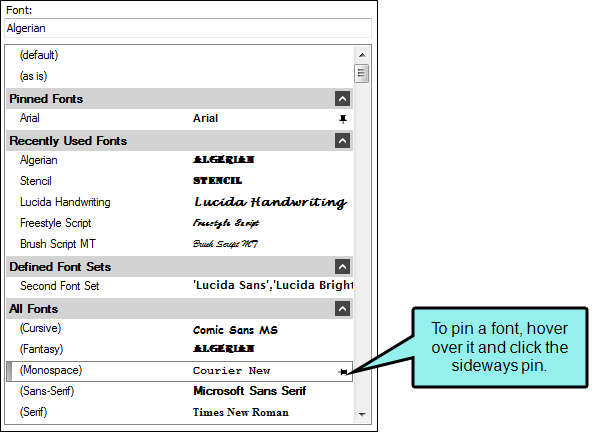
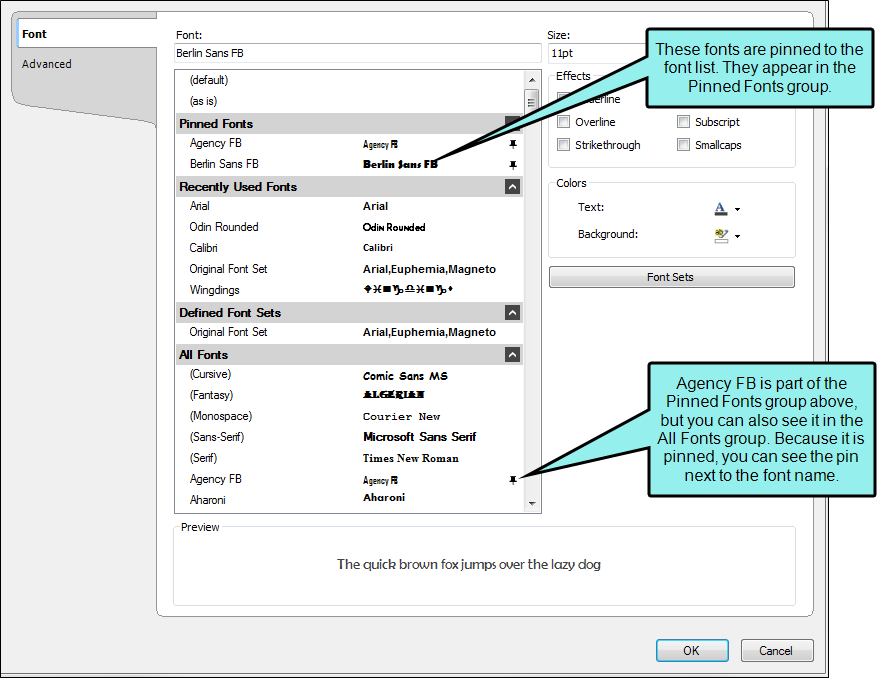
Select the Font tab. From the Font field, select the font you want to pin. A pin
 appears to the right of the font. You can pin fonts from any font group.
 -
To pin the font to the font list, click
. The pin changes to  to show that the font has been pinned to the font list. Pinned fonts are also added to the Pinned Fonts group at the top of the font list.
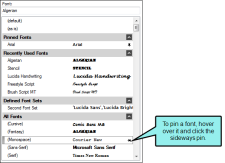
-
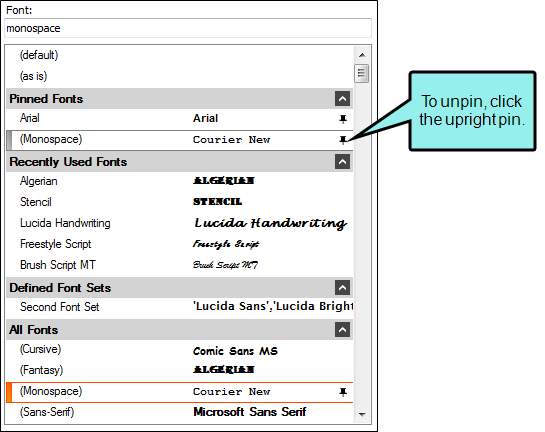
To unpin the font, click the pin again and it will be moved back to All Fonts group at the bottom of the list.
Example Three fonts have been added to the Pinned Fonts group. You can still see the fonts in the All Fonts group, as well.

- Click OK.
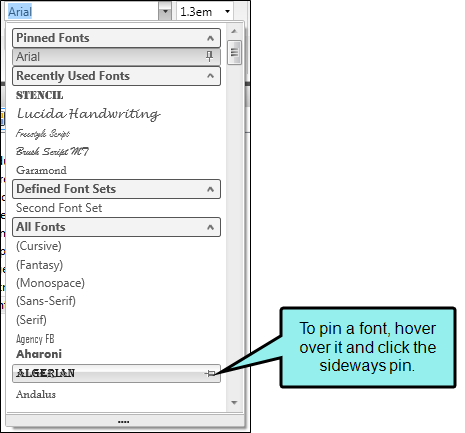
How to Pin Fonts From the Font Family Field
- Open the document or topic.
-
Select the Home ribbon and click the down arrow in the Font Family
 field.
 - Hover over the font you want to pin. A pin
 appears to the right of the font.
 -
To pin the font to the Font Family field, click
. The pin changes to  to show that the font has been pinned to the font list. Pinned fonts are also added to the Pinned Fonts group at the top of the Font Family field.
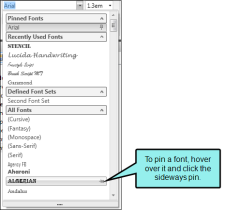
-
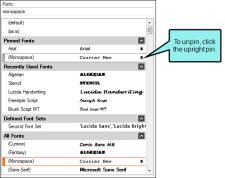
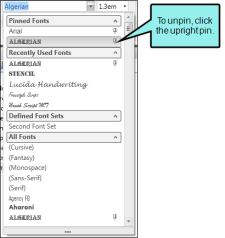
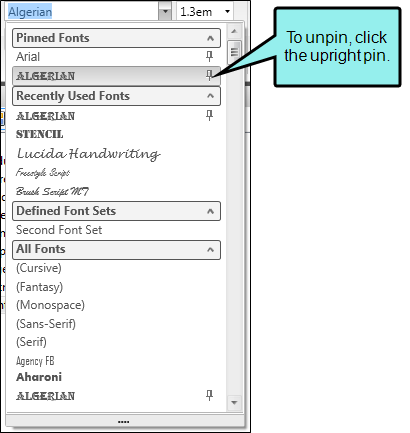
To unpin the font, click the pin again and it will be moved back to All Fonts group at the bottom of the list.
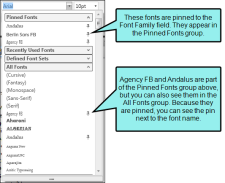
Example Three fonts have been pinned to the Font Family field. They are visible in the Pinned Fonts group. You can still see the fonts in the All Fonts group, as well.

What’s Noteworthy?
Note This feature is not supported for MadCap Lingo review package (LIREV) files.
What’s Next?
After you complete these steps, you can select fonts from the Pinned Fonts group when applying them to content. See Selecting Fonts.