Internal Text Editor
This is a simple editor that you can use to view and modify the true code, including text, tags, and metadata in HTM files.
[Menu Proxy — Headings — Online — Depth3 ]
Split View With XML Editor
The XML Editor and the Text Editor are closely synchronized with each other. They can be shown in a single window with options for viewing both at the same time and configuring their appearance.
How to Use Split View
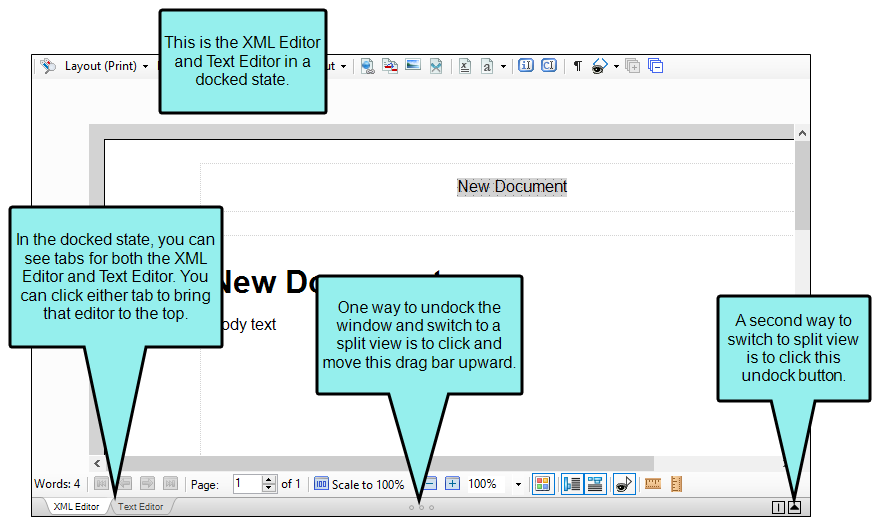
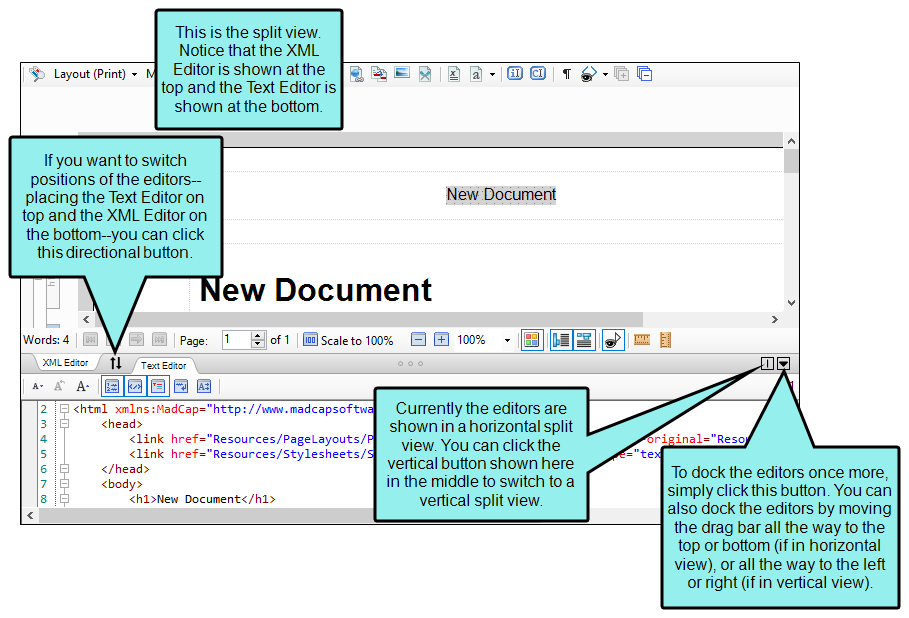
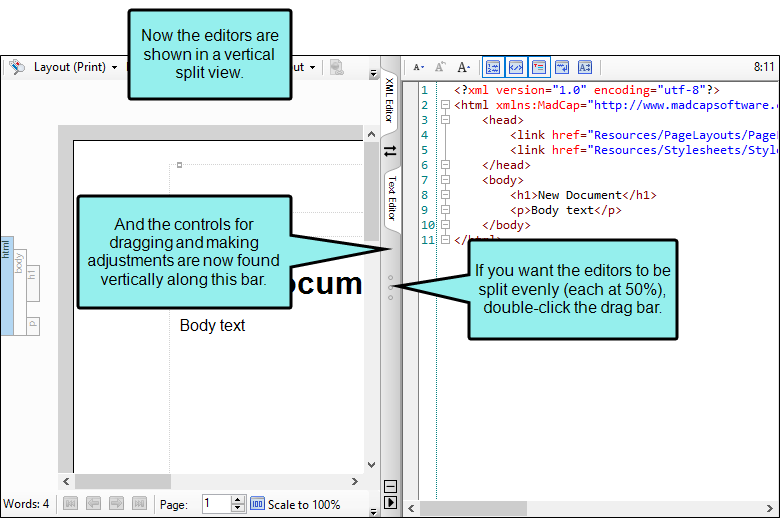
You can view the XML Editor and Text Editor in a docked state, where only one editor can be seen at a time, but you can easily access the other editor by clicking on a tab. Alternatively, you can undock the window and view both the XML Editor and Text Editor in a split view. Buttons allow you to switch between a horizontal split view and a vertical split view.
Note You can also switch between the XML Editor and Text Editor by pressing CTRL+` (grave accent) on your keyboard.
Features of Split View
Not only does split view allow you to see the XML Editor and Text Editor jointly in different ways, but there are also special features with split view.
-
Synchronization of Text
-
Highlighting text in one editor automatically highlights the related text in the other editor.
-
Clicking in one editor causes the other editor to jump to the same position.
Note If you highlight areas in the XML Editor that matches non-consecutive sections of XML, no highlight is shown in the Text Editor. For example, in the XML Editor, you can highlight different parts of a table, but because of the order in which table markup is written in XHTML, it cannot be similarly highlighted in the Text Editor.
-
-
Code Validation If you type characters that result in invalid XML, the Text Editor displays an error with information as to why the error exists.
In addition, the following rules are in effect, depending on whether the editors are docked or undocked:
-
If the editors are not docked (i.e., you can see the XML Editor), updates (i.e., highlights, edits) stop going from the code to the XML Editor. If you make an edit in the XML Editor while erroneous XML is in the Text Editor, the changes in the XML Editor take precedence over any edits in the Text Editor.
-
If the editors are docked (i.e., you cannot see the XML Editor), you will be unable to start a split view or click the XML Editor tab until the error is resolved.
-
-
Invalid Edits Outside of Contributor If the document being viewed is edited outside of Contributor with invalid XML and saved, Contributor will prompt you to open the file as text. If you select “Yes,” the editors remain open in split view, but the Text Editor becomes the main editor and the XML Editor cannot be shown until the invalid code is fixed.
Character and Symbol Entities in the Code
Remember that this is an XML editor that follows the W3C XHTML Schema specification. Therefore, if you want or need to enter entities for characters and symbols (e.g., via a third-party tool), you need to use the XHTML entity number.
After you add a valid entity into the Text Editor, it is converted to the actual character or symbol after you switch to the XML Editor view and then back to the Text Editor view.
You can find a list of valid entity numbers for characters and symbols on the W3C website. See:
http://www.w3.org/TR/html401/sgml/entities.htmlExample You are working in the code and want to add an en dash (—). To do so, you would enter the following:
–
Do not enter – (because it is not valid XML).
Autocomplete
You can use autocomplete in the Text Editor to quickly select valid tags as you type XHTML code. To use this feature, click  in the local toolbar of the Text Editor.
If you are working on topics or snippets in the split view version of the Text Editor, the following autocomplete features are available.
-
Creating a tag If you press < on your keyboard, a popup shows context-aware tags that can be used at that point.
As you type, the selected item in the list will jump to the tag that begins with the text you are typing.
You can select a tag by double-clicking it, or by pressing either the ENTER or > key on your keyboard. Once a tag is selected, the ending tag is automatically created.
-
Adding attributes for a tag If you press the spacebar while inside of a tag, a popup shows a list of attributes that can be used at that point.
As you type, the selected item in the list will jump to the attribute that begins with the text you are typing.
You can select an attribute by double-clicking it or by pressing the ENTER key on your keyboard. Once an attribute is selected, the attribute text is completed and an equal sign followed by quotation marks (="") is added to the end of the text, with the cursor being placed between the quotation marks.
Manage Font Size
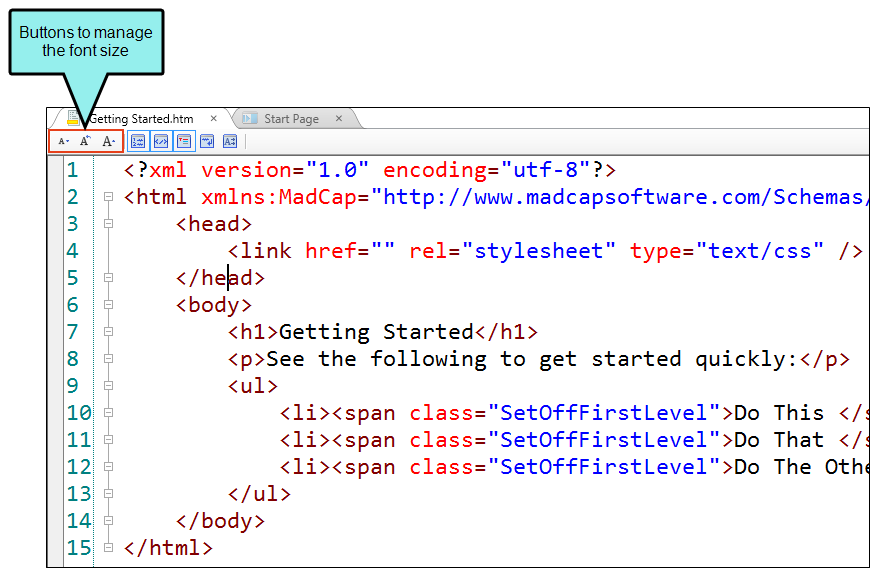
Three buttons in the local toolbar of the Internal Text Editor let you manage (increase, decrease, reset) the font size. These options change the font size in the editor only, making it easier to see the text as you work. These options do not change the size of the actual content, affecting the output.
In addition to the buttons, you can use corresponding shortcut keys:
-
 or CTRL+- Decrease size
 -
 or CTRL+0 Reset size
 -
 or CTRL+= Increase size
Buttons and Sections
|
|
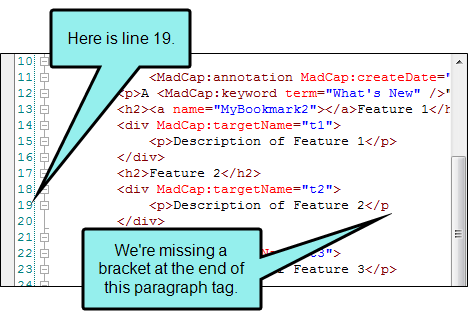
Shows or hides numbered lines in the text editor. This makes it easier to identify a particular line that requires editing. Example Let's say that you edit the XHTML for a topic and forget to add an angle bracket to the end of a tag. If you save and close the text editor, you might see an error message. You can open the file in the text editor again and quickly find the line where you need to fix the tag.
|
|
|
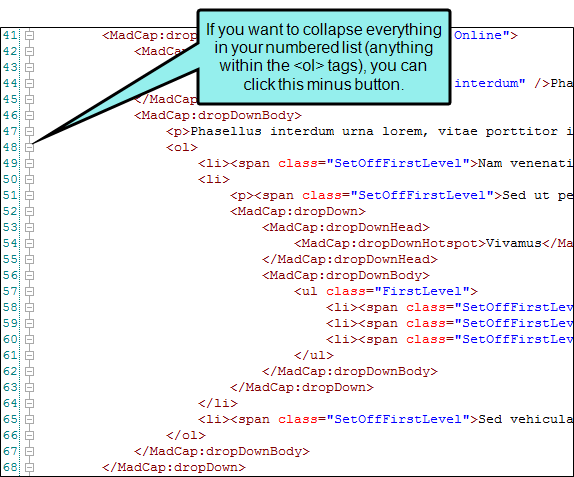
Shows or hides small minus and plus buttons next to lines with tags. These let you collapse or expand those portions of the code. Example You might have a topic that looks like this in the Internal Text Editor:
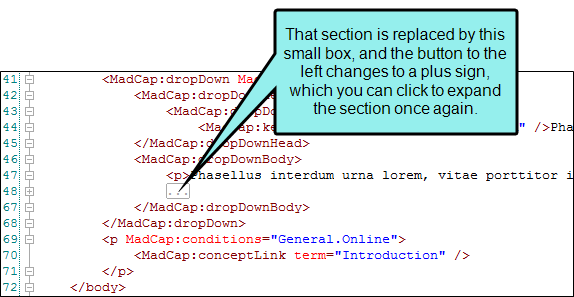
After clicking the collapse button, it will look like this:
If you hover over the small box, a popup shows the tagged content for that section.
|
|
|
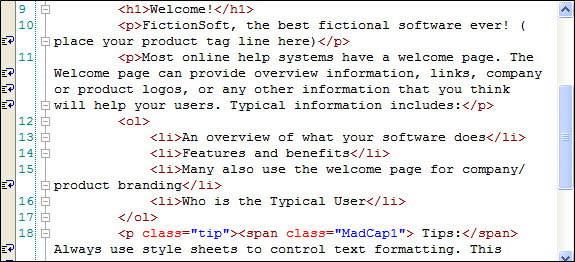
Shows or hides syntax coloring in the Internal Text Editor. This makes it easier to identify different parts of the file. Example In the following image, you can see that the tags appear in brown/dark red, attributes (e.g., class, src) appear in red, and values (e.g., style names, paths to links) appear in blue.
|
|
|
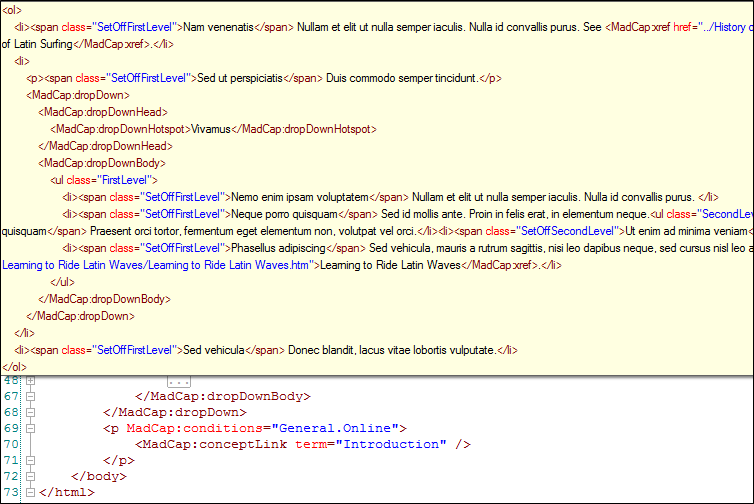
Enables or disables word wrapping in the Internal Text Editor. This makes it much easier to see all of the words and tags in an area. Without the word wrap feature, lines in the Internal Text Editor can often be quite long and require you to use the horizontal scroll bar in order to see text not shown. Example Here is a topic open in the Internal Text Editor, without the word wrap feature enabled.
If you click the button to enable word wrap, the topic looks as follows. Notice that all of the text can be seen. You do not need to use the horizontal scroll bar to see it all.
|
|
|
Enables the autocomplete feature. |
|
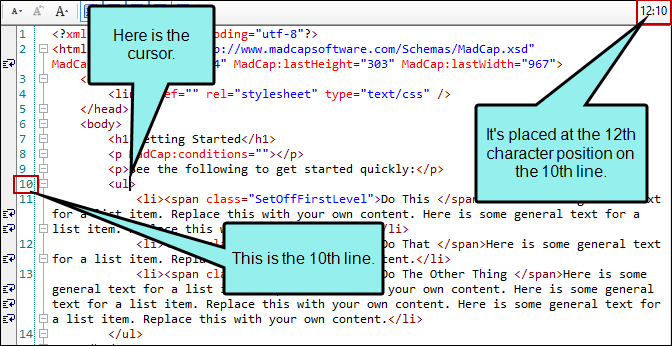
[Character:Line] |
The character and line position of your cursor is shown in the upper-right corner of the editor.
|


What’s Noteworthy?
Important You cannot use the Internal Text Editor when working with review packages.