

You might use page layouts in new documents that you create, or you might see page layouts in templates or topics sent to you by Flare authors. See Creating New Documents.
[Menu Proxy — Headings — Online — Depth3 ]
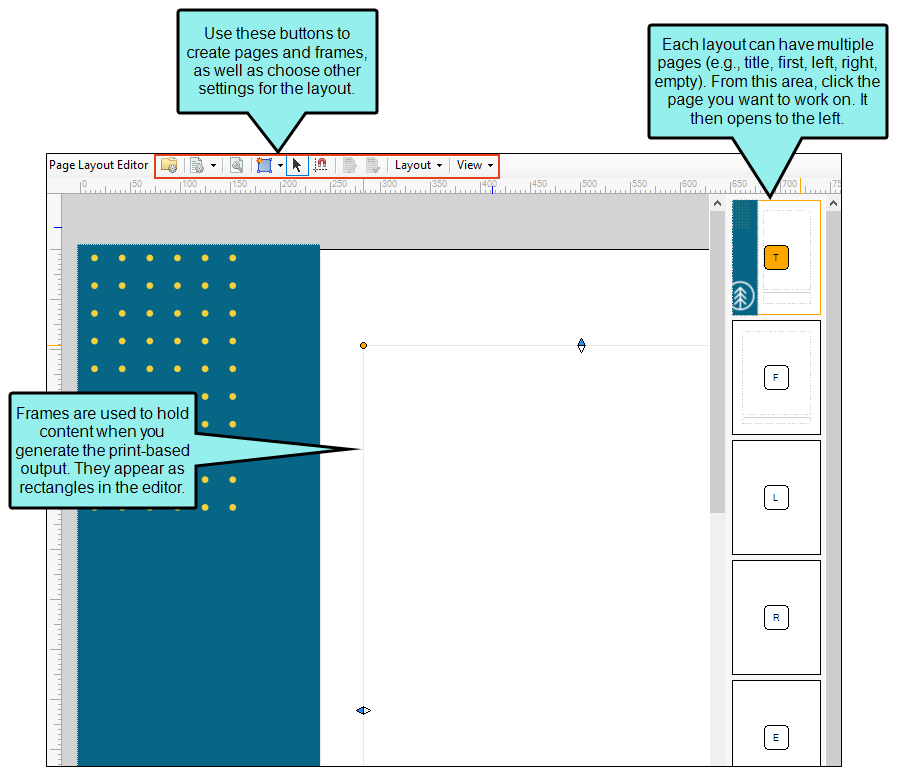
Page Types
Each page layout can consist of several pages. Why would you want more than one page? If you want different settings to be applied to the various pages in your final output—depending on their position in the document—you will want multiple pages.
- Title Select this type if you want the settings to be applied to the first page in your output, which typically displays the manual title. If you include an Empty page type in your page layout, the title page in the output will be followed by the empty page. It is not mandatory that you use this page type for a title. Instead, you can use one of the other types, such as Normal.
- First Select this type for the first page of a new chapter. This page type can be used in a situation where you are creating a simple configuration and you are not concerned with left and right pages (e.g., a document for electronic distribution only). In most cases, a First page type would be followed by Normal pages.
- First Left Select this page type if you want chapters to begin on left-sided pages, and you need a different look for those pages than would be used for a regular left page.
- First Right Select this page type if you want chapters to begin on right-sided pages, and you need a different look for those pages than would be used for a regular right page.
-
Left Select this type if you want the settings to be applied to a page in the output when it appears on a left (or even) page (e.g., page 42).
- Right Select this type if you want the settings to be applied to a page in the output when it appears on a right (or odd) page (e.g., page 43).
- Normal Select this type if you do not want a Left/Right type of page flow, but instead just want the same layout on every page, perhaps like a screenplay.
- Empty Select this type if you want the settings to be applied to an empty page in the output. You might use this page type after Title pages. Otherwise, you probably want to use the Empty Left and Empty Right page types instead.
- Empty Left Select this type if you also have a First Right page type and need empty pages to be injected before them when necessary (i.e., to force a new chapter to begin on the right side).
-
Empty Right Select this type if you also have a First Left page type and need empty pages to be injected before them when necessary (i.e., to force a new chapter to begin on the left side).
Frames
Each page in a layout can contain multiple frames, which are used to hold content (such as page numbers and chapter titles) and determine where that content is positioned. When you add a new page, make sure the page contains at least a body frame (unless that page is using one of the empty page types). By default, certain frames may already be included in a page, depending on the template you select when adding a page layout. Frames are typically displayed as large, clear rectangles or squares on a page.
-
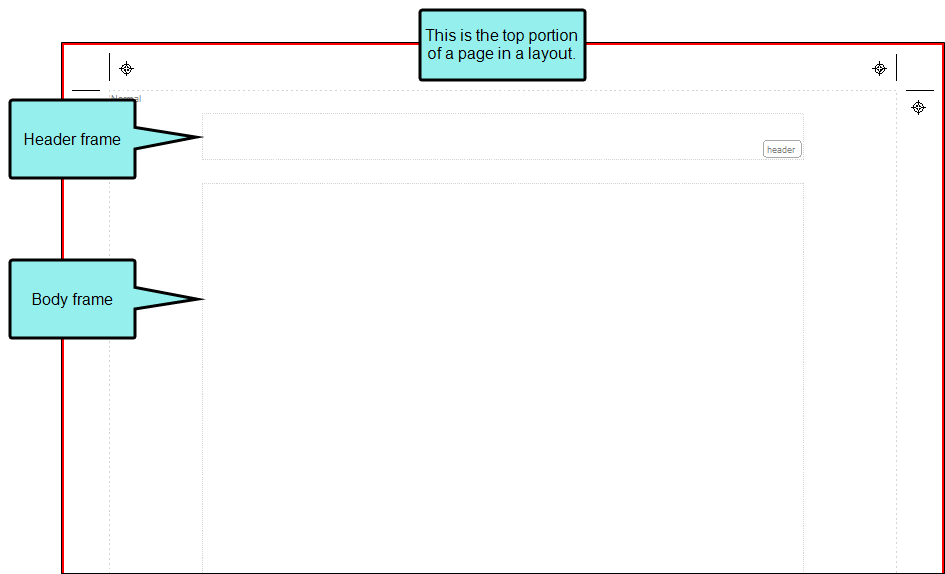
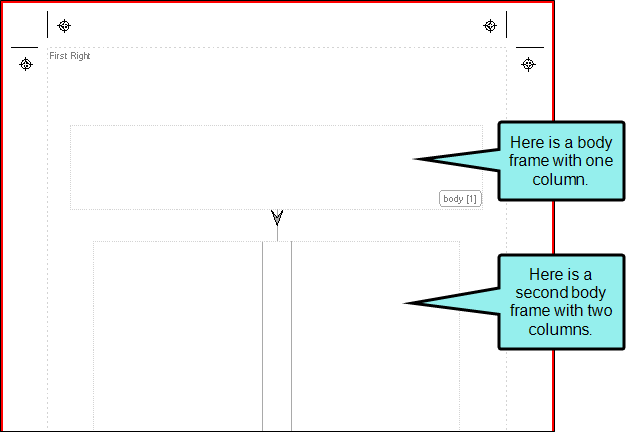
Body Frame This frame, usually the largest on the page, is basically a placeholder for the content that you add to topics. You cannot add content directly to a body frame. If necessary, you can have multiple body frames on a page. This lets you customize the flow of text from one frame to another on a page.
Example You want the body text be displayed in one column on the top quarter of each page, but then you want the text to continue below in two columns. In order to accomplish this, you can create two body frames on a page—one with a single column and the other with two columns.

- Header Frame This frame is designed to hold content from the topic (e.g., chapter title, page number). The frame is usually positioned at the top of a page, above the body text.
- Footer Frame This frame is designed to hold content from the topic (e.g., chapter title, page number) or text that you add. The frame is usually positioned at the bottom of a page, below the body text.
- Decoration Frame This frame can be used to display content for aesthetic purposes on a page. You can add color, a border, text, and images to a decoration frame.
- Image Frame This frame opens the Insert Image dialog, prompting you to provide an image file. The image is added to a frame of the same size, which you can place on the page as necessary. If you do not want to use an image frame, you can use a decoration frame instead to display a picture.
To position frames on a page, you can simply click on the edge and drag to resize. You can also click in the middle of a frame and drag to move it. In addition, there are various options available from the Layout drop-down button for aligning and positioning frames, as well as for rotating text within a frame.