Creating Drop Caps Effects


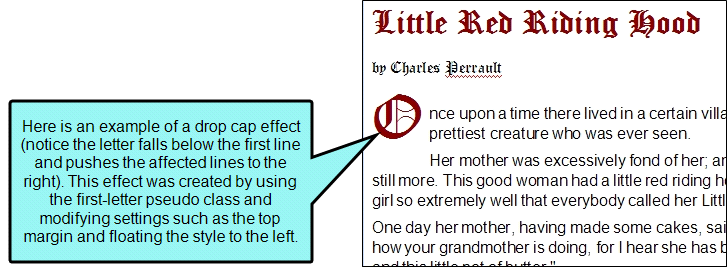
If you want to create a drop caps effect in a paragraph, causing the initial letter to look different and drop below the first line, you can use Contributor's first-letter pseudo class.
[Menu Proxy — Headings — Online — Depth3 ]
How to Create a Drop Caps Effect
- Open the stylesheet you want to modify or create a new one.
-
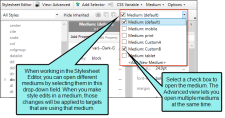
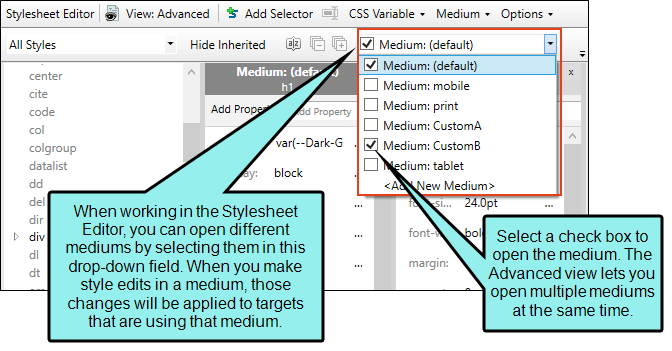
From the Medium drop-down in the Stylesheet Editor, make sure the proper medium is selected before you begin. In the Advanced view, you can open multiple mediums at once; you just need to look at the title at the top of the medium pane and make sure you are working in the correct one. If you are not using stylesheet mediums for your different outputs or if you want all mediums to have the same settings, just leave the medium set to default and continue.
Mediums can be used if you want to use one group of settings for online output types and another group of settings for print-based output types. For example, you might use the default medium for your online outputs and the print medium for your print outputs.
Please note that Contributor remembers the last medium that you used when working in the stylesheet, so it may or may not be the one that you want to use the next time around.
- In the local toolbar, make sure the first button displays
 . If the button displays
  instead, then click it.
 - In the upper-left corner of the Stylesheet Editor, click in the drop-down field and select
 .
. - Select the paragraph style for which you want to create the drop caps effect.
- In the local toolbar, click New Selector. The New Selector dialog opens.
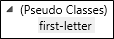
- Expand the Advanced Options section, and from the Pseudo Element drop-down, select first-letter.
-
Click OK. The new class is added under a "(Pseudo Classes)" heading and is automatically selected.
- From the Show drop-down list on the upper-right side of the editor, select
 .
. - (Optional) You can use the toggle button in the local toolbar to show properties below in a group view
 or an alphabetical view
  .
. - Modify the necessary properties to give the first letter a different look than the rest of the paragraph. Following are some of the more common changes for an effect such as this.
Font Color
- If you are using the grouped view, expand the Font group.
- To the right of color, select a color. For advanced color options, click
 and use the fields in the Color Picker dialog, or click
  to select a color already used elsewhere on your screen.
Font Family
- If you are using the grouped view, expand the Font group.
- Click
 to the right of font-family. From the drop-down select the font family or font set you want to use.
Font Size
- If you are using the grouped view, expand the Font group.
- To the right of font-size, click and set the font size in the popup. When you are finished, click OK.
Font Weight
- If you are using the grouped view, expand the Font group.
- To the right of font-weight, click the down arrow and select a weight (e.g., bold).
Space After
- If you are using the grouped view, expand the Block group.
- To the right of letter-spacing, click and select the amount of space after the initial letter, before the rest of the paragraph text. When you are finished, click OK.
- Modify the necessary properties to produce the effect of the initial letter dropping below the first line. Usually this involves floating the letter to the left and adjusting the margins above and/or below it, as well as to the right.
Float
- If you are using the group view, expand the Box group.
- Click to the right of float, and select left.
Margins Above/Below/Right
- If you are using the group view, expand the Box group.
- To the right of margin-bottom, margin-right, and/or margin-top, select the amount of space around the initial letter. You can even enter negative numbers if necessary.
- Click
") to save your work.
to save your work.
Note In order to use this feature, you must ensure that the first letter of the paragraph is not preceded by any other content (such as an image).
Note You can also use the first-child pseudo class, which lets you apply style settings to the first child of another element (e.g., the first <p> tag that occurs within a <div> tag).
What’s Next?
After editing a style, you can apply it to content in a topic or snippet.