


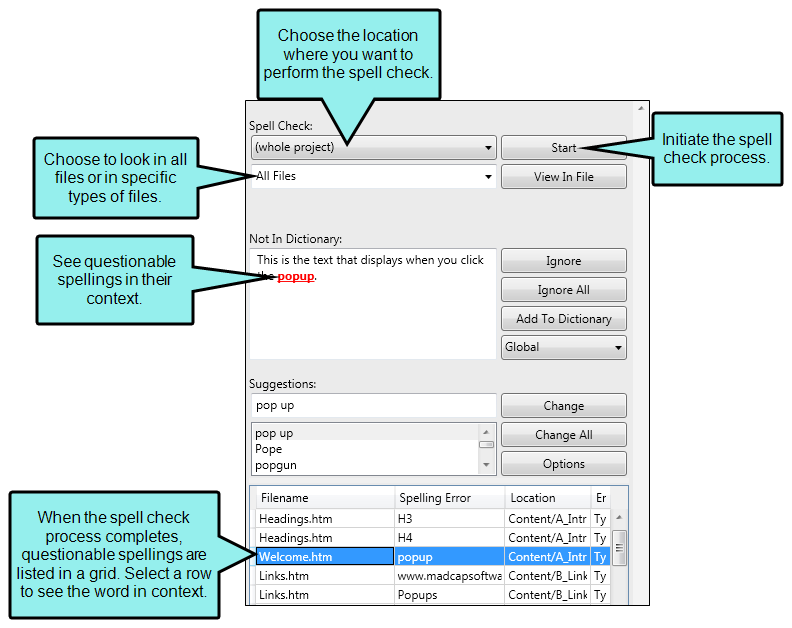
You can spell check various types of files. Questionable spellings are listed in a grid at the bottom of the window pane after you start the spell check process. You can click on a row to deal with a specific misspelling, then select the following row to move to the next one, and so on. You can also open a particular file where a questionable spelling occurs.
How to Spell Check Manually
- Open the document or topic.
- Do one of the following, depending on the part of the user interface you are using:
- Ribbon Select Tools > Spell Check Window.
- Keyboard Shortcut Press F7. If you use this shortcut, the Spell Check window pane opens and automatically displays the first questionable spelling it finds in the current file.
The Spell Check window pane opens.
- In the first drop-down,select the location where you want to perform the spell check:
- pick a folder Choose a folder to spell check the files within it.
- review package Spell check all files in the review package.
Note If you have a Flare review package (FLTREV file) open, none of the above options are shown. Instead this field displays (review package).
- In the next drop-down, select which kind of files you want to spell check (if you have selected something other than "current document" in the previous field):
- All Files Select this option to spell check all file types, including (but not limited to) those listed in this drop-down field.
- Topics Select this option to spell check only topic files.
- Snippets Select this option to spell check only snippet files.
- Table of Contents Select this option to spell check only TOC files.
- Glossaries Select this option to spell check only glossary files.
- Index Keywords Select this option to spell check only index keywords.
Note In addition to selecting a file type from the list, you can type the file type extension in the field directly. This can be especially useful for file types not included in the drop-down.
-
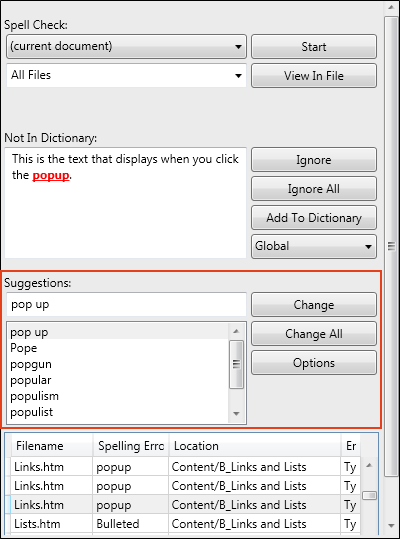
Click Start. All occurrences of questionable spellings are displayed in a grid at the bottom of the window pane.
If the process is in progress, the label changes to "Cancel," which you can click to stop the process.
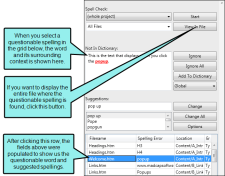
- In the grid select a row. The "Not In Dictionary" and "Suggestions" fields are populated with the results.
-
(Optional) You can click View In File to open the file where the current questionable spelling occurs, highlighting it.
-
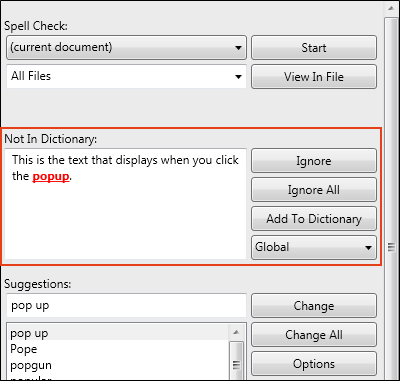
The "Not In Dictionary" field displays each questionable spelling in its context with red, underlined font.
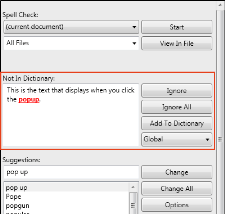
You can use the buttons and drop-down field to the right in order to take action on the questionable spelling:
- Ignore Contributor ignores the spelling of the word for the current session.
-
Ignore All Contributor ignores the spelling of the word. This means that if other occurrences of the word are found in any other files in future sessions, they will not be flagged as questionable spellings. This is similar to adding words to a dictionary. The difference is that this feature simply ignores questionable spellings of certain words, whereas a dictionary also lists spellings as suggestions.
- Add To Dictionary Contributor adds the word to the dictionary so that it is not flagged as a questionable spelling in the future. The word will also be displayed as a suggestion for future questionable spellings that are very similar.
- Global If you select Global, spellings of words are added to a dictionary that can be used by any projects pointing to it.
-
The "Suggestions" field displays alternative suggestions for each questionable spelling.

You can use the buttons to the right in order to replace the current spelling with a suggestion, or to set other options:
- Change Contributor changes only the current instance of the misspelled word with the alternative word selected in the Suggestions field.
- Change All Contributor changes all instances of the misspelled word with the alternative word selected in the Suggestions field.
-
Options This opens the Spelling tab of the Options dialog.
If you are using a global dictionary, you can use fields at the top of the dialog to choose a location for it.
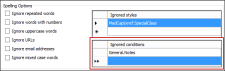
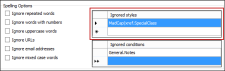
You can also use the fields at the bottom of the dialog to ignore any of the following when spell checking files:
- Ignore repeated words
- Ignore words with numbers
- Ignore uppercase words
- Ignore URLs
- Ignore email addresses
- Ignore mixed case words
-
Ignored conditions If there are certain chunks of content that are conditioned and you want to ignore them when spell checking, you can enter them in this grid (type the condition tag set, followed by a period and then the name of the condition). For example, you might have a condition that you use for content that is not yet ready for release. Content with this condition might have your notes and characters that you don't feel the need to spell check.
-
Ignored styles If there are certain styles or classes in your stylesheet that you want to ignore when spell checking, you can enter them in this grid. For example, you might have styles containing code text that you do not want to be affected by a spell check.
Note Ignored style or classes can also be set in the Advanced view of the Stylesheet Editor by entering "none" in the mc-language property for a style or class. You may want to do this if you want to prevent Contributor from spell checking a certain style (e.g., styles used for code snippets).


Warning When you use a spell check suggestion to change the spelling in a file, the edit is made on disk, not in the editor. Therefore, you cannot undo the action if you change your mind. Instead, you will need to open the affected file and change the text manually.
Note This feature is not supported for MadCap Lingo review package (LIREV) files.