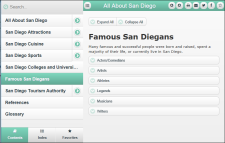
Creating Expanding/Collapsing Sections
For online output, you can create sections of content that are expanded or collapsed by default. This is an ideal way to subdivide a long topic in online documentation.
-
In the Word source document, select the header and the text that you would like to make into a section.
Example
An example header could be "San Diego State University." The text could be a description of the university.
- Select the Doc-To-Help ribbon.
- In the D2HML Styles group, click Collapsible Section. The Collapsible Section dialog opens. The selected text displays in the Header and Text areas.
- If you would like the section to be expanded by default, in the Options area, select Expanded. If you want the section to be collapsed by default, select Collapsed.
- Click OK.
-
Continue creating sections. Note that the Heading for each section now has the C1H Section Collapsed or C1H Section Expanded style applied to it.
Note The heading for the section now has the C1H Section Collapsed or C1H Section Expanded style applied to it.
Note The header will be displayed in the online output with a + and - control next to it. When the user clicks on the control, the text will be displayed or hidden. The Expand All or Collapse All control at the top of the topic will allow the user to expand/collapse all of the text at once.
Note The Generate XHTML check box in the Help Targets dialog must be selected to enable expanding/collapsing sections.
Note In EPUB targets, all content in collapsible sections will be displayed (just as it would in manual targets).
