After you add folders to the External Resources window pane, you can copy any of the files to your project, mapping them to the source files at the same time.
This is a different process than that of importing files, which you can do elsewhere in Flare. Files that are brought into a project using a traditional import process can be connected to the source file, but only in one direction (i.e., files can be updated from the source to the imported file in the project). On the other hand, files that are copied from the External Resources window pane can be connected via mappings to the source files in two directions (i.e., files can be updated from the source to the copied file or from the copied file to the source).
[Menu Proxy — Headings — Online — Depth3 ]
How to Copy and Map External Resource Files
- Make sure the External Resources window pane is open. If it isn't, select View > External Resources.
-
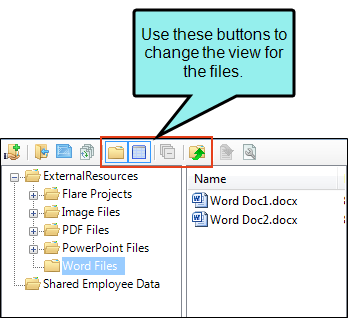
Locate the file that you want to add to the project. You can use the "multi-view" to do this.
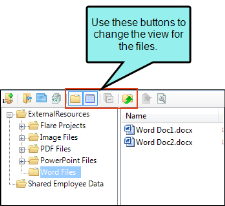

Shows or hides the folders that the files are stored in.

Shows or hides the files. If you click this button when the "Show Folders" button is selected, the area splits into two halves. The folder is shown on the left side, and the files and subfolders within it are shown on the right.

Collapses the folders.

If the "Show Files" button is the only one selected, you can click this button to move up one folder level.
- Do one of the following:
In the local toolbar click
 .
.OR
- Right-click on the file and from the context menu select Copy to Project.
- In the dialog that opens, find and select the location in your project that you want to add the file. Again, you can use the multi-view buttons to navigate to folders in your project.
- Click OK.
- In the Copy to Project dialog select Keep file synchronized (create mapping).
-
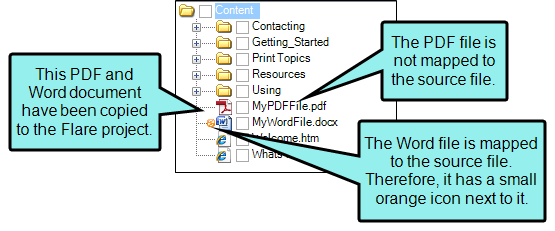
Click OK. The file is added to the project, as you can see by opening the Content Explorer. If you selected to map the file, a small orange icon
 is shown next to it.
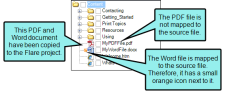
What’s Next?
After you map project files to source files located elsewhere, you can synchronize them to ensure that each file contains the same content. This process lets you import content from external files, export content from files in the project, or keep the most recently modified content. See Synchronizing External Resource Files.