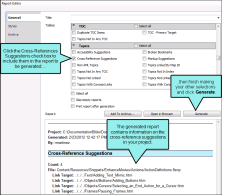
The Cross-Reference Suggestions window pane displays links in a project that you might want to convert to cross-references. This window pane also provides you with the option to convert the selected links to cross-references.
For example, if you have regular text hyperlinks (<a> tags), you might want to convert them, because cross-references change dynamically and are therefore usually preferred over text hyperlinks.
[Menu Proxy — Headings — Online — Depth3 ]
How to View Cross-Reference Suggestions
- Open a project.
-
Select Analysis > Suggestions > Cross-Reference Suggestions.
The Cross-Reference Suggestions window pane opens.
-
Double-click a file to open it in the XML Editor. The file opens and highlights the cross-reference suggestion.
How to Convert Cross-Reference Suggestions
- Open a project.
-
Select Analysis > Suggestions > Cross-Reference Suggestions.
The Cross-Reference Suggestions window pane opens.
-
Do one of the following:
-
Click the Convert to Cross-References button
 in the local toolbar.
OR
-
Right-click any file in the Cross-References Suggestions window pane and from the context menu, select Convert to Cross-References.
The Convert to Cross-Reference dialog opens.
-
- In the Convert to Cross-References dialog, you can make selections from the following options.
Target Options
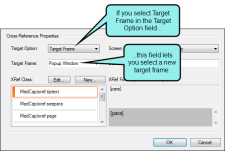
In the Target Option field, select one of the following to indicate how you want the destination file to open when the link is clicked.
- Link Target This uses the target that is set in the original link.
Target Frame This enables the Target Frame field (immediately below), which you can use to select one of the following target frame options.
- Page Default The destination file opens in the same window as the output window.
- Parent Frame The destination file opens in the parent frame of the current topic while hiding that topic.
- New Window The destination file opens in a new browser window.
- Same Frame The destination file opens in the same window frame as the current topic.
- Top Frame The destination file opens in the same output window, removing all other framesets. You might use this option, for example, if the destination topic has its own frameset.
- Popup Window The destination file opens in a popup box on top of the current topic.
Screen Tip Options
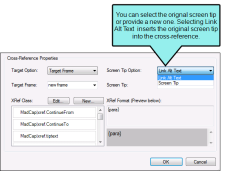
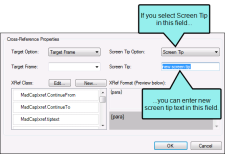
In the Screen Tip Option field, select one of the following to add a screen tip to the link. This is useful when it comes to accessibility.
Link Alt Text This uses the screen tip text that is set in the original link.
Screen Tip This uses the screen tip text that you enter in the Screen Tip field (immediately below).
Cross-Reference Style Class
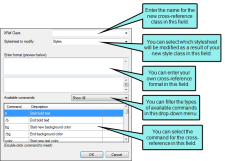
In the XRef Class field, you can set the cross-reference's style class and format . The style class is previewed to the right.
- Click OK. A message indicates how many files have been updated.
