


You can use the List-Of proxy to generate a list (or "table") of various types of elements (e.g., tables, images) in your output, with links to the corresponding content.

For steps specific to these kinds of lists, see Creating a List of Images and Creating a List of Tables.
[Menu Proxy — Headings — Online — Depth3 ]
How to Create a List of Elements
- Add a new topic.
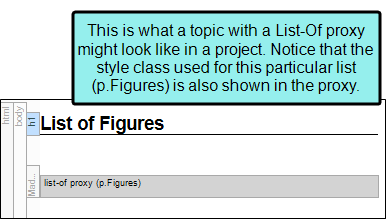
- At the top of the topic, enter a title for your list (e.g., "List of Figures").
- Select Insert > Proxy > Insert List-Of Proxy. The List-Of Proxy dialog opens.
-
In the Tag Name field, select the parent tag to be used for creating the list.
Example You've inserted tips throughout your project, and before each tip you've added a short heading with autonumbering that briefly describes the tip (e.g., Tip 2.3: Use Styles for Formatting). Now you want to create a list of all tip headings. Let's say that you created a class of the p style called "tiphead" for this purpose (i.e., p.tiphead). In this case, you would select p from the Tag Name field when inserting the List-Of proxy.
-
(Optional) In the Tag Class field, select the style class to be used for creating the list.
Example Using the example above, you would select "tiphead" from this field.
- (Optional) In the Stylesheet class for each generated entry field, you can select yet another style class that is used to determine how each item in the generated list looks. This should be a class of the p style that you have created. You would use this style class, for example, if you want to change the font of the entries or add a leader (e.g., series of dots) between the entries and the page numbers.
-
(Optional) In the field labeled Stylesheet class for proxy, you can select a class to affect the look of the entire list.
You might create and use a proxy style class, for example, if you want to add a border around the generated list. If you do not select a class from this field, the generated list will use the style settings from the parent MadCap|listOfProxy style. You have the option of creating a class for this proxy style in the Stylesheet Editor. To do this, select the MadCap|listOfProxy style and in the local toolbar click Add Selector to create a class. The class will then be available from this field.
- Click OK. The proxy is added to the topic.
- Click
") to save your work.
to save your work.
Note When you generate content from a proxy (e.g., list-of, mini-TOC proxies), keep in mind that some content may not show up in the output if you have used an option in the target to include only certain content based on links.
What's Next?
If you are creating print-based output, make sure to add the topic with the proxy to the outline TOC. See Creating a TOC.

