


A Mini-TOC proxy lets you generate a portion of your table of contents (TOC) or topic headings at a particular location in the output. A Mini-TOC proxy can be used for both online and print-based output. For online output, you can insert a Mini-TOC proxy into a template page or a topic. For print-based output formats, you can insert a Mini-TOC proxy into any topic where you want to generate a small TOC. For example, let's say you want the first page of each chapter in a manual to start out with a small TOC, showing the page numbers where subheadings occur within that chapter. In that case, you can insert a Mini-TOC proxy into each topic that you plan to use as the beginning of each chapter. If you insert the proxy into a template page, each topic using that template page will have a mini-TOC. If you insert the proxy into certain topics only, mini-TOCs will be generated only within those particular topics.
Example—Online Output
Example—Print Output
[Menu Proxy — Headings — Online — Depth3 ]
How to Create a Mini-TOC
- Place your cursor in a topic or template page and select Insert > Proxy > Insert Mini-Toc Proxy.
-
(Optional) From the TOC Depth field, select a number to dictate the depth of the mini-TOC.
For example, if the proxy is intended for print output and you want the mini-TOC to be based on heading levels in the topics, you might place the proxy after an h1 heading and select 4 as the depth. In that case, the proxy will include headings that are using h2, h3, and h4 styles (but not h5 or h6).
-
(Optional) From the Stylesheet class field, you can select a style for the mini-TOC.
You might create and use style classes if you want to generate multiple mini-TOCs with different looks for each output. Otherwise, the generated mini-TOC will use the style settings from the parent MadCap|miniTocProxy style. You can create a style class for this purpose in the Stylesheet Editor. To do this, select the MadCap|miniTocProxy style and click Add Class to create a class.
- Click OK.
- Click
") to save your work.
to save your work.
How It Works
How does Flare decide which topic links to include in a mini-TOC? It works a bit differently for online output than it does for print-based output.
Print-Based Output
By default the mini-TOC for print output is based on the h1 through h6 styles that you have applied to content in your topics. When you insert the proxy, you select a number for the heading depth. This number refers to the absolute heading level. For example, if you place the proxy after an h1 heading and select 4 as the depth, the proxy will include headings that are using h2, h3, and h4 styles (but not h5 or h6). If you place the proxy after an h2 heading with 4 as the depth, the proxy will include the h3 and h4 styles only. Please note that the print mini-TOC created from the proxy is not necessarily based on the structure of your outline TOC (i.e., the file found in the TOCs folder in the Project Organizer). However, there is a switch on the Advanced tab in the Target Editor that lets you base the generated mini-TOC on the structure of your outline TOC.
Online Output
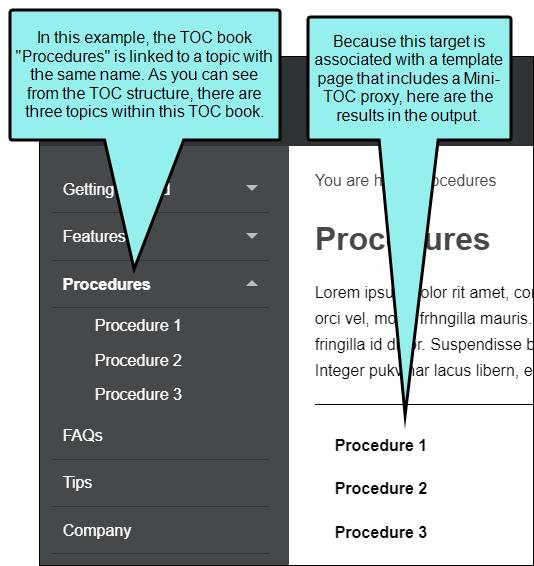
For online output, the depth refers to the number of sub-levels found under that topic in the TOC file.
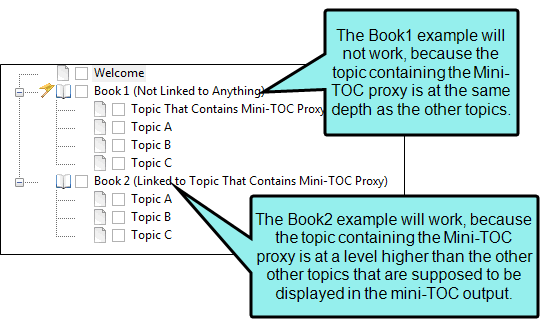
Let's say you place the proxy in a topic that is located on the first level in a TOC, with three levels of topics below it, like this:
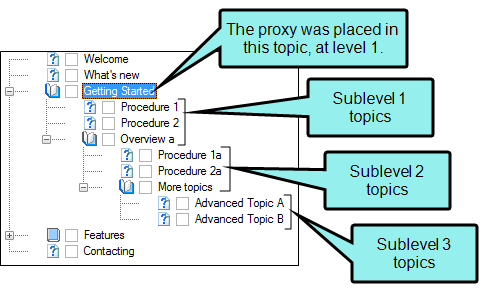
With a depth of 3, all three levels of topics will be included in the mini-TOC in online output, even if those topics happen to start with an h1 heading.
Examples
Example — Online Output
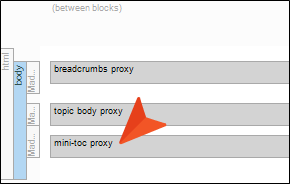
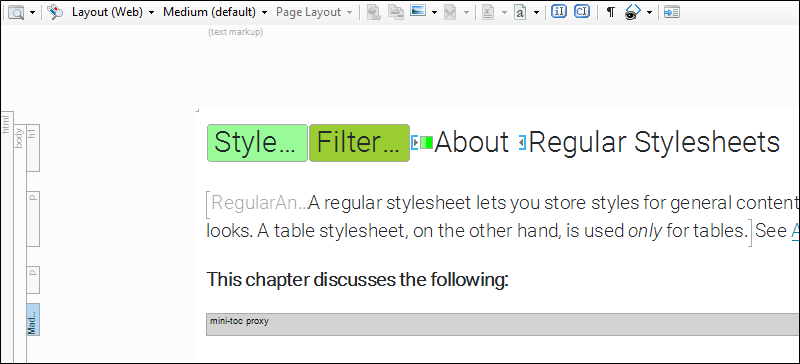
Here is an example of a template page where a Mini-TOC proxy has been inserted. A Body proxy and Breadcrumbs proxy have also been inserted.
Here is how a mini-TOC might look in the output for a Help system:
Example — Print-Based Output
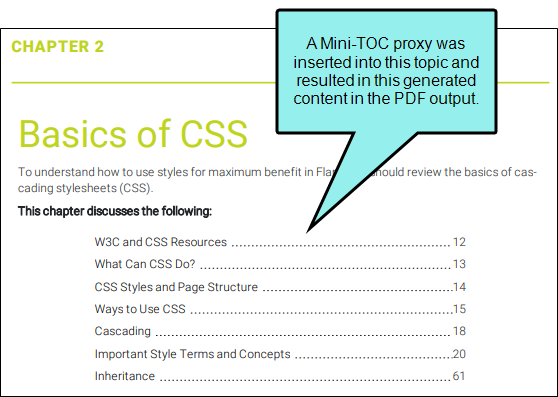
This is what a topic with a Mini-TOC proxy might look like in a project.
This is what a topic with a Mini-TOC proxy might look like in the output.

Example — Styles Method for Print Output
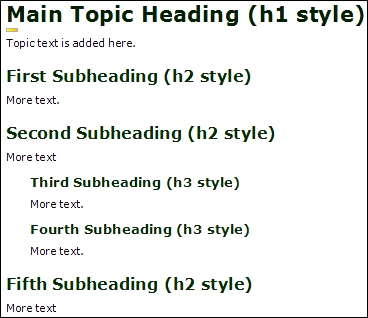
Let's say that you want to use the default method in print-based output, where the mini-TOC entries are based on headings using the h1 through h6 styles in your project. Perhaps you have created a lengthy topic, with the h1 style applied to the first heading in that topic and several subheadings below it that are using the h2 and h3 styles. Like this:
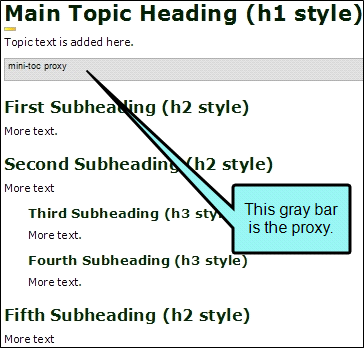
Now let's say that you insert a Mini-TOC proxy between the h1 heading and the first h2 heading, like this:
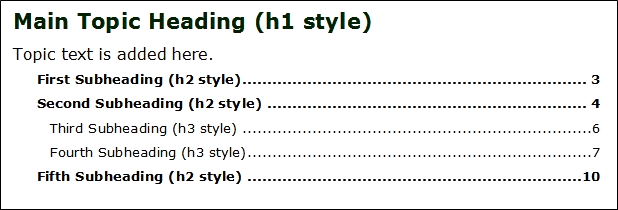
When you insert the proxy, let's say you specify that it should use a depth of 3. In that case, the output will display links that point to all your subheadings—the h2 headings (which are second-level headings), as well as the h3 headings (which are third-level headings). But suppose you also have, say, h4 headings in the topic content. Those h4 headings will not be included in the mini-TOC because you selected a depth of 3 rather than 4 or higher.
In the output, it might look something like this:
Example — TOC Structure Method for Print Output
Let's say that you want to use the method where the mini-TOC entries are based on the structure of your outline TOC. Perhaps you have created several topics that are organized in your TOC, like "Chapter 5" in this example:
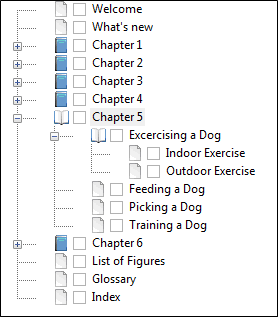
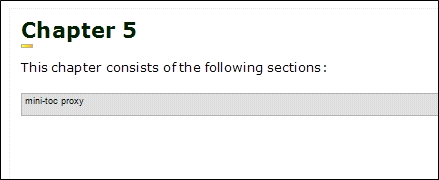
That book in the outline TOC consists of seven topics (Chapter 5, Exercising a Dog, Indoor Exercise, Outdoor Exercise, Feeding a Dog, Picking a Dog, and Training a Dog). Let's say that you want to insert a Mini-TOC proxy into the "Chapter 5" topic so that it creates a small TOC pointing to the other topics under it. Furthermore, suppose that you are using the h1 style at the top of each of those topics, and you do not want to change that fact. In that case, you can simply insert the Mini-TOC proxy into the "Chapter 5" topic, like this:
When you insert the proxy, you specify that it should include three levels of headings in the mini-TOC, because in the output Flare will create three levels based on your structure.
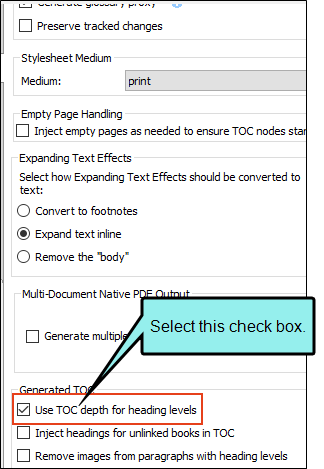
You can then open the target that you want to generate, select the Advanced tab, and click the option to generate your TOC based on the structure of the outline TOC in your project.
Like this:
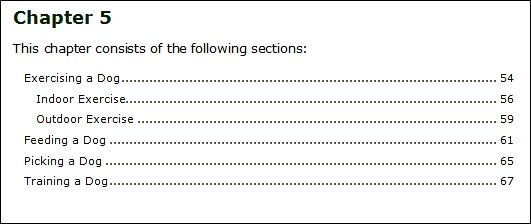
In the output, the "Chapter 5" topic might look something like this:
Please remember that the topic containing your Mini-TOC proxy must be on a higher level in the TOC than the topics that you want to be captured by that mini-TOC.
What’s Noteworthy?
Note If you want to affect the look of the individual entries in the generated mini-TOC, you can use the MiniTOC1 through MiniTOC9 styles (classes of the p style) in the Stylesheet Editor. For example, let's say that you want to use blue font for the first-level headings in the generated mini-TOC. You can change the font color setting on the p.MiniTOC1 style. You can also modify the entire container holding the mini-TOC.
Note In previous versions of Flare, the code for styling Mini-TOC proxy links was .MCMiniTOCLink. Starting in Flare V4, the style class used for this purpose is p.MiniTOC1.
Note When you generate content from a proxy (e.g., list-of, mini-TOC proxies), keep in mind that some content may not show up in the output if you have used an option in the target to include only certain content based on links.

