Work through each section below to complete the remaining items needed for the Elasticsearch service.
[Menu Proxy — Headings — Online — Depth3 ]
How to Install the Elasticsearch Service
Install Elasticsearch on the remote server to provide the engine for the Elasticsearch service.
- From Windows File Explorer, right-click the Elasticsearch folder on the remote server, and select Properties.
- In the Elasticsearch Properties dialog, select the Security tab.
- In the Groups or user names section, select the Everyone account. If this account is not listed, do the following.
- Create this account by clicking Edit. (You need to be signed is as an administrator.)
- In the Permissions for Elasticsearch dialog, click Add. The Select Users, Computers, Service Accounts, or Groups dialog opens.
- In the Enter the object names to select section, type Everyone. Click OK.
- In the Permissions for Elasticsearch dialog, choose the permissions for Everyone. Under the Allow category, select Read and Write.
- Click OK.
- Navigate to Elasticsearch\config directory, and open the elasticsearch.yml file in a text editor (e.g., right-click, and select Edit with Notepad++).
-
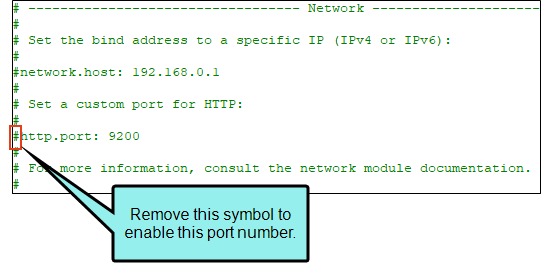
Under the Network section, find the string “http.port: 9200” and remove the # character from it.
Note Elasticsearch uses port 9200 by default. You will notice in the Elasticsearch.yml file that the http port is 9200, and in the appsettings.json file the port is 9602 (in a later step). These numbers must match. You can choose to edit one of the files with either number. Just make sure they show the same number after the edits. If you change the port number in the YML file, you can specify the port number where it reads: http.port: 9200.

-
Save the YML file.
-
In the Windows Search bar, type cmd.
-
In the command prompt, navigate to the location of the copied Elasticsearch\bin directory (e.g., cd C:\Elasticsearch\bin).
-
Type elasticsearch-service.bat install and press ENTER.
-
Type elasticsearch-service.bat start and press ENTER. Elasticsearch is now running as the remote web server.
How to Set Up the Content Services Portal
The Content Services Portal is necessary in order to manage the search data for the Elasticsearch-enabled HTML5 output.
- From Windows File Explorer, right-click the Web.ContentServices folder on the remote server, and select Properties.
- In the Web.ContentServices Properties dialog, select the Security tab.
- In the Groups or user names section, select the Everyone account. If this account is not listed, do the following.
- Create this account by clicking Edit. (You need to be signed is as an administrator.)
- In the Permissions for Web.ContentServices dialog, click Add. The Select Users, Computers, Service Accounts, or Groups dialog opens.
- In the Enter the object names to select section, type Everyone. Click OK.
- In the Permissions for Web.ContentServices dialog, choose the permissions for Everyone. Under the Allow category, select Read and Write.
- Click OK.
- In the Web.ContentServices folder on the remote server, create a folder titled "logs.”
- In the Web.ContentServices folder on the remote server, open the appsettings.json file in a text editor (e.g., right-click, and select Edit with Notepad++).
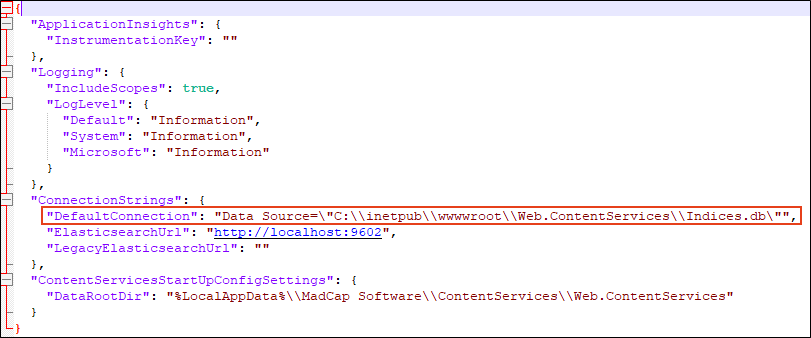
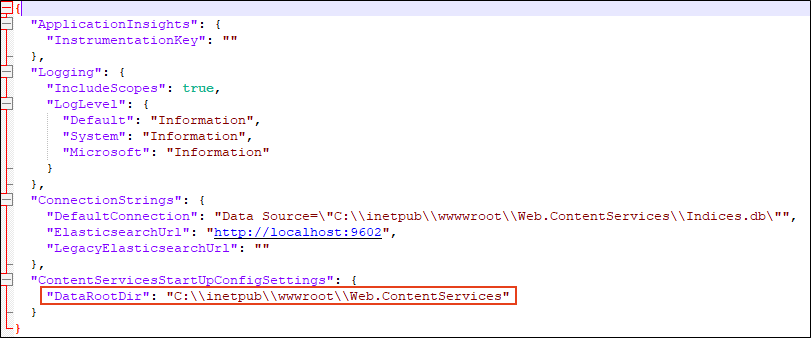
Under the ConnectionStrings section, update the path to be used for the DefaultConnection. The default string line should read as shown in the following image.
Note The Indices.db file is actually not created until the Content Services application is started in IIS and users start searching on the Elasticsearch output. In this step, you are simply specifying the location of where you want this file to reside on your remote server.
Note Elasticsearch uses port 9200 by default. You will notice in the Elasticsearch.yml file that the http port is 9200 (in a previous step), and in the appsettings.json file the port is 9602. These numbers must match. You can choose to edit one of the files with either number. Just make sure they show the same number. If you change the port number in the JSON file, you can specify the port number where it reads: http://localhost: 9602.
Under ContentServicesStartupConfigSettings, update the path to be used for the DataRootDir. The default string line should read as shown in the following image.
Save the JSON file.
Note Ensure that the paths you provide for DefaultConnection and DataRootDir in the appsettings.json file have read/write permissions for the user account logging into the web server.
Warning If you decide to place the Web.ContentServices folder in a different location from the C:\inetpub\wwwroot location, make sure the configuration settings in the appsettings.json file match the location on your remote server where you placed the Web.ContentServices folder.
Optional—How to Restrict Access to Content Services
To restrict access to the Content Services Portal, configure the Content Services web application. This is done by installing the URL Rewrite Module, which will enable IP address security restrictions to work in your web.config.file. This is an optional procedure.
-
In a browser, navigate to:
Copyhttps://www.iis.net/downloads/microsoft/url-rewrite - From the URL Rewrite web page, scroll down to the Download URL Rewrite Module 2.1 section.
- Determine the appropriate download option for your machine (e.g., x64 installer), and select it.
- Click the executable file to install.
- In the Web.ContentServices folder on the remote server, open the web.config file in a text editor (e.g., right-click, and select Edit with Notepad++).
-
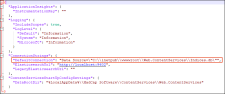
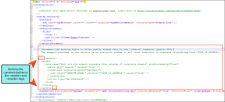
Remove the comment characters from the <rewrite> and </rewrite> tags in this file.
-
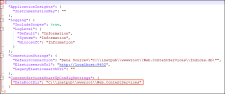
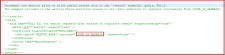
Modify YOUR_IP_ADDRESS with your desired IP address pattern. You can enter a range of IP addresses in this field, or a singular IP address. This will block other addresses that do not match your IP address pattern from gaining administrator access to your Content Services Portal.
Note You can enter a single IP address of the remote server to limit portal access to users only on that computer. However, you might need to provide access for more than just the remote server computer. For example, enter a range of IP addresses to provide access for authors to publish to the server.


How to Configure the Content Services Web Application
- From the Windows Search bar, type IIS.
- Click the resulting item, Internet Information Services (IIS) Manager app to open IIS Manager.
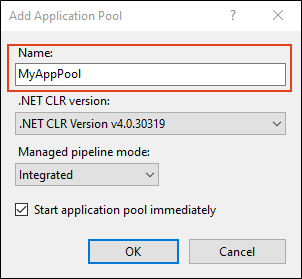
- Right-click Application Pools, and select Add Application Pool. The Application Pool dialog opens.
-
In the Name field, type a name (e.g., MyAppPool). Keep the other default settings, and click OK. For information about application pools, refer to Microsoft documentation:
Copyhttps://docs.microsoft.com/en-us/iis/configuration/system.applicationhost/applicationpools/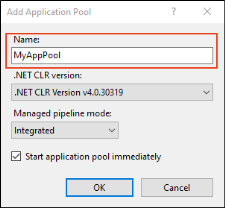
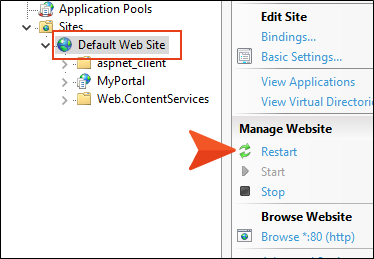
- In the IIS Manager, navigate to Sites > Default Web Site.
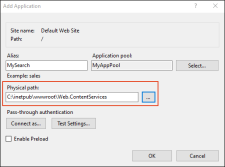
- Right-click Default Web Site, and select Add Application.
- Enter the name of the Alias for your Elasticsearch website (e.g., MyPortal).
-
Click the Select button, and choose your Application pool.
Note You can use the default Application pool or create a new one for this service.
- Next to the Physical path field, click the ellipsis button.
-
Select the C:\inetpub\wwwroot\Web.ContentServices directory. Or, if you placed the Web.ContentServices directory in another location on your server, select that location instead.
-
Click OK. Your Content Services application is now displayed under Default Web Site in IIS.

-
Click Start (or Restart if it is already running) on your Default Web Site. The Content Services application is now running.


Optional—How to Verify Content Service Portal Installation
Verifying the installation of Content Services Portal is not necessary to do, but it might provide peace of mind that is running properly.
- From the Windows Search bar, type IIS.
- Click the resulting item, Internet Information Services (IIS) Manager app. The IIS Manager opens and should show the website configured from earlier steps.
-
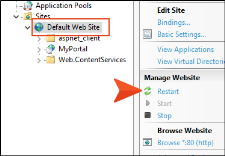
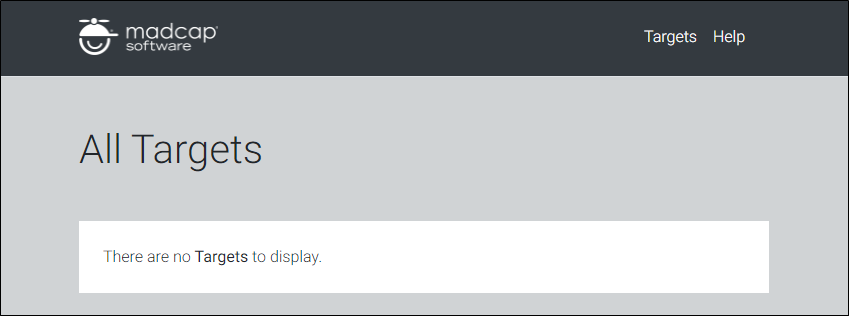
Right-click the portal (e.g. MyPortal) and select Manage Website > Browse. If the following page displays, the portal was configured successfully.
The URL for the portal displays as http://localhost/MyPortal where “MyPortal” is the name of the website picked in an earlier step. In order for another computer to have access to this server, replace “localhost” with the name of the remote server. For example, the URL to use from another computer to access this portal is http://[name of server]/[MyPortal].
- Ensure the computer with Flare (used to publish to the server) has access to the remote server. Open a browser on that local computer and browse to http://[name of server]/[MyPortal]. It should display the same portal page as in the last step. This URL is the also the one to use for the Elasticsearch destination file in the Flare project.
What’s Next?
The next steps in the process involve integrating Elasticsearch with Flare. Once those are complete, you’ll be able take advantage of the full capabilities of Elasticsearch as your search engine. See Enabling Elasticsearch in the Target Editor.

