—Git
Synchronizing files performs a pull to update the local database with files from the remote repository, and then pushes any local commits to the remote repository. Changes made during a synchronize affect your current branch. You will see the Resolve Version Conflict dialog if conflicts exist when you synchronize your files.
If a remote file is different from the version in your local database, the Resolve Conflicts dialog opens. If you want to accept all of the differences between the remote and local files, thus merging them, click Auto Merge All. If you want to review the differences in the files side by side and resolve each conflict, click Resolve
How to Synchronize Files
-
Do one of the following, depending on the part of the user interface you are using:Select Source Control > Synchronize.
-
Status Bar In the lower-right of Flare, click
 . A number next to the up arrow indicates how many commits need to be pushed. If you see a number next to the down arrow on this button, it indicates that there are pending remote commits that you still need to pull to your local repository. A number displays next to the down arrow only after you do a fetch (i.e., "git fetch"). This is a command that you cannot perform from the Flare interface, but you can do it using another tool such as Git Bash. Another way for a number to display next to the down arrow is if you first do a pull on one branch, then switch to another branch that has pending remote commits.
 Note If you do not see this option, make sure View > Status Bar is enabled.
Note After committing changes, you might need to click somewhere in the interface before numbers populate next to this button.
-
Ribbon Select Source Control > Synchronize.
-
Right-Click If you have the Content Explorer, Project Organizer, Pending Changes window pane, or File List open, right-click any file and select Source Control > Project > Synchronize.
-
-
(Optional) If you did not commit your files before starting the synchronize, a dialog asks if you want to commit your files. Click Yes to continue. See Committing Source Control Files—Git.
Note You must commit all modified files to proceed with the synchronization.
-
The Select Remote for Synchronize dialog opens. From the Remote drop-down, select the repository you want to synchronize with.
-
(Optional) To add or remove a remote repository, click
 . The Remote Repositories dialog opens.
To Add a Remote Repository
-
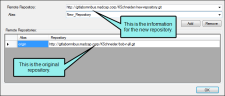
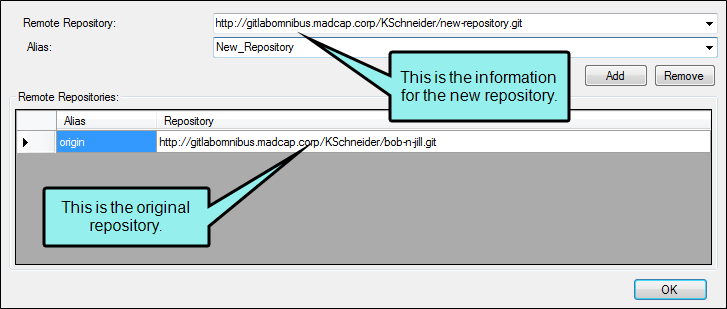
In the Remote Repository field, enter the address of the new repository.
Note You may need to obtain this information from your system administrator.
-
In the Alias field, enter a name for the new repository. This is the name that will appear in the Remote drop-down when you need to select a remote repository.
Note Repository names cannot include spaces.
-
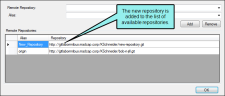
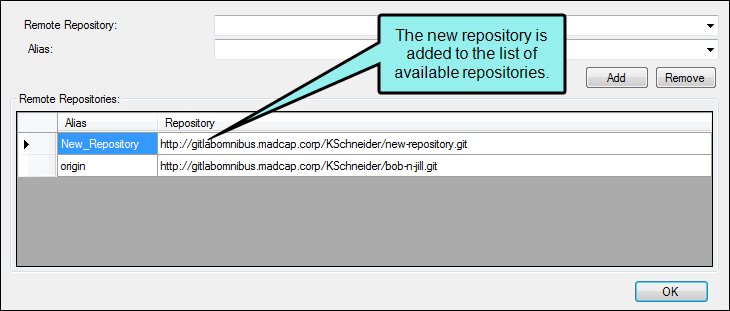
Click Add to add the new repository to the list of available repositories.
-
Click OK.
To Remove a Remote Repository
- From the Remote Repository list, select the repository you want to delete.
- Click Remove. The repository is removed from the list of available repositories.
-
Click OK.
-
-
In the Select Remote for Synchronize dialog, click OK. If the Log In dialog opens, complete the User name and Password fields and click OK.
-
If a remote file is different from the version in your local database, the Resolve Conflicts dialog opens. If you want to accept all of the differences between the remote and local files, thus merging them, click Auto Merge All. If you want to review the differences in the files side by side and resolve each conflict, click Resolve
-
Select Source Control > Synchronize.
-
(Optional) If you did not commit your files before starting the synchronize, a dialog asks if you want to commit your files. Click Yes to continue. See Committing Source Control Files—Git.
-
The Select Remote for Synchronize dialog opens. From the Remote drop-down, select the repository you want to synchronize with.
-
In the Select Remote for Synchronize dialog, click OK. If the Log In dialog opens, complete the User name and Password fields and click OK.
-
If a remote file is different from the version in your local database, the Resolve Conflicts dialog opens. If you want to accept all of the differences between the remote and local files, thus merging them, click Auto Merge All. If you want to review the differences in the files side by side and resolve each conflict, click Resolve

