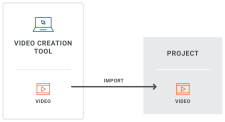
When it comes to image and video files, you will probably use a tool outside of Flare to create them (although there is some functionality in Flare’s Insert ribbon for capturing images). Then you can insert those files into Flare projects or enter links to them.
[Menu Proxy — Headings — Online — Depth3 ]
Images
Images
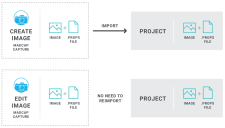
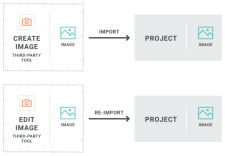
After creating image files, they are added to your Flare project and inserted by reference into content files. You can use MadCap Capture, or you can use a third-party image tool. Because of its tight integration with Flare, there are definite benefits to using Central.
See Images.
-
Each image file created using Capture includes a .props file next to it. This lets you make your changes in Capture, with the image automatically being updated in Flare. There is no need to reimport the image.
-
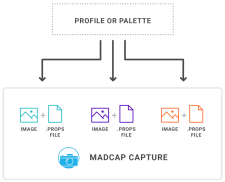
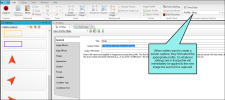
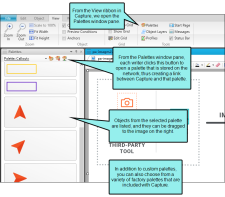
You can take advantage of global profiles (settings for new images) and palettes (objects, such as callouts and arrows). This means that you can store and maintain these special files somewhere on your network, where anyone with Capture can use them. Also, this helps maintain consistency of images across Flare projects, especially when you have a team of writers.
- There are probably fewer editing features in Capture than you will find in some established third-party tools. Although you can edit images in many ways within Capture, the primary purpose of Capture is not to provide advanced editing capabilities. Instead, its main purpose is to integrate tightly with Flare projects.
Third-Party Tools
-
You will need to re-add each image file to your Flare project whenever you make changes to it.
- Third-party tools may or may not have features that allow you to apply settings in advance (i.e., profiles) or maintain a library of custom objects to include in images (i.e., palettes).
- Many third-party tools have some very powerful editing features. If making slick, professional-looking images is a priority, you might want to use one of these applications.
What the MadCap Documentation Team Does
We use MadCap Capture to create and edit images because of its single-sourcing capabilities and tight integration with Flare.
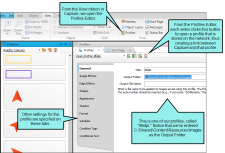
First, we created a couple of image profiles in Capture. Both profiles have identical settings (e.g., 96 DPI), except that one profile places a thin border around new screen captures and the other doesn’t. Then we placed these profiles in a folder on our network. Each writer adds a link to these profiles in Capture.
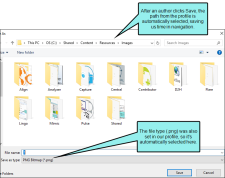
One of the most important settings in the profiles is the output folder, which for us, is C:\Shared\Content\Resources\Images. This simply means that when a writer uses one of these profiles for a screenshot and clicks Save, the dialog immediately goes to this location. This saves time because we never have to navigate to the Images folder in our main Shared project (the most frequent place where we save images). This is also one reason that all writers store Flare projects in the root C:\ folder; the output folder setting in the profile is the same for everyone.
We also created a palette in Capture that contains objects (e.g., callouts, arrows, rectangles) that we frequently add to images. By placing these objects in a palette and storing them in a network folder, we are assured that each writer is using the same objects and maintaining consistency.
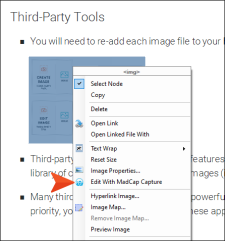
When profiles and palette objects are used in an image, that information is placed in the .props file next to the image file. This means that when we want to make changes to an image, we simply right-click it in Flare and select Edit With MadCap Capture.
The image opens in Capture, and we can make any changes to it that we want, including adjusting the objects. As soon as we click Save, the image is updated in Flare. In other words, we don’t need to waste time reimporting the image into the project.
Videos
After creating video files, you can add those files to your Flare project and then insert them into content files, such as topics or snippets.
Alternatively, you can point to videos that you’ve uploaded to websites such as YouTube and Vimeo.
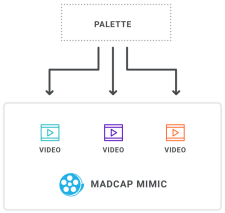
There are several video creation software tools on the market that you can use to produce your movies. If you use MadCap Mimic, you have the added benefit of being able to use the same palettes that are leveraged in Capture.
