|
Option |
Description |
|---|---|
|
|
Toggles between showing or hiding the subfolders in the Content Explorer. |
|
|
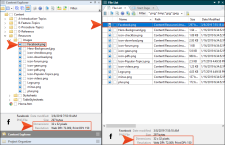
Splits the Content Explorer into two halves. When you select a folder on the left side, the folders and files within it are shown on the right side. Also, you can select multiple files on the right side, which lets you perform the same action on all of them at the same time. You can use the down arrow to view the files on the right in a list format or in a tile format. |
|
|
Expands all of the folders so that you can see all of the files under each one. |
|
|
Collapses all of the folders so that you can no longer see all of the files under each one. |
|
|
Lets you show or hide the small squares next to each folder and file, which are used to show colors representing condition tags that have been applied. |
|
|
Moves up one folder in the hierarchy. This button becomes enabled if you use the Split View button |
|
|
Refreshes the window pane so that the latest information is shown. |
|
|
Opens the selected item. |
|
|
Opens the Properties dialog for the selected item. |
|
|
Creates a new custom folder, which you can use to organize your files. |
|
|
Opens the Add File dialog, which lets you create a new topic or import one from outside the project. |
|
|
Lets you limit the files that are displayed by file format.
|
|
|
Displays the color of condition tags that are associated with the file (if any). Condition tags are used to determine specific content or files to be included in some targets but not in others. |
|
|
See Checking In, Committing, and Submitting Source Control Files and Checking Out Source Control Files. |
|
|
This indicates that you have a file in your project but have not yet added it to the integrated source control application. |
|
|
This indicates that the file is added to source control but is not currently checked out, which means that it contains a "Read Only" designation in its properties. In order to edit the file, you must check it out from source control. You will see this icon if your project is bound to Microsoft Team Foundation Server or Perforce Helix Core. |
|
|
This indicates that another user has locked the file. You will often see this icon in conjunction with the If your project is bound to Subversion and you need to commit the file in while another user is working on it, you can steal their lock. To do this, right-click on the file and select Source Control > Lock. In the Lock dialog, select Steal the lock, then click Lock. You will see this icon if your project is bound to Microsoft Team Foundation Server, Perforce Helix Core, or Subversion.
|
|
|
This indicates that you have locked the file. You will often see this icon in conjunction with the If your project is bound to Subversion, other users can steal your lock. If you are using Team Foundation Server, you can lock a file when you check it out. You will see this icon if your project is bound to Microsoft Team Foundation Server, or Perforce Helix Core, or Subversion.
|
|
|
You will see this icon if your project is bound to Microsoft Team Foundation Server, Perforce Helix Core, or Subversion. |
|
|
This indicates that the file is not current (i.e., the local copy of the file is older than the source control copy). This might happen if another user checks out the file, makes changes to it, and checks it back in to source control. If this occurs, you can check the file out or get the latest version of the file from source control. You will see this icon if your project is bound to Microsoft Team Foundation Server, Perforce Helix Core, or Subversion. See Checking Out Source Control Files or Updating or Getting the Latest Version of Source Control Files. |
|
|
This indicates that a file has been renamed, but not modified in any other way. If you make any additional changes to the file, such as editing the text or adding a condition tag, the renamed You will see this icon if your project is bound to Subversion. |
|
|
This indicates that the file is deleted from source control, but you still have a copy of the file on your local machine. If necessary, you can add the file to source control. You will see this icon if your project is bound to Microsoft Team Foundation Server.
|
|
|
This indicates that the file is mapped to an external resource or SharePoint file.
|
|
[Preview Bar] |
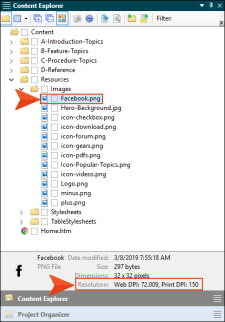
This is the area at the bottom of the Content Explorer. When you click on a folder or file, this bar shows its name, size, and last modified date. When you click on an image file, a small copy of that image is shown, as well as its resolution and dimensions. If you have set the online or print DPI for an image using MadCap Capture, these values are also shown. |


 and select a file or folder on the right side of the split view.


