As you build your eLearning content, Flare provides simple ways to create questions. Once you have eLearning questions in the XML Editor, you can edit them via context menus or by working in conjunction with the Question Properties window pane.
[Menu Proxy — Headings — Online — Depth3 ]
Question Types
The multiple choice and multiple response question types are available to insert into a topic. They both include structure bar tags, but they are visually distinguishable in the editor by a shape. The multiple choice type is preceded by a circle and requires one correct answer. The multiple response type is preceded by a square and requires multiple answers for it.
How to Create a Question
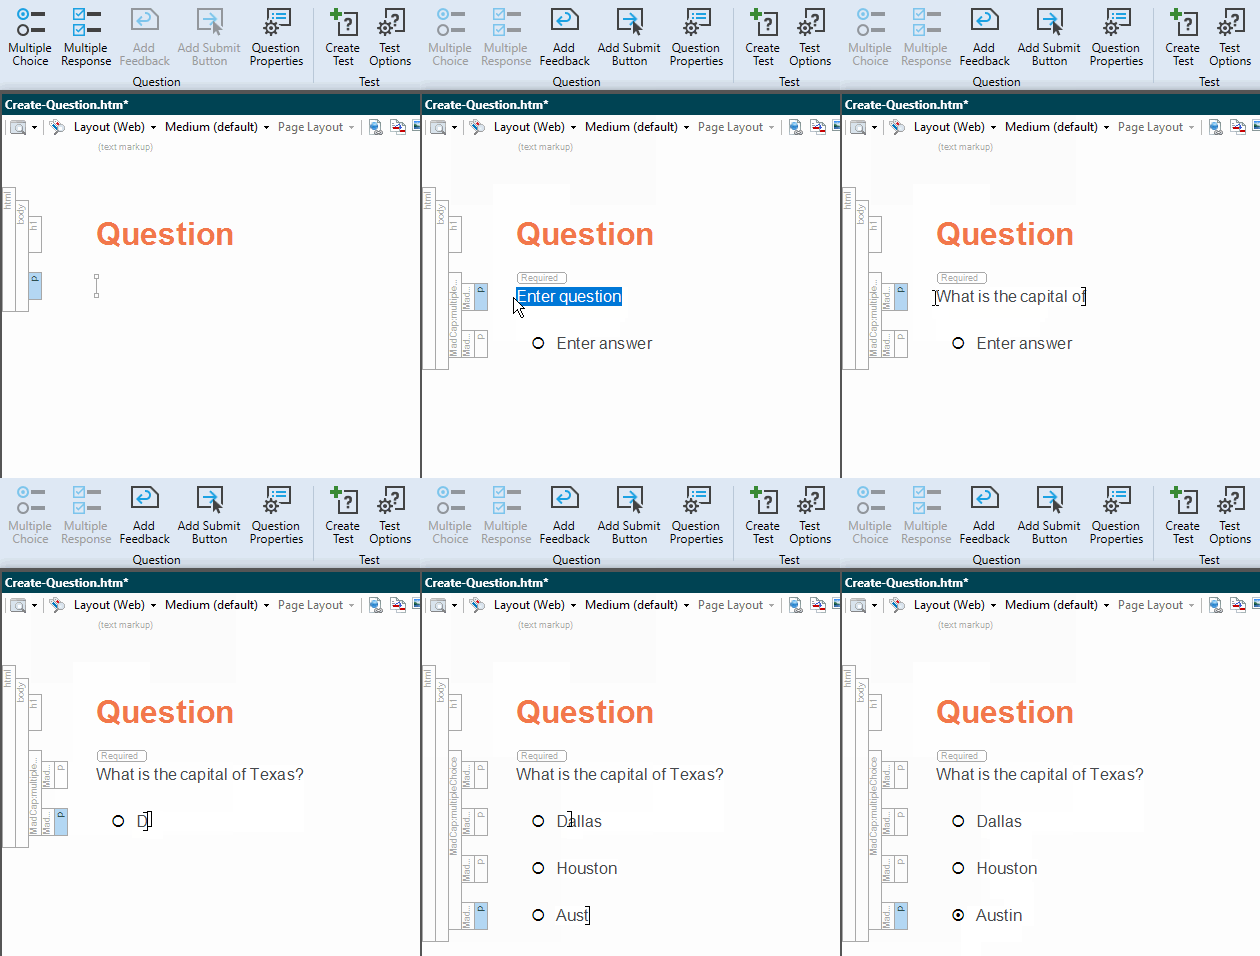
- Place the cursor in an empty paragraph where you want to insert a question section.
- From the eLearning ribbon, select the Multiple Choice button or the Multiple Response button. Default question text is added along with one answer.
- (Optional) From the eLearning ribbon, select the Question Properties button. The Question Properties window pane opens to the right of the editor. This offers editing options that are not available from the ribbon or editor. See Question Properties Window Pane.
- Enter your question and answer.
- Replace the default text in the first paragraph with a question.
- Replace the default text in the second paragraph with an answer.
- To add more answers, press ENTER for another paragraph to display. Repeat this until all the answer options are included.
- Assign the correct answer(s).
- Multiple Choice Select the circle before the correct answer in the editor. Alternatively, select the correct answer’s paragraph, and then from the Question Properties window pane or from the MadCap:multipleChoiceItem structure bar context menu, select Correct Answer.
- Multiple Response Select the square before each correct answer. Alternatively, select the correct answer's paragraph, and then from the Question Properties window pane or from the MadCap:multipleChoiceItem structure bar context menu, select Correct Answer.
- Click
 to save your work.
If the animation below is cut off, you can see the complete animation by clicking the link under it to open the full topic.
Note To add a question into the editor from the Question Properties window pane, click the ![]() button.
button.
Note By default, all questions are "required," meaning that a question must be answered in the output before the "next" topic button is enabled in the toolbar. If a question is "optional," then the "next" topic button is enabled regardless if the question is answered. This can be changed using the Question Properties window pane.
Alternatively, in the stylesheet you can modify the mc-required-question property for the MadCap|multiple Choice style. If you change the value to "false" the default changes to "optional." You can also create a "required" style class, and an "optional" style class if you want easier access and more control.
Note Question sections can be added to any topic in your project; not just topics intended for an eLearning course. A topic can include one or multiple questions in it—of different types.
How to Switch Question Types
Once a question section is inserted into the editor, you can manually change the question type at any time. Do one of the following, depending on the part of the user interface you are using:
-
XML Editor Right-click the active question, and select Switch to Multiple Response (or Switch to Multiple Choice).
-
Question Properties The Multiple Response Question box is selected when the multiple response question type exists. Deselect this box to convert the active question to multiple choice, and vice versa.
How to Create Question Sections From Existing Content
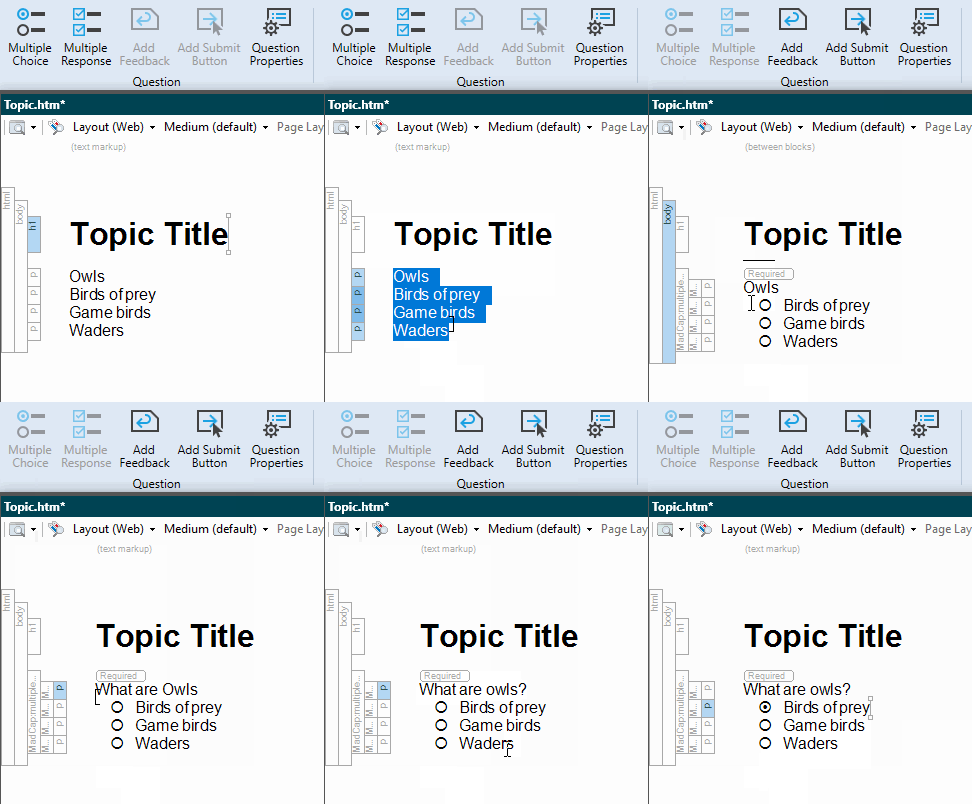
You can create question sections from content that already exists in a topic.
-
In the XML Editor, select one or more consecutive paragraphs.
-
From the eLearning ribbon, select Multiple Choice or Multiple Response.
-
The first paragraph from the selection becomes the question.
-
The second and remaining paragraphs each become an answer option.
-
-
Select the correct answer(s).
How to Create Question Sections Using Snippets
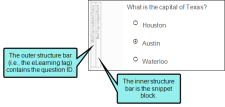
You can single-source question sections using a snippet and reuse it elsewhere in the project. The key to doing this is to insert the snippet within the <MadCap:multipleChoice> tag, which is the outer tag added when you insert a new question. This tag contains the question ID for that section.
-
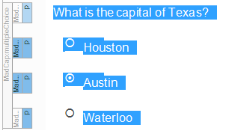
In the XML Editor, select the question section paragraphs that you want to include in a snippet. The snippet can include some or all of the question section (e.g., question, answer(s), feedback, submit button).
-
Select Home > Create Snippet. The Create Snippet dialog opens to name, create, and save it.
-
Open a topic where you want to insert the snippet.
-
From the eLearning ribbon, insert a new question (e.g., multiple choice or multiple response).
-
At the inserted default question section, place your cursor in the text, and press the down arrow. The cursor should be at the end of the question section.
-
Select Insert > Snippet.
-
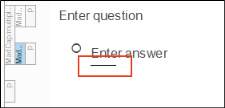
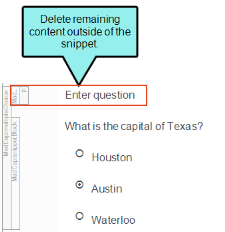
From the Insert Snippet Link dialog, select the snippet, and click OK. It inserts as a snippet block. You might have to delete remaining parts of the original default question section.
The cleaned up text is all that should be in the snippet block.
Warning You can create snippets for entire question sections and reuse them. However, use caution when doing so, because each question has its own question ID associated with it, and you do not want the ID to end up inside the snippet. The question ID is necessary for eLearning tracking.
Note The <MadCap|multipleChoice> tag includes the question ID. This is evident in the Text Editor.
An alternative way to select the text, is to open the Text Editor for the topic with the question section in it that you want to make into a snippet. You can delete the <MadCap|multipleChoice> tag lines that wrap the question section, and save the file. View the topic in the XML Editor, select the question and answer paragraphs, and then create a snippet.

