Systems Menu
Important Pulse is deprecated in Flare, which means that it is slated to be removed in a future version.
AVAILABLE TO: Administrators and Employees
In the Pulse dashboard, the Systems menu is available to members of the Employees and Administrators group. Members of the Employees group can find existing systems. Members of the Administrators group can both find and create systems.
[Menu Proxy — Headings — Online — Depth3 ]
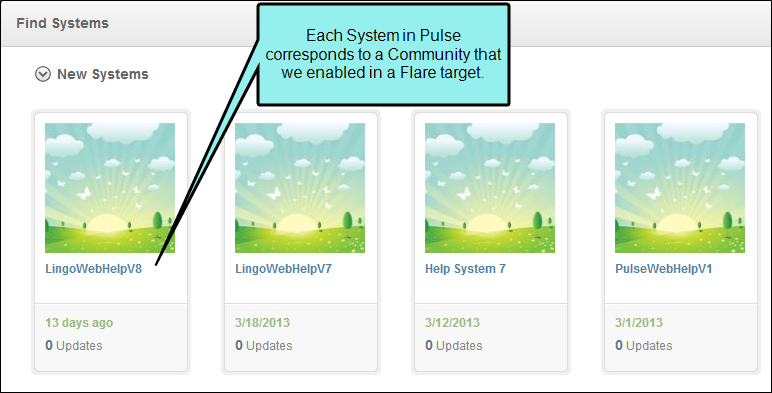
Pulse Systems and Flare Communities
To integrate a Pulse system with the Flare output, you must first create a community in the Flare target
A Flare community always corresponds to a Flare target. If you publish more that one online Flare target, you have these options:
-
Enable One Flare Community for All Targets This creates one Pulse system and Flare community to use with all of your Flare targets. It also lets you run reports for the entire community.
-
Enable a Unique Flare Community for Each Target This creates a separate Flare community and Pulse system for each Flare target. The benefit to this approach is that it lets you run reports for each community.

Creating Systems and Communities
There are two ways to create a new system in Pulse to integrate with a Flare community. For the best experience, it is recommended that you always create communities using the Flare Target Editor:
|
Method |
Description |
Notes |
|---|---|---|
|
Analytics Tab in the Flare Target Editor |
When you add a Flare community to a target, that community is automatically added as a system in Pulse. This gives members of the Customers group the ability to post updates, questions, articles, and tasks in embedded discussion forms for your Flare output. Members of the Administrators and Employees groups can also moderate these posts and other Pulse features using the Pulse dashboard. |
This is the recommended method. |
|
Systems Menu in the Pulse Dashboard |
If you decide to create a system in Pulse, it will require several extra steps on your part to integrate that system with Pulse. |
This method is supported, but not recommended. See the instructions below. |
How to Create a System Using the Pulse Dashboard
Warning If you create your new system using the Pulse dashboard, it will require several extra steps on your part. This is why we recommend creating Pulse systems from the Analytics tab of the Flare Target Editor.
- Log in to the Pulse dashboard using an account that is a member of the Administrators group.
-
Open the Create System page using one of these methods:Select Systems > Create System. Select Systems > Find System. Then click Create System at the bottom of the page.
-
Under the Basic tab, type the following for the system hub:Name The name of the system.Description A short description about the system.
- Click Create this System. This opens the new system's page in thePulse dashboard.
- Select Administration > Settings. The Settings page opens.
- In the Settings page, click Communities.
-
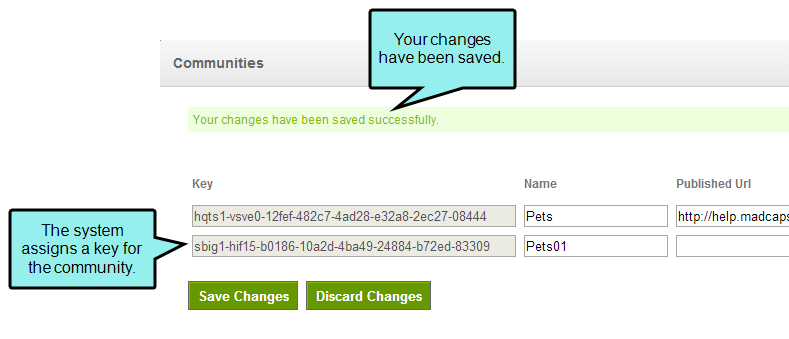
In the Communities page, click New. Then type the name of the system in the Name box. Your entry must exactly match the system name you created earlier.
-
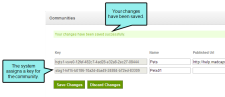
Click Save Changes. When prompted to confirm that you want to save all changes, click OKA key for your new Flare community appears in the Communities list and a message confirms that your changes have been saved successfully.
- Log out of the Pulse dashboard.
- Open the Flare target.
-
In the Target Editor, select the Analytics tab.
Note These instructions assume that you have already enabled the Pulse server and entered your community login information.
- Under Current Pulse Configuration, click Refresh.
- Under Community, click Manage. Note that your new Pulse system/Flare community is now listed in Flare.
- Click Remap Topics.
Configuring Systems
You can configure a variety of settings for a Pulse system.
How to Configure the Basic Settings for a System
- Log in to the Pulse dashboard using an account that is a member of the Administrators group.
-
Select Systems > Find Systems. Then click the desired system link to configure it. The system page appears.
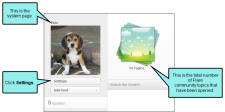
- In the system page, click Settings. The system's Feed Settings page opens.
-
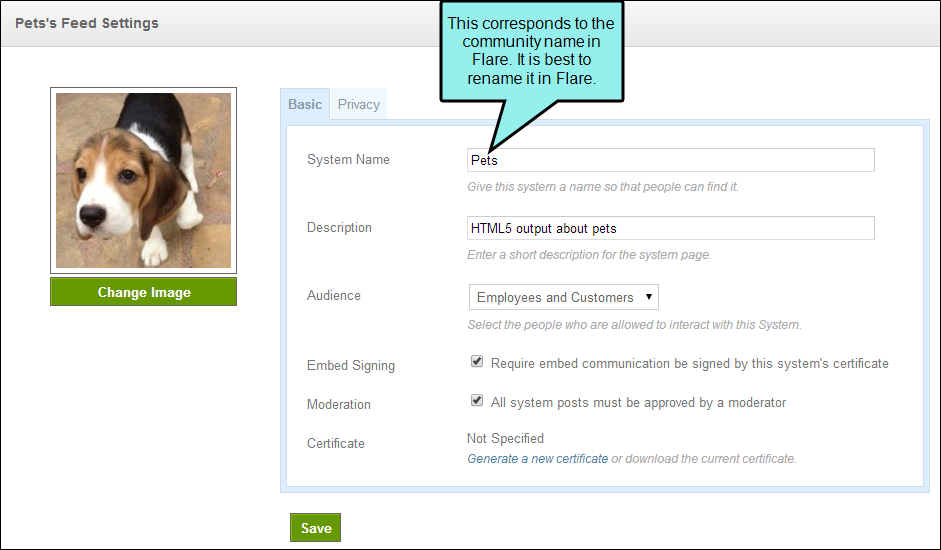
In the Basic tab, define the general system settings. You have these options:
- Change Image Click Change Image to upload an image file for your system. Adding an image is a helpful way to distinguish between multiple systems.
-
System Name Change the name of the system. For best results and to ensure that your Flare topics are properly mapped to the Pulse features, it is strongly recommended that you always change the Flare community name. This will automatically change the System Name in Pulse.
- Description Update the system description. If this is a Flare-integrated system, we recommend noting it in the description.
- Audience Select the groups that are allowed to interact in the community. You can select Employees and Customers, or just Employees.
- Embed Signing If you have an embedded signing requirement for SSL, place a check mark in this box. This is the default setting. Remove the check mark to disable the option. To find out if your company has SSL requirements, see your Network Administrator.
- Moderation Select this option if you want new posts to always require approval by a moderator.
- Certificate If you require a certificate for SSL, click Generate a new certificate. This creates a certificate file that you can download in the Personal Information Exchange (PFX) file format. To find out if your company has SSL requirements, see your Network Administrator.

- Click Save.
How to Configure the Privacy Settings for a System
- Log in to the Pulse dashboard using an account that is a member of the Administrators group.
- Select Systems > Find Systems. If you cannot see this menu, your user account does not have sufficient permissions to find systems.
- Click the appropriate system link. The system page appears.
- In the system page, click Settings. The system settings are shown.
-
Click the Privacy tab. Use the controls in this tab to define the privacy settings for access to the system. You have these options:
to remove users and group
If you want to remove a user or group from the privacy list, click the
 next to the desired item.
Note By default, Pulse will automatically add your user name and any groups that your account belongs to as privacy settings for the system.
to add a user or group
- In the Privacy tab, click Add a user or group.
-
In the Add a User or Group dialog, do the following:
- In the entry field, type the user or group name to add. This populates the list with matching items from the Pulse database.
- Place a check mark in the box next to the desired user account or group name.
- Repeat these steps until you have added all of the desired users and groups.
- Click Add.
to specify user and group permissions
Next to each user group, select one of the following settings from the drop-down list:
Role
Description
Owner
Provides full access to the system and its feeds. They can comment, post, add and remove content, adjust system settings, and add feeds.
Moderator
Provides users in the group with the ability to moderate (approve or reject) new posts in the community.
Contributor
Provides users and group members with the ability to post content to the system and its feeds.
Commenter
Provides users and groups members with the ability to comment on system post and its feeds. This setting does not allow individuals to post content themselves.
Viewer
Provides users and group members with read-only access to the system and its feeds.
- Click Save.
Adding and Configuring System Feeds
You can add and configure system feeds in Pulse.
How to Add Feeds to a System
Important If you use the instructions below to add feeds for a Flare community, you must remap the topics in the Analytics tab of the Flare Target Editor.
- Log in to the Pulse dashboard using an account that is a member of the Administrators group.
-
Select Systems > Find Systems. If this menu item is not available, your user account does not have administrator permissions.
- Click the appropriate system link. The system page appears.
- In the system page, click Add Feed. This opens the Add System Feed page. Next, you must configure the feed as described below.
How to Configure a Feed
You can configure a variety of settings for a Pulse system feed.
Click Create this Feed. The feed is created and added to the system.
Important If you use the instructions below to configure feeds for a Flare community, you must remap the topics in the Analytics tab of the Flare Target Editor.
-
Follow the steps above to add a new feed to a system.
-
In the Add System Feed page, enter the following information:
- System Feed Name Type a name for the system feed (e.g., MadCap Software Blog).
- Description Add a short description about the feed.
-
Source Select the source for the feed. You can select from a list of common formats for content syndication. You have these options:RSS 2.0 or Atom 1.0 Feed This is the default option. Microsoft CRM Pop3 Email Address Exchange Web Services Email Address
-
Feed Format Select the format of the data for the feed. Choose one of the following options.Text This is a text format for information interchange. Json Short for "JavaScrip Object Notation." This is a text-based open standard for readable database interchange. Jws Java Web Start. This is another means for information interchange.
- Allow Impersonation This option determines whether the system can post messages to the feed on behalf of the users in response to updates from the external source. Select True if you want the system to make posts for the users. Select False if you do not.
- Source URL Enter the source URL address of the feed you are adding to the system.
- Poll Period (Minutes) This determines the amount of time in minutes that the system waits in between polling the source for updates. Those updates are then added to the system feed.
-
Use Credentials Check this check box if you want this feed to require credentials. Clicking this check box causes three additional fields to appear. Use these fields to enter a user name, password, and domain name to use for credentialing.
- Click Create this Feed. The feed is created and added to the system.
How to Find Systems
Users who are members of the Administrators and Employees groups are permitted to find systems in Pulse.
- Log in to the Pulse dashboard using an account that is a member of the Administrators or Employees group.
- Select Systems > Find Systems. The Find Systems page appears.
- The newest systems in the Pulse database will be displayed by default. You can search for a system in the Search field in the upper-right corner of the page. You can also filter the systems by clicking the down arrow in the upper-left corner of the page and selecting from the following options.
- New Systems Displays the most recently created systems.
- Most Active Systems Displays the systems with the most user activity.
- All Systems Displays all systems that exist in the Pulse database.
-
Click a system.
Note You can also create a system in the Find Systems dialog by clicking Create System.
What’s Noteworthy?
Important It is recommended that you rename communities within Flare, rather than within the dashboard. If you rename a community via the Pulse dashboard, it will not automatically update within the Flare target.