You can modify the default border that is added above footnote comments. You can change the border thickness, color, style, and other settings. You can also remove the border altogether.
How to Edit the Border Above Footnotes
- From the Content Explorer, open the stylesheet that you want to modify.
-
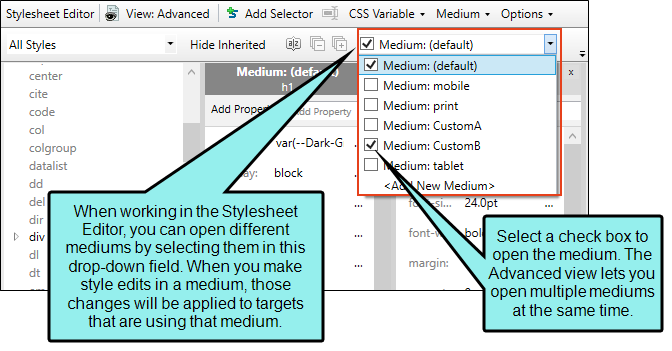
From the Medium drop-down in the Stylesheet Editor, make sure the proper medium is selected before you begin. In the Advanced view, you can open multiple mediums at once; you just need to look at the title at the top of the medium pane and make sure you are working in the correct one. If you are not using stylesheet mediums for your different outputs or if you want all mediums to have the same settings, just leave the medium set to default and continue.
Mediums can be used if you want to use one group of settings for online output types and another group of settings for print-based output types. For example, you might use the default medium for your online outputs and the print medium for your print outputs.
Please note that Flare remembers the last medium that you used when working in the stylesheet, so it may or may not be the one that you want to use the next time around.
- In the local toolbar, make sure the first button displays
 . If the button displays
  instead, then click it.
 - In the upper-left corner of the editor, click in the drop-down field and select
 .
. - Select MadCap|footnotesBlock.
- From the Show drop-down list on the upper-right side of the editor, select
 .
. - (Optional) You can use the toggle button in the local toolbar to show properties below in a group view
 or an alphabetical view
  .
. -
Do any of the following;
To Change the Border Color
- If you are using the grouped view, expand the Border group.
- To the right of border-top-color, click
 , and select a color. For advanced color options, click
  and use the fields in the Color Picker dialog, or click
  to select a color already used elsewhere on your screen. You can use the Color Picker to select a CSS variable.
To Change the Border Style (e.g., Dashed, Dotted, Double, Solid)
- If you are using the grouped view, expand the Border group.
- To the right of border-top-style, click , and select a style.
To Change the Border Thickness
- If you are using the grouped view, expand the Border group.
- To the right of border-top-width, click , enter a number and a unit of measurement, and click OK.
To Change the Border Alignment
By default, the alignment of the border is set to "left," but you can change this setting.
- If you are using the grouped view, expand the Border group.
- To the right of border-top-align, click , and select one of the options.
To Change the Border Length
By default, the length of the border is set at 66% of the size of the "box" holding the footnotes. You can adjust this percentage.
- If you are using the grouped view, expand the Border group.
- To the right of border-top-length, click , enter a percentage number, and click OK. You can also use the drop-down on the right side of the popup to select a unit of measurement other than percentage.
To Remove the Border
- If you are using the grouped view, expand the Border group.
- To the right of border-top-width, click , enter 0, and click OK.
- Click
") to save your work.
to save your work.