


You can insert a footnote or endnote marker at any spot in a topic. When doing this, you can specify where the accompanying footnote or endnote text should be placed.
[Menu Proxy — Headings — Online — Depth3 ]
How to Insert a Footnote or Endnote
- Open the content file.
- Place your cursor where you want to insert the footnote marker.
-
Select Insert > Footnote.
The Insert Footnote/Endnote dialog opens.
-
In the first part of the dialog, you can select the location where the accompanying footnote or endnote will be placed in the output. However, there is an alternative to selecting a location from this list. In Step 5, you can select a style that can already have the footnote position specified. If you select a style that has the footnote position specified, you do not need to make a selection from this list.
- End of Page This places the footnote comment at the end of the page where the in-text footnote number is inserted.
- End of Topic This places the footnote comment at the end of the topic where the in-text footnote number is inserted. This is similar to the previous option. However, a single topic may result in multiple pages in the output. This option ensures that the footnote is placed at the end of the topic, not necessarily on the same page where the corresponding number or symbol is placed.
- End of Section This places the footnote comment at the end of the section where the footnote number is inserted.
- End of Chapter This places the footnote comment at the end of the chapter where the footnote is inserted.
- Endnote Proxy This is designed to place the footnote comment at a specific location in the output, such as at the end of the book. It works in conjunction with an Endnotes proxy, which you create separately. The comment displays wherever you insert the Endnotes proxy.
- In the next area, you can select a style class for the footnote to determine its look and placement. The MadCap|footnote style is the default option.
-
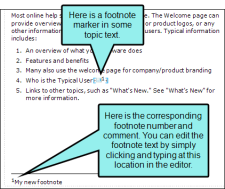
Click OK. The footnote marker is added in the topic. The footnote comment area is added at the bottom of the page or topic, depending on the footnote type you select.
Note Like other markers, a footnote marker can be hidden in the editor so that only the number can be seen. The marker is not shown in the output, whether you hide or show it in the editor when you are working.
-
Click in the footnote area at the bottom of the page or topic and change the text as necessary.
-
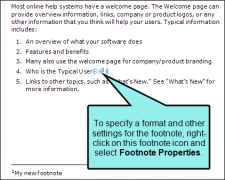
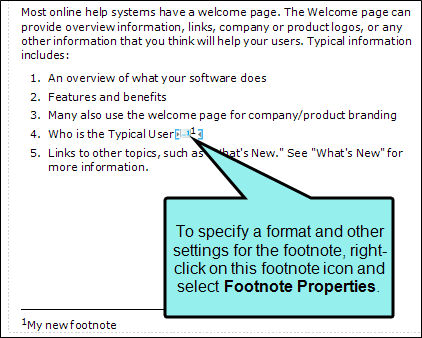
(Optional) You can add other elements (e.g., images) and provide formatting for the content, just as you would in a topic. If you have markers turned on, you can right-click the footnote icon and select Footnote Properties from the context menu. This lets you select a format for the footnote number (e.g., uppercase alpha, lowercase Roman), as well as specify other settings in the Footnote Properties dialog.
- Click
") to save your work.
to save your work.

What’s Next?
After you insert a footnote or endnote, you can edit it in several different ways, including changing the way that it looks. See Editing Footnotes.
If you are inserting endnotes to be displayed at the end of a book, you need to create an Endnotes proxy to indicate where those endnotes will be displayed. See Creating an Endnotes Proxy.

