After an individual emails you an MCCO contribution topic (or places it in a SharePoint or external resources folder), you can bring it into your Flare project (see Importing Contribution Files), where you can view and accept it. After accepting the topic, it is converted to an HTM file (XML-based, just like your regular topics) and added to your project.
How to Accept Contribution Files
- Select View > Contributions. The Contributions window pane opens.
- Click in the drop-down field at the top of the window pane, select Contributions. All contributed topics that you have brought into your project, but have not yet been accepted, are listed in the pane.
- In the list, select the topic that you want to accept.
- In the local toolbar, click
 . The Accept Contribution Wizard opens.
 - (Optional) In the File Name field, you can use the name that the contributor provided, or you can rename it.
- In the Select Folder section, find and select a folder in the Content Explorer where you want to place the new topic.
-
Click Next.
Flare checks for conflicts between the contribution resource files and the project's resource files (e.g., images, videos, stylesheets). If conflicts are found, a message indicates the number.

- Click Next.
-
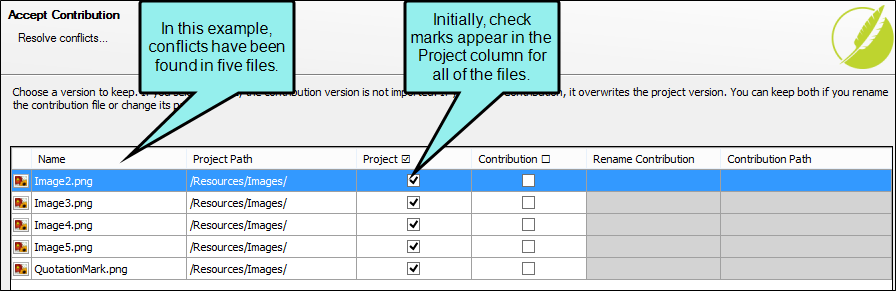
If conflicts where found, the next page lists them in a grid. By default, check marks appear in the Project column for all files. If you leave the check marks in this column, the files that are already in the project will be used while the contribution files will be ignored.

You can accomplish the following on this page of the wizard:
Sort Columns
You can sort the columns by clicking on the heading. Also, you can readjust the width of a column to display all of its content by double-clicking the header.
Select Project or Contribution File in Grid
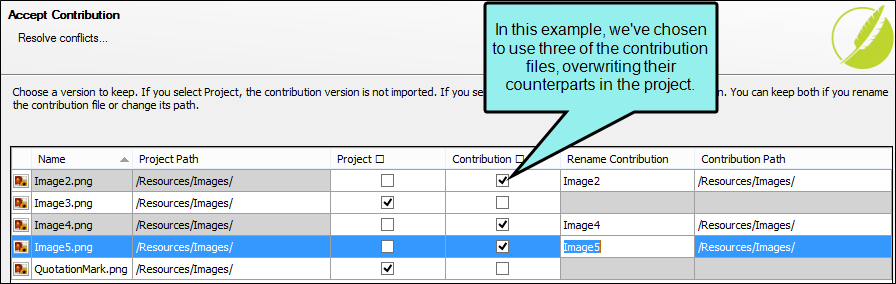
For any contribution files that you prefer to keep over the existing project file, you can click the appropriate check box in the Contribution column. The contribution file will then overwrite the project file.

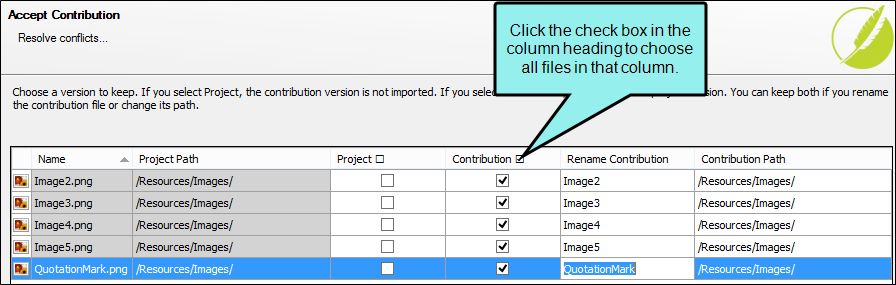
If you want to use all of the files in the Project or Contribution column, you can click the check box in the appropriate column heading.

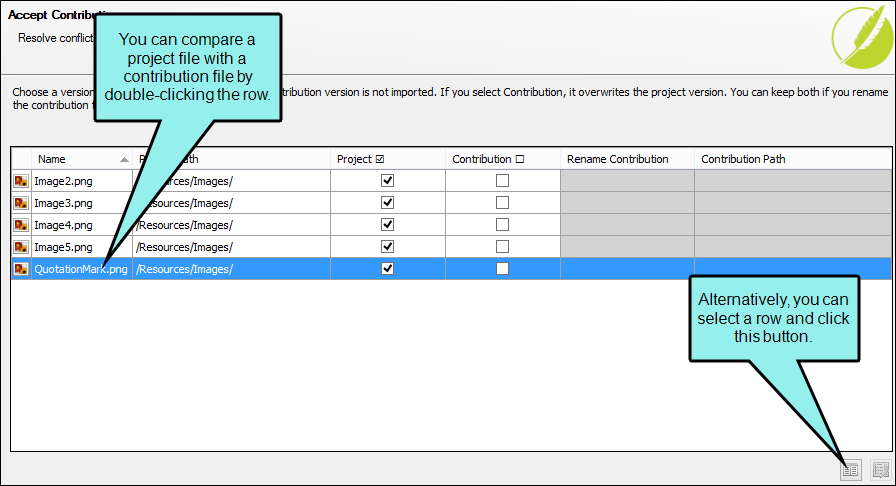
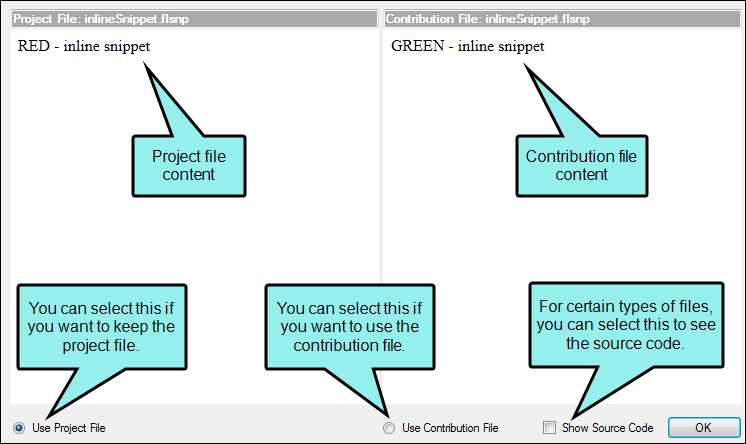
Compare Project and Contribution Files
If you're not sure which file you want to use, you can compare the project and contribution files. To do this, either double-click the row in the grid or select the row and click
 .
.
When you do this, a comparison dialog opens, showing the existing project file on the left and the new contribution file on the right. Within this dialog, you can select options to choose which file to keep. You can also select an option to view the source code.

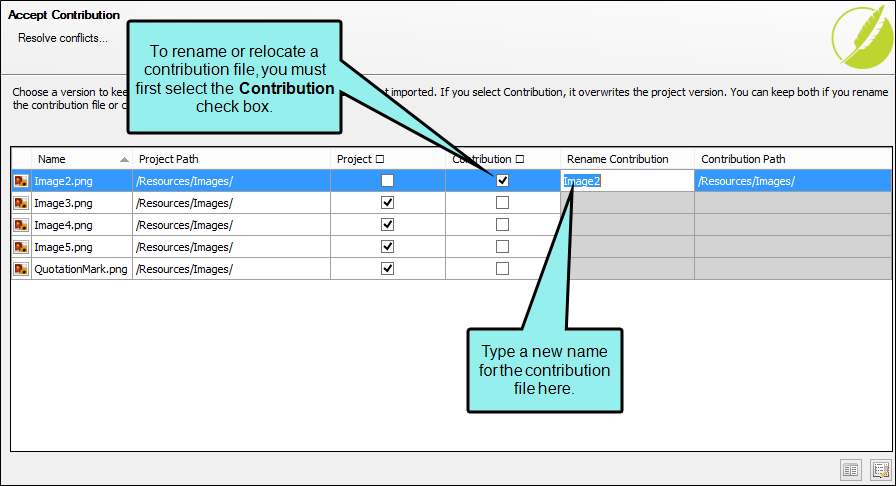
Rename and Relocate Contribution Files
You can accept a contribution file but give it a new name and/or location. This brings the contribution file into your project but does not overwrite the project file that it conflicts with.
How to Rename or relocate a Contribution File
- In the grid, select the check box in the Contribution column for the file you want to rename. The final two columns in the grid become populated.
-
If you want to give the file a new name, click in the Rename Contribution cell and type a new name.

-
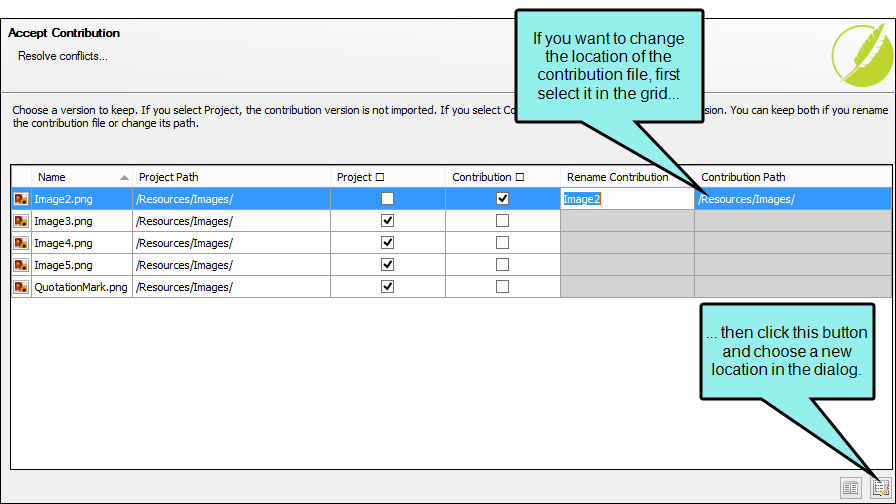
If you want to change the location of the contribution file so that it does not conflict with the project file, click
 . Then in the dialog that opens, select a new location in the project and click OK.
- When you are finished dealing with any conflicts, click Next.
- (Optional) The resource files associated with the contribution file are listed. If you want to change the name or location of a particular resource file, select it in the list. Then change the text in the File Name field and/or click
 to select a new path in the project. It is recommended that you leave the default path.
 - (Optional) If you want to see a preview of the imported file, click Next.
- Click Finish.
- Click OK.
- You will be asked if you want to recycle the contribution file. Click Yes if you do not want to keep a copy of the contribution document; the file will be deleted from your project. Click No if you want to keep a copy of that document.