Flare includes Microsoft Team Foundation Server support for Microsoft Visual Studio Team Services (VSTS). This is also known as Visual Studio Online, as well as Microsoft DevOps on Azure. If you manage your source control projects with Microsoft's online version of Visual Studio, you can bind your projects to Flare and perform check-ins and check-outs of files.
Use the following steps if you have already created a Flare project and want to bind ("connect") it to the Microsoft VSTS repository using Microsoft Team Foundation Server.
[Menu Proxy — Headings — Online — Depth3 ]
How to Bind a Project to Source Control
- Open the project.
- Select Project > Project Properties. The Project Properties dialog opens.
- Select the Source Control tab.
- Click Bind Project. The Bind Project dialog opens.
-
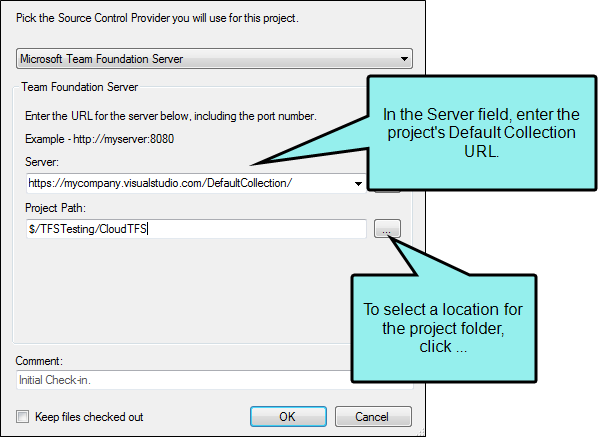
From the drop-down, select Microsoft Team Foundation Server.
-
In the Server field, enter the URL of the project's "Default Collection."
Note When binding to VSTS project using TFS, you must manually enter the URL in the Server field. You can only browse for a server location when binding to a local project using TFS.
Note You may need to obtain this information from your system administrator. Click OK in the dialogs until you return to the main wizard page.
Note If you run into issues in this dialog, chances are your user permissions do not have access to all of the collections on VSTS. Please try to enter in the server/collection path manually.
-
Next to the Project Path field, click
 . You may need to log in to Microsoft VSTS. If the Log In dialog opens, complete the User name and Password fields.
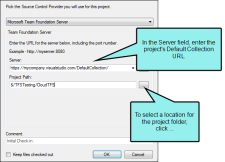
The Browse Source Control Folders dialog opens.
- Click on the Team Foundation Server folder to which you want to bind the Flare project.
- Click OK.
- (Optional) In the Comment field, you can enter any internal comments.
- (Optional) If you want the files in the project to be checked out when you are finished, click Keep files checked out.
- In the Bind Project dialog, click OK.
- If the Log In dialog opens, complete the User name and Password fields and click OK. Copies of the Flare files are created and added to the folder you specified.
- In the Project Properties dialog, click OK. The project is connected to Team Foundation Server, and you can now check files in and out as necessary.
How to Bind a Project to Source Control Using the Explorer
- Open the project.
- Select View > Source Control Explorer. The Source Control Explorer opens.
-
From the drop-down or the Home pane, select Settings. The Settings pane opens.
- Click Bind. The Bind Project dialog opens.
-
From the drop-down, select Microsoft Team Foundation Server.
-
In the Server field, the URL of the project's "Default Collection."
Note When binding to VSTS project using TFS, you must manually enter the URL in the Server field. You can only browse for a server location when binding to a local project using TFS.
Note You may need to obtain this information from your system administrator. Click OK in the dialogs until you return to the main wizard page.
Note If you run into issues in this dialog, chances are your user permissions do not have access to all of the collections on VSTS. Please try to enter in the server/collection path manually.
-
Next to the Project Path field, click
. You may need to log in to Microsoft VSTS. If the Log In dialog opens, complete the User name and Password fields.
The Browse Source Control Folders dialog opens.
- Click on the Team Foundation Server folder to which you want to bind the Flare project.
- Click OK.
- (Optional) In the Comment field, you can enter any internal comments.
- (Optional) If you want the files in the project to be checked out when you are finished, click Keep files checked out.
- In the Bind Project dialog, click OK.
-
If the Log In dialog opens, complete the User name and Password fields and click OK. Copies of the Flare files are created and added to the folder you specified.The project is connected to Team Foundation Server, and you can now check files in and out as necessary.
Note When you use Visual Studio Team Services with Flare, you will be prompted to log in to Visual Studio Team Services via a dialog in Flare. Your login credentials are stored in a cookie in the Internet Explorer Temporary Internet Files folder:
C:\Users\[username]\AppData\Local\Microsoft\Windows\INetCache
When this cookie expires, you will logged out of Visual Studio Team Services, and Flare will prompt you to log in again.
What’s Next?
After you bind a Microsoft VSTS project using Microsoft Team Foundation Server in Flare, you can use the Flare interface in the same way as you would with any other project bound to Microsoft Team Foundation Server.
You may still need to use Microsoft VSTS for some administrative tasks (in the same way as you might need to use Microsoft Visual Studio occasionally when binding a project to Team Foundation Server). For information on using Microsoft VSTS, see the Microsoft Visual Team Services Help.

