After you create a macro, you may need to manage it in a different ways. In the Manage Macros dialog, you can do any of the following.
[Menu Proxy — Headings — Online — Depth3 ]
How to Assign a Shortcut to a Macro
- Open the content file.
- Select the Tools ribbon. In the Macros section, click Manage. The Manage Macros dialog opens.
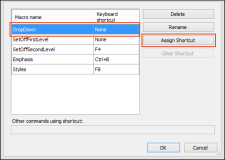
- From the Macro Name list, select the macro to which you want to assign a shortcut.
-
Click Assign Shortcut.
-
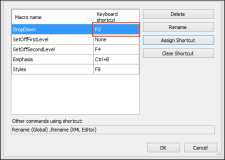
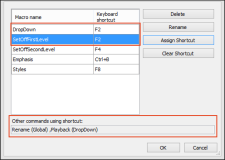
Click OK in the dialog, then use your keyboard to press the shortcut you want to use. The shortcut will be added to the grid on the left.
- Click OK.
How to Remove a Shortcut From a Macro
- Open the content file.
- Select the Tools ribbon. In the Macros section, click Manage. The Manage Macros dialog opens.
- From the Macro Name list, select the macro from which you want to remove a shortcut.
- Click Clear Shortcut. The shortcut is removed.
- Click OK.
How to Rename a Macro
- Open the content file.
- Select the Tools ribbon. In the Macros section, click Manage. The Manage Macros dialog opens.
- From the Macro Name list, select the macro you want to rename.
- Click Rename. The Rename Macro dialog opens.
-
Enter a new name for the macro.
Note When naming or renaming a macro, you must use a unique name.
- Click OK.
-
In the Manage Macros dialog, click OK.
How to Delete a Macro
- Open the content file.
- Select the Tools ribbon. In the Macros section, click Manage. The Manage Macros dialog opens.
- From the Macro Name list, select the macro you want to delete.
- Click Delete. The macro is removed from the list of macros.
- Click OK.


