


You can apply conditions to entire files in your project. This includes any file contained in the Project Organizer (such as glossary or target files) or the Content Explorer (such as topic, image, stylesheet, snippet, and page layout files). You can apply condition tags when you create an element (i.e., in the Add File Dialog), or after the element has been created.
[Menu Proxy — Headings — Online — Depth3 ]
How to Apply Conditions to Newly Created Files
- Create a new file (e.g., topic, alias file, image). The Add File Dialog opens.
- Expand the Attributes section at the bottom of the dialog.
- If you want to apply condition tags to the file, expand the Attributes section at the bottom of the dialog. Next to the Condition Tags field, click
 and select the conditions you want to apply.
 -
Click OK.
How to Apply Conditions to One File at a Time
- Open the Project Organizer or Content Explorer.
- Locate the file to which you want to apply a condition tag. In the Project Organizer, files are stored in various folders. In the Content Explorer, topic files are located by default at the top level (unless you place them in subfolders that you’ve created); other files are traditionally located in subfolders within the Resources folder, although they can be stored in custom folders as well. For example, snippet files are usually located in a subfolder called "Snippets."
- Right-click the file and from the context menu select Properties. The Properties dialog for the file opens.
- Click the Conditional Text tab. The first condition tag set is selected and the associated condition tags are shown on the right.
- If you want to see condition tags for a different condition tag set, select it.
- For each condition tag that you want to apply to the file, click the check box next to the tag. A check mark appears in the box.
-
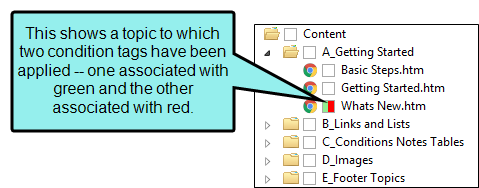
Click OK. The square next to the file name in the Project Organizer or Content Explorer now takes on the color of the condition tag. If you applied more than one condition tag to the file, each color is shown. (If you do not see squares, click
 in the local toolbar.)
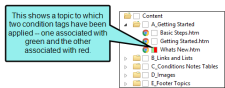
How to Apply Conditions to Multiple Content Files Using the File List Window Pane
- Do one of the following, depending on the part of the user interface you are using:
- Ribbon Select View > File List.
- Keyboard Shortcut Press CTRL+SHIFT+J.
The File List window pane opens.
- (Optional) From the Filter list in the window pane, select the type of files to view.
- Select the files to which you want to apply condition tags. You can hold the SHIFT key to select a range, or you can hold the CTRL key to select individual items.
- In the local toolbar, click
 . The Properties dialog opens.
 - Click the Conditional Text tab. The first condition tag set is selected and the associated condition tags are shown on the right.
- If you want to see condition tags for a different condition tag set, select it.
- For each condition tag that you want to apply to the files, click the check box next to the tag. A check mark appears in the box.
- Click OK. The squares next to the file names in the File List window pane now take on the color of the condition tag. If you applied more than one condition tag to the file, each color is shown.
How to Apply Conditions to Multiple Project or Content Files Using the Split View Feature
- Open the Project Organizer or Content Explorer.
- Click the Show Files button
 . The Project Organizer or Content Explorer splits into two halves (left and right).
 - On the left side of the split Project Organizer or Content Explorer, select the folder containing the files to which you want to apply condition tags.
- On the right side of the split Project Organizer or Content Explorer, select the files. You can hold the SHIFT key to select a range, or you can hold the CTRL key to select individual items.
- In the toolbar click . The Properties dialog opens.
- Click the Conditional Text tab. The first condition tag set is selected and the associated condition tags are shown on the right.
- If you want to see condition tags for a different condition tag set, select it.
- For each condition tag that you want to apply to the files, click the check box next to the tag. A check mark appears in the box.
- Click OK. The square next to the file name in the Project Organizer or Content Explorer now takes on the color of the condition tag. If you applied more than one condition tag to the file, each color is shown in the square. (If you do not see squares, click in the local toolbar.)
- To hide the split view, click the Show Files button again.
- Click
") to save your work.
to save your work.
Note Notice that folders also have blank squares next to them. This means that you can apply condition tags to everything contained in any folder by following the same steps above.
Note You can include and exclude content files (e.g., topics, images) in your output through the use of conditions.
However, you cannot do this for project files (e.g., TOCs, skins). Applying a condition to a project file is used only for Global Project Linking (see Global Project Linking).
Although applying a condition to a glossary file itself does not affect the output, you can apply conditions to terms within a glossary. Applying conditions to glossary terms will affect the output. See Applying Conditions to Files.
What’s Noteworthy?
Note You can quickly see how a topic (as well as a snippet or template page) will look in the final output by previewing it. The Preview window pane is dynamic, allowing you to keep the preview open while you work and see changes as you make them in the XML Editor. When you use the preview feature, you can select any target in your project. The topic will be previewed with the condition tag settings from that target. You can quickly see what the topic looks like with certain condition tags included and others excluded.
What’s Next?
Although you have applied condition tags to content, any targets that you build will still contain all of your content (whether something has a condition tag applied to it not). To ensure that content with certain condition tags are excluded from your output, you need to associate condition tags with targets. See Associating Conditions With Targets.
