This is where much of the work occurs, and it requires someone who is knowledgeable at editing both HTML and CSS text files.
[Menu Proxy — Headings — Online — Depth3 ]
How to Edit the Preview HTML and CSS Files
-
Build output from your project. In this case, we are generating HTML5 output.
-
Open the output to see how it looks on a large screen, a tablet, and a smart phone.
-
In Windows, navigate to your Preview folder and open the Preview.html and preview_styles.css files in a text editor, such as Notepad++.
-
Based on how your output looks, and on the following information, edit both of those files until you match the desired look. It can also help to open the Preview.html file in a browser and refresh it as you make edits to the source files.
-
Save your changes.
Preview.html File
This is the small web page viewed on the branding page of the Start a New Project Wizard or the Branding Editor.
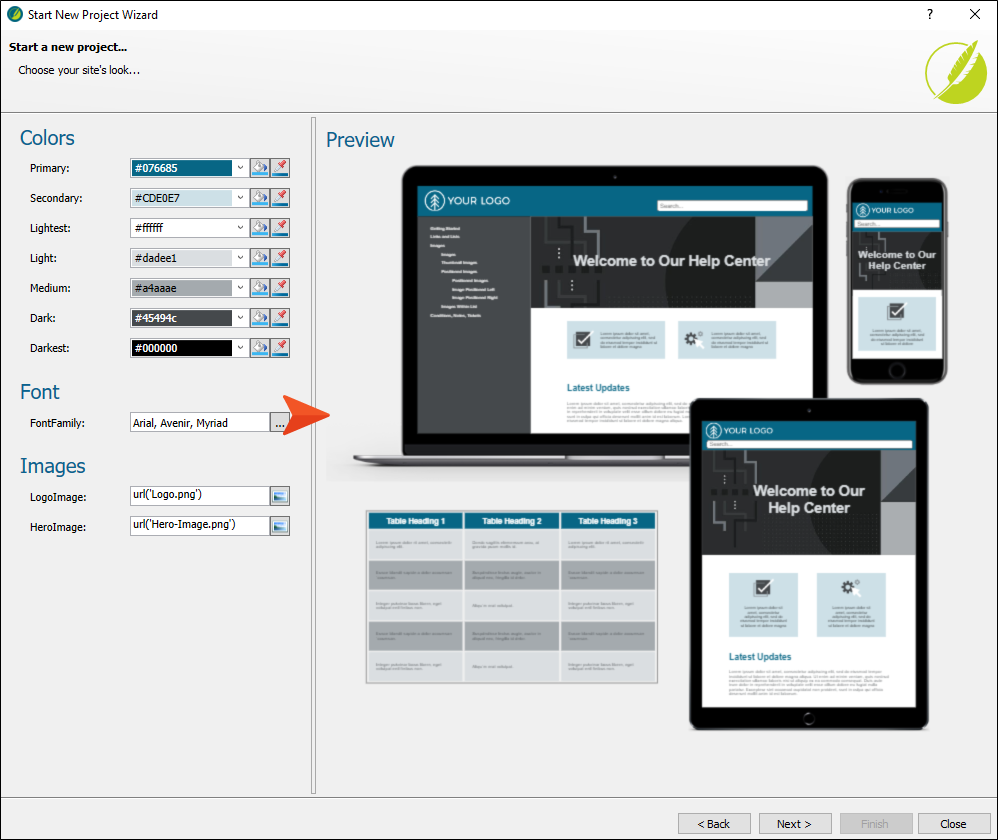
You will make changes to this file to re-create the look of your project template output for the branding preview.
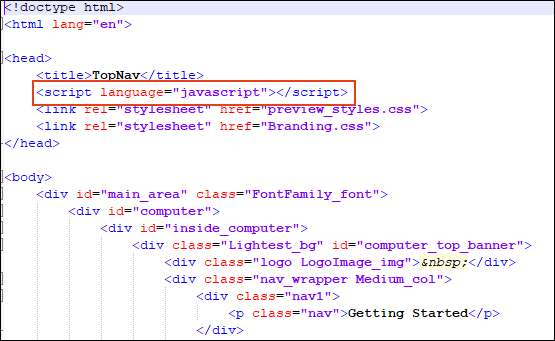
In the <head>, make sure the following line is included:
<script language="javascript"></script>This allows the resizing JavaScript code to run.
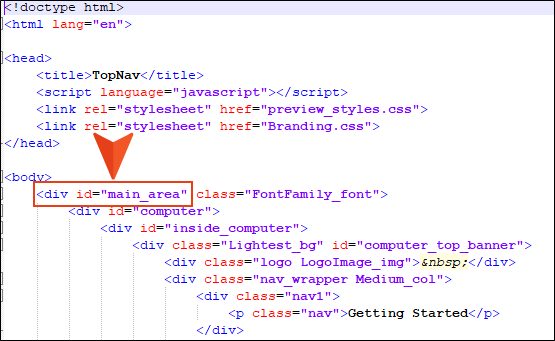
The bounding box of this web page should be an element ID main_area. This element is referenced by name in the resizer script, so it needs to be there, and it should have a size of 880px wide by 800px tall.
Here are the naming conventions for areas of elements that can be changed with branding properties:
Name_col Font color property of element (e.g., Primary_col).
Name_bord_col Border color property of element (e.g., Primary_bord_col).
Name_bg Background color property of element (e.g., Primary_bg).
Name_img Background image property of element (e.g., LogoImage_img).
Name_font Font family property of element (e.g., FontFamily_font).
These relate to the properties in the Branding-Template.xml file, and to the branding CSS variables that will become part of a new Flare project created from the custom project template. For example, perhaps there is an area of your preview web page that is currently using Primary_bg. It will therefore display the color associated with the Primary CSS variable in the project. But you could edit this to something else, such as Secondary_bg. And in that case, this section of the preview web page will use the color from the Secondary CSS variable instead.
Preview_styles.css File
This file is used to control the look of elements in the small preview web page (Preview.html File). In addition to other styles, you will see selectors corresponding to the various CSS variables (e.g., .Primary_bg is the selector relating to the background color for the Primary CSS variable). In addition, you will see IDs for the different elements in the preview (#computer for the desktop, #iphone for a smart phone, #ipad for a tablet).
Example The HTML5 output for the Top Navigation project (the basis we selected for our new project template) looks like this on a big monitor:
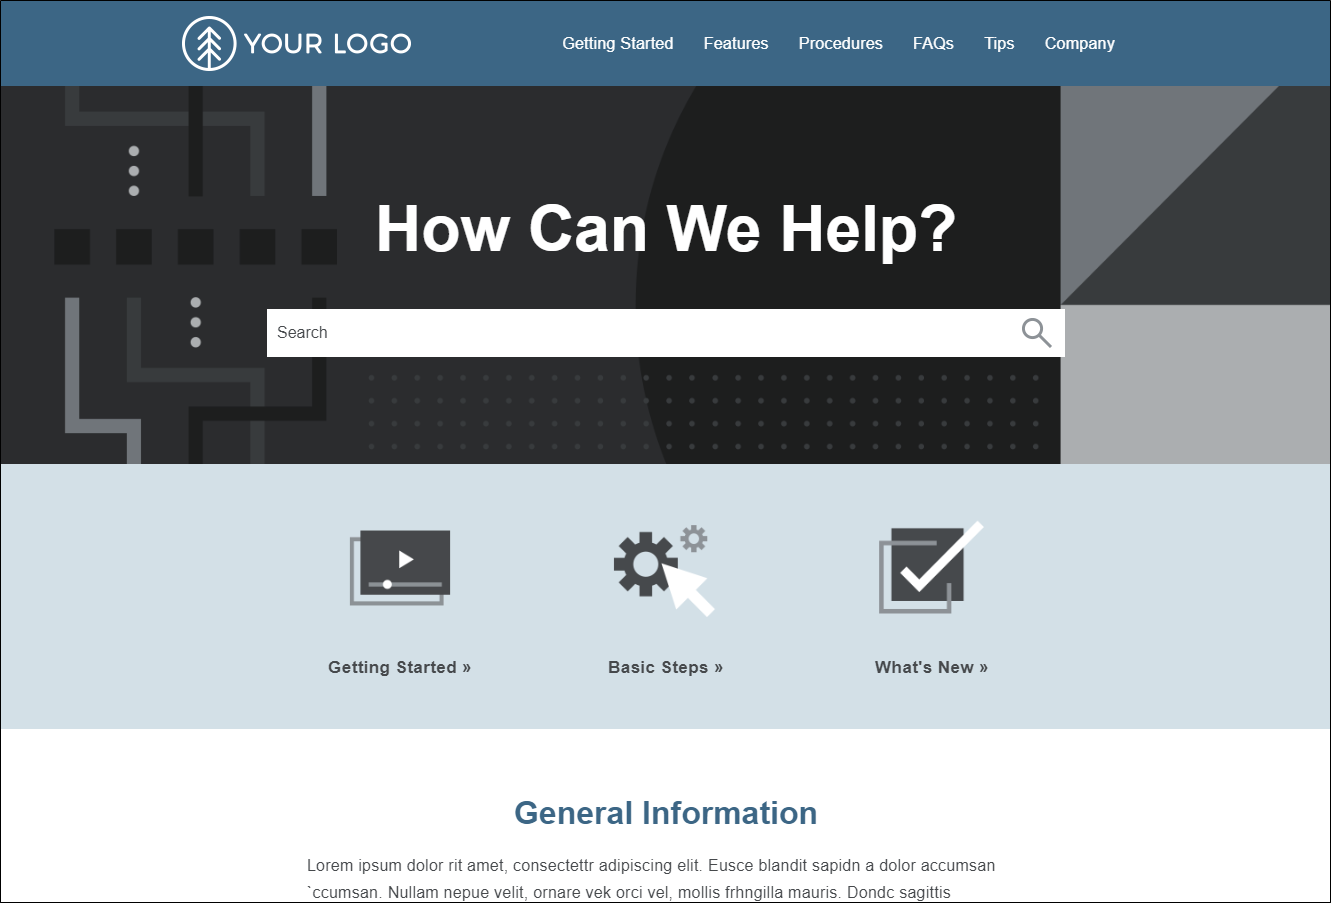
But our Balboa project looks like this on a big monitor:

So we needed to make many changes.
This is just the Home page, and it doesn’t even show all of it. As you will see below, this is even more true with the tablet and smart phone views. Therefore, you might decide to display an interior topic for one or more of the other views so that users can see exactly what will change as they select colors, a font, and images from the branding fields. But in this example, we will just use the Home page for all of our views.
For the large desktop view, the Preview.html file started out looking like this (since it was based on the Top Navigation template):
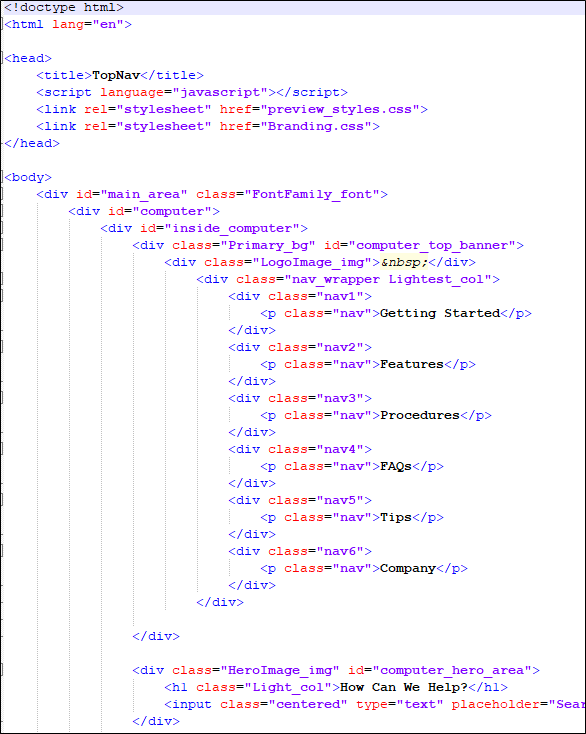
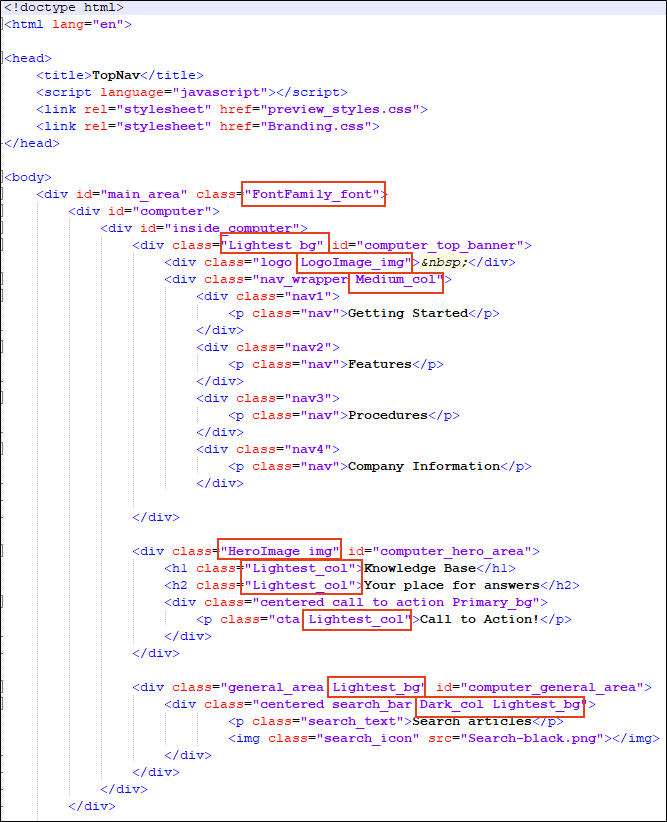
We made many changes, such as the following (highlighted in yellow), to change the look of our preview:
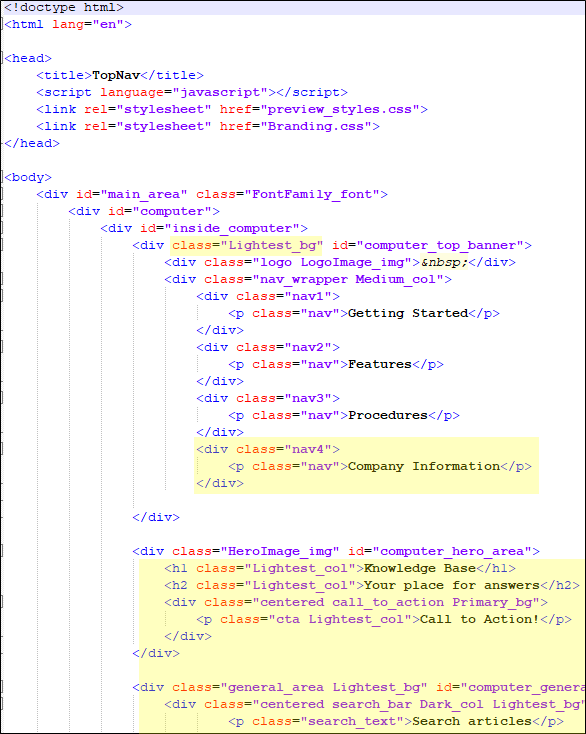
And we edited the preview_styles.css file to account for our changes in the HTML file:
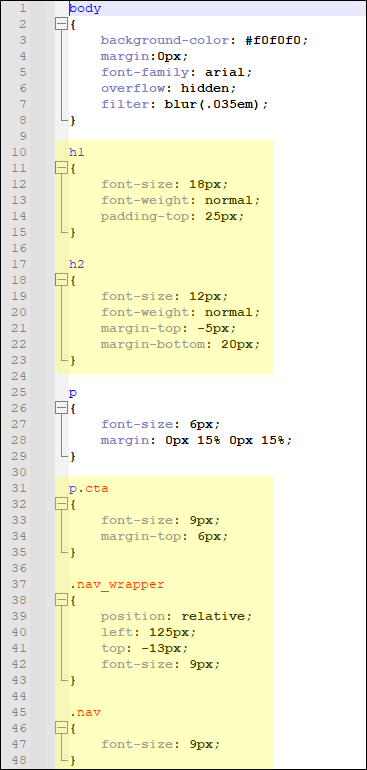
Of course, we made many more changes than these images show.

