 TABLES TUTORIAL
You can add captions to your tables quite easily. Then, you can use your stylesheet to control how those captions look , including applying autonumbering to them.
[Menu Proxy — Headings — Online — Depth3 ]
How to Add a Caption in the Table Properties
- Open the Famous-Austin-Folks.htm topic.
- Right-click anywhere inside the table and from the context menu select Table Properties.
-
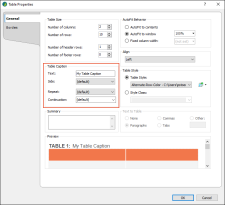
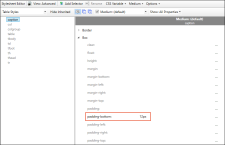
On the General tab of the dialog, click in the Table Caption Text field and enter My Table Caption.
Leave the other fields in the Table Caption area as they are.
-
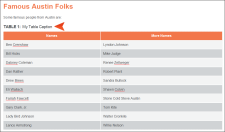
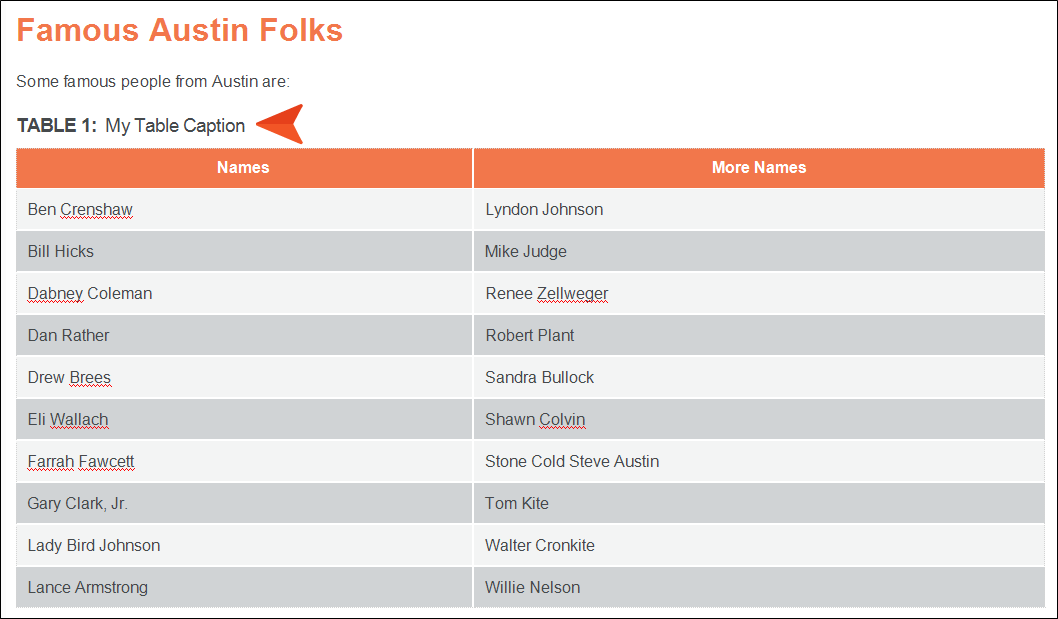
Click OK. The caption is added above the table.
- Click
") to save your work.
to save your work.


How to Use Styles to Control the Look of Table Captions
- Open the Styles.css stylesheet.
-
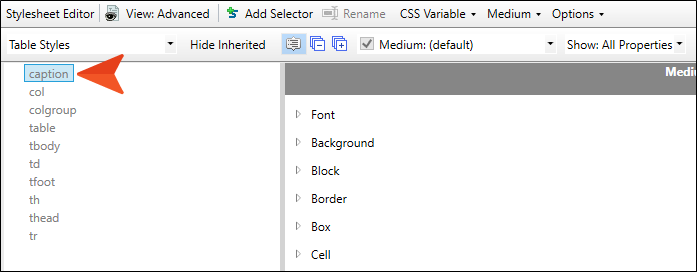
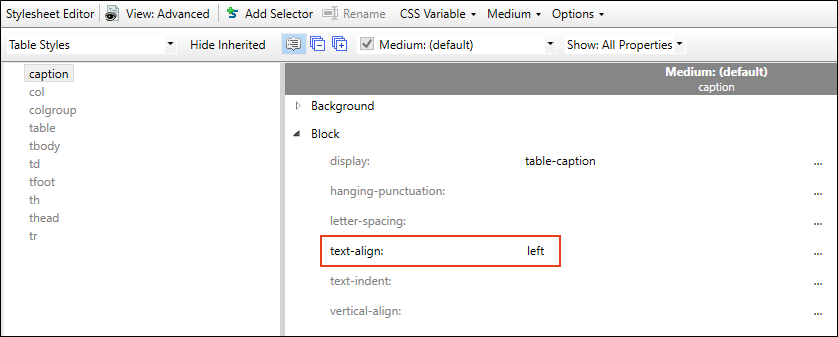
On the left side of the editor, filter the styles to show Table Styles. Then select caption.

-
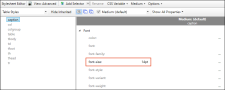
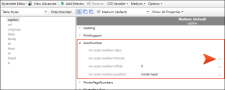
Let's give our table captions a larger font, aligned left, with more space between them and the start of the tables. First, expand the Font property group (if you are using the group view in the Stylesheet Editor), and set the font-size to 14pt.
-
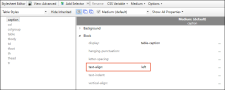
In the Block group, set the text-align property to left.
-
In the Box group, set the padding-bottom property to 12px.
-
Now let's add an autonumber to the style so that captions are incremented when you have multiple tables. Scroll down and expand the AutoNumber group. Then to the right of mc-autonumber-format, click
 .
.
-
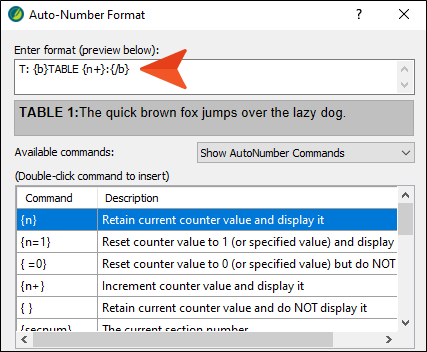
Copy the following format, and paste it into the field at the top of the dialog. Add a couple of spaces at the end of the format (i.e., after {/b}).
T: {b}TABLE {n+}:{/b}

Note In this example, "T" at the beginning of the format is arbitrary. You can use any letter you want.
- Click OK.
- Click to save your work.
-
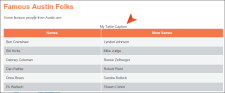
Go back to the Famous-Austin-Folks.htm topic. Notice the changes to the caption.
- Right-click the table structure bar to the left of the table, and from the context menu select Copy.
- Then right-click the table structure bar again, and this time select Paste After.
-
Click the floating paste icon
 at the bottom-right of the second table, and in the menu make sure Don't Merge Tables is selected.
 Note If the horizontal scroll bar obstructs the icon when you hover over it, clicking at the very top of the icon should open the menu. Another option is to temporarily add a paragraph at the bottom of the topic under the second table so that the scroll bar doesn't get in the way. Then copy and paste the table again.
- Click anywhere on the caption at the top of the second table. Then press the up arrow key on your keyboard to move the cursor between the tables, and press ENTER.
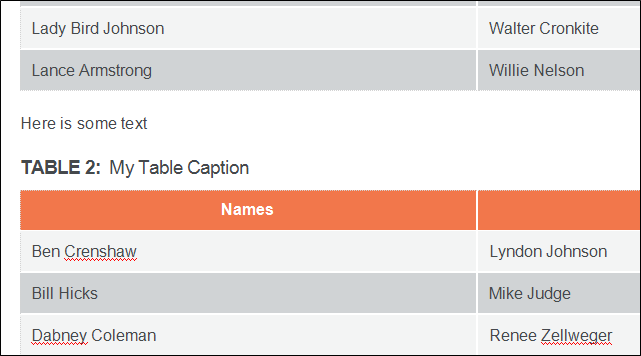
- Type Here is some text, just to add some content between the tables.
-
Notice that the second table caption still says TABLE 1. That's because the editor needs to be refreshed to see the correct autonumber. Press F5.
Now it says TABLE 2, while the caption above the first table says TABLE 1.

- Click to save your work.


Note You can make more extensive autonumber changes to table captions, such as having a different autonumber format for online vs. print output, or adding chapter numbers. For more details about how this can be done, see the Autonumbers Tutorial. That tutorial explores captions on images, but you can apply the same concepts to table captions.
Ta-Da!
Congratulations! You've reached the end of this tutorial. Be sure to check out others. See Tutorials.

