-
In Windows, navigate to the location where you installed Flare Desktop.
-
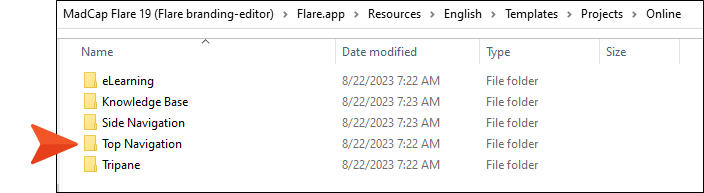
Within that folder, navigate to Flare.app > Resources > English > Templates > Projects.
-
In that location in Windows, navigate to one of Flare Desktop’s built-in factory template folders that most closely resembles your custom project template. For example, if your project uses the Top Navigation format, you might want to find the Top Navigation project template folder and files.
-
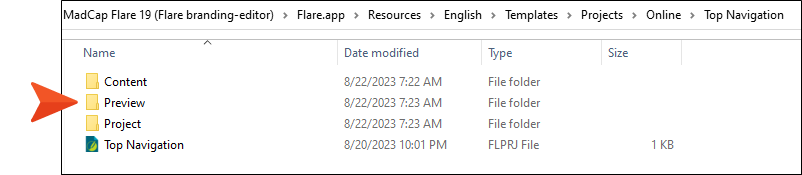
Within that project template folder, copy the Preview folder.
-
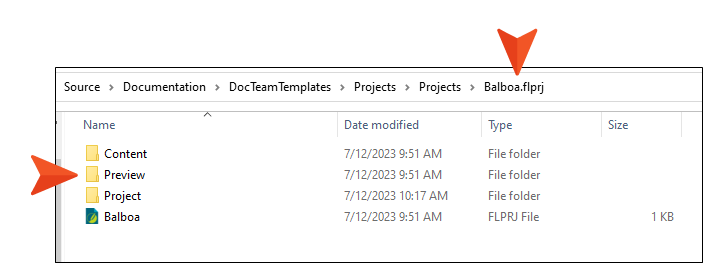
Paste it into the Windows folder holding your custom project template files. In the following example, we pasted it into our Balboa project template, which is located on one of our company’s network servers. (This is the same location where we used the Template Manager to save our project template in Step 1: Create or Open a Project Template. The location for your project template will of course be different.)
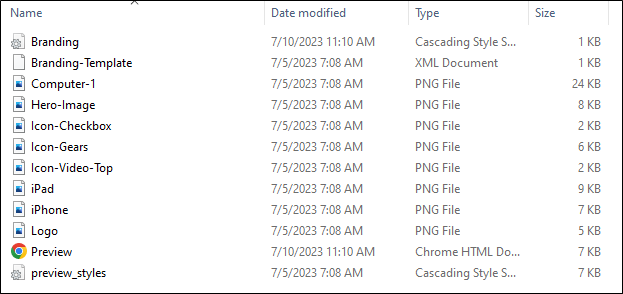
The Preview folder should contain these files:
-
Branding.css
-
Branding-Template.xml
-
Preview.html
-
Preview_styles.css (might not be included in some of Flare Desktop’s built-in project templates)
-
Any image files that are part of the template that support the branding preview (e.g., Logo.png, Hero-Image.png)
Here are the contents of the Preview folder that we copied from the Top Navigation project template for this example:
As you enhance your own project template, you’ll edit some of these, and perhaps replace or remove others.

