 AUTONUMBERS TUTORIAL
Let's edit the h1 style so that chapter autonumbers are used in PDF output. We will make some additional adjustments so that the numbering and table of contents (TOC) display correctly.
[Menu Proxy — Headings — Online — Depth3 ]
How to Edit a Style With Chapter Autonumbering
-
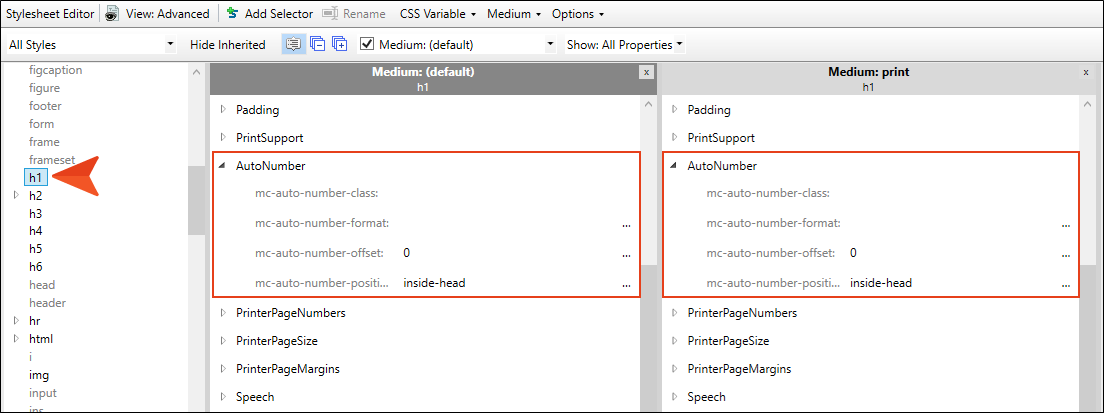
Open the Styles.css file, and on the left side of the Stylesheet Editor, select the h1 style. Then expand the AutoNumber group on the right.
-
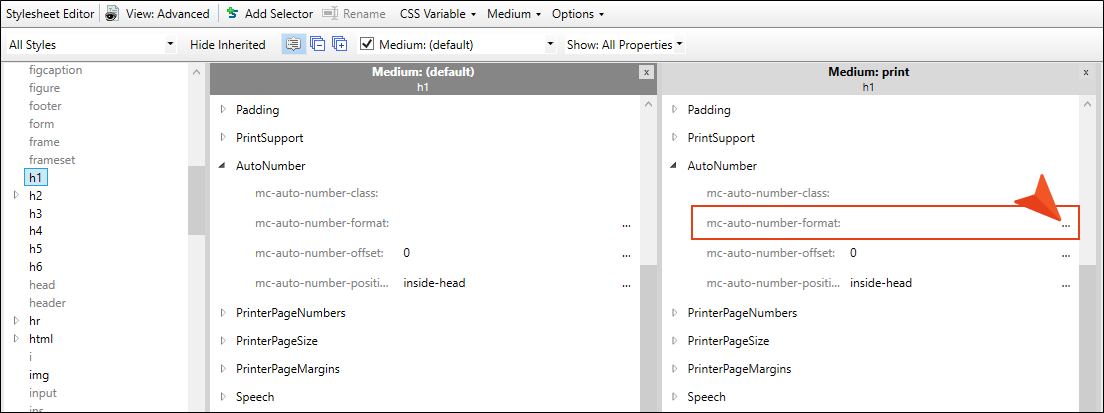
We are going to leave the Default medium alone, because chapter numbers do not make sense in online output. But they do in print-based output. So in the Medium: print section, to the right of mc-autonumber-format, click
 .
.
-
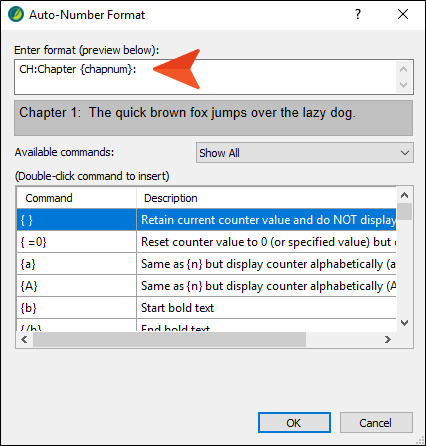
Copy the following format, and paste it into the field at the top of the dialog. Add a couple of spaces after the colon.
CH:Chapter {chapnum}:
- Click OK.
- Click
") to save your work.
to save your work.
How to Create a Table of Contents Topic for Print Output
This project is set up to automatically generate a TOC for the PDF target. Unfortunately, with this automatic TOC feature, you do not have control over the heading of the TOC, which uses the h1 style, just as the topic headings throughout the project. This means that the chapter autonumbering will begin with the TOC heading, and we don't want that. Therefore, we will create a separate topic to be used for the generated TOC, which gives us more flexibility and the opportunity to start the chapter autonumbering where it should be.
-
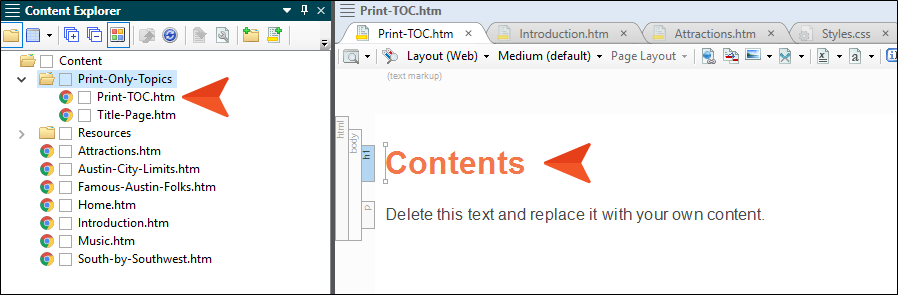
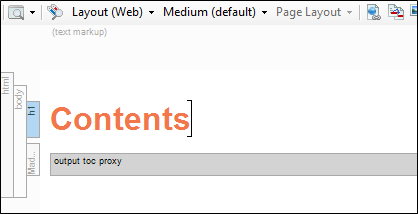
Create a new topic, naming it Print-TOC, and place it in the Print-Only-Topics folder of the Content Explorer. Enter Contents for the main heading in the topic.
-
Delete the text under the heading, and in its place add a TOC proxy. To do this, select the Insert ribbon, and from the Proxy drop-down click Insert TOC Proxy. Click OK in the dialog. A gray bar representing the proxy is added to the topic.
- Click to save your work.
-
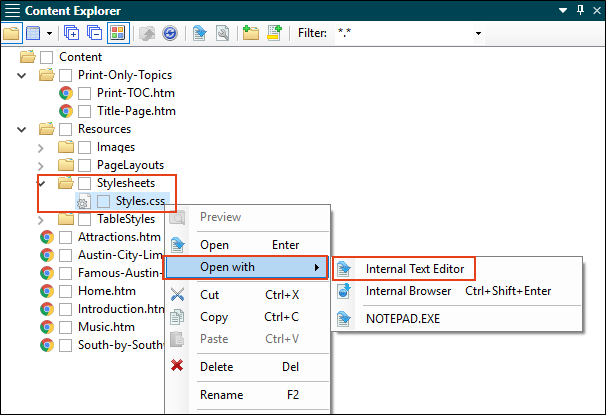
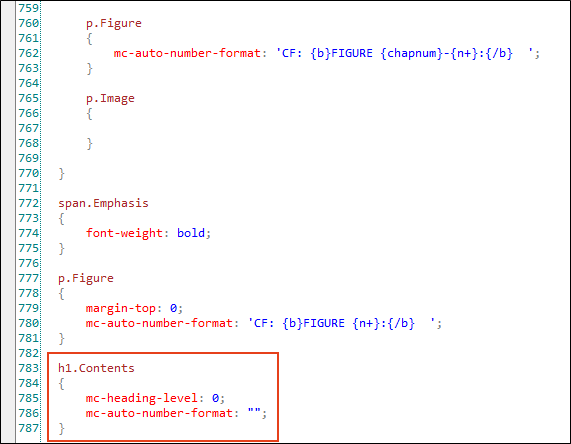
Now we're going to create a new class of the h1 style that does not have any autonumbering and will not be repeated in the generated TOC. It's easiest to do this in the Internal Text Editor. Begin by copying the following.
Copyh1.Contents
{
mc-heading-level: 0;
mc-auto-number-format: "";
} -
In the Content Explorer, right-click Styles.css and select Open with > Internal Text Editor.
-
Scroll to the bottom of the editor and paste the style and properties.
- Click to save your work.
-
Open the Print-TOC.htm topic, and apply the new h1.Contents style class to the heading.

- Click to save your work.
How to Add the Print TOC Topic to the "Outline" TOC
With print-based output, the TOC file stored in the Project Organizer serves more as an outline than as a TOC. The actual generated TOC will be produced from the proxy that you added to the new topic. But in order for this to happen, we need to add the topic to the TOC file.
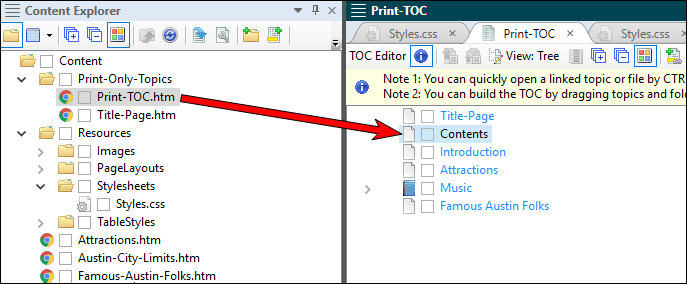
- From the Project Organizer, open the TOCs folder and double-click Print-TOC.
-
From the Content Explorer, drag the new Print-TOC.htm topic to the TOC Editor, and drop it under the Title-Page entry. The word "Contents" is shown, because it is set up to automatically use the heading text in that topic.
- We don't want this topic to accidentally be shown on the same page as the title, or use the same page layout, so in the TOC Editor double-click the new Contents entry.
- In the Properties dialog, select the Printed Output tab.
- From the Break Type field, select Page Layout Break.
-
From the Page Layout field, select Chapters.
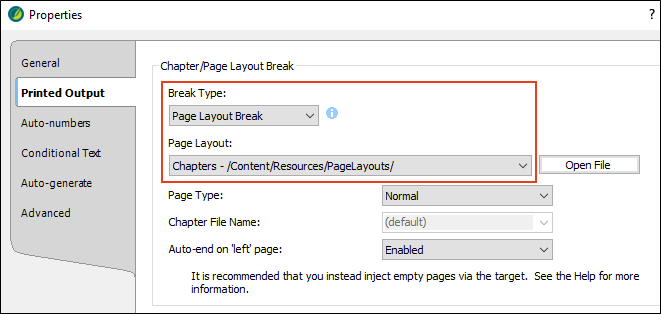
- Click OK.
- Click to save your work.
How to Reset the Chapter Numbering
Most of our work with chapter numbers is done. However, if you were to build and view the PDF output at this point, you would notice that the first chapter is actually shown as "Chapter 2," and the rest of the chapters increment from there. We need to tell Flare Desktop where to start the numbering.
-
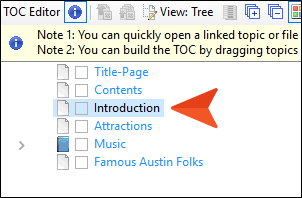
In the TOC Editor showing the outline for the PDF output (i.e., the Print-TOC.fltoc file), double-click the Introduction entry.
- In the Properties dialog, select the Auto-numbers tab.
-
In the Chapter Number section, select Reset to, and enter 1 in the field.
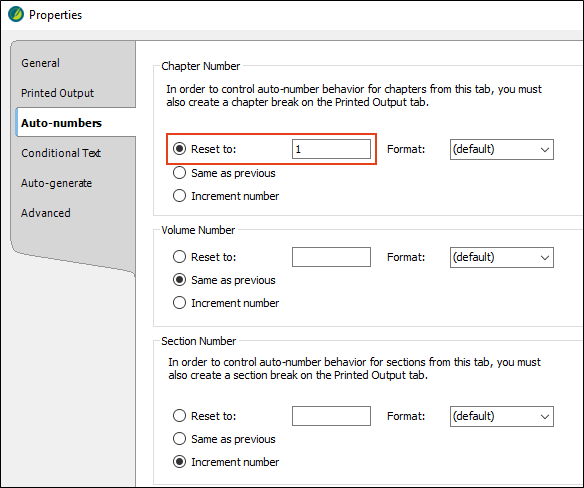
- Click OK.
- Click to save your work.
How to Review the End Results
- Build and view both of the targets in the project.
-
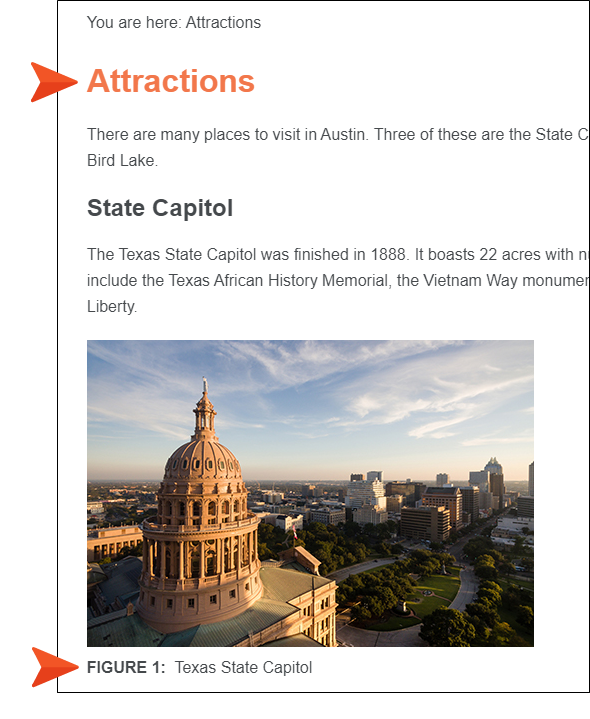
In the HTML5 online output, open the Attractions topic. Notice that the heading does not have autonumbering. When you scroll down, you will see that each image has a simple figure autonumber under it, next to the caption. We have designed the autonumber format so that the numbering restarts on each topic (i.e., the first image in a topic will be Figure 1).
You can also open the Introduction topic to view the figure caption there as well.
-
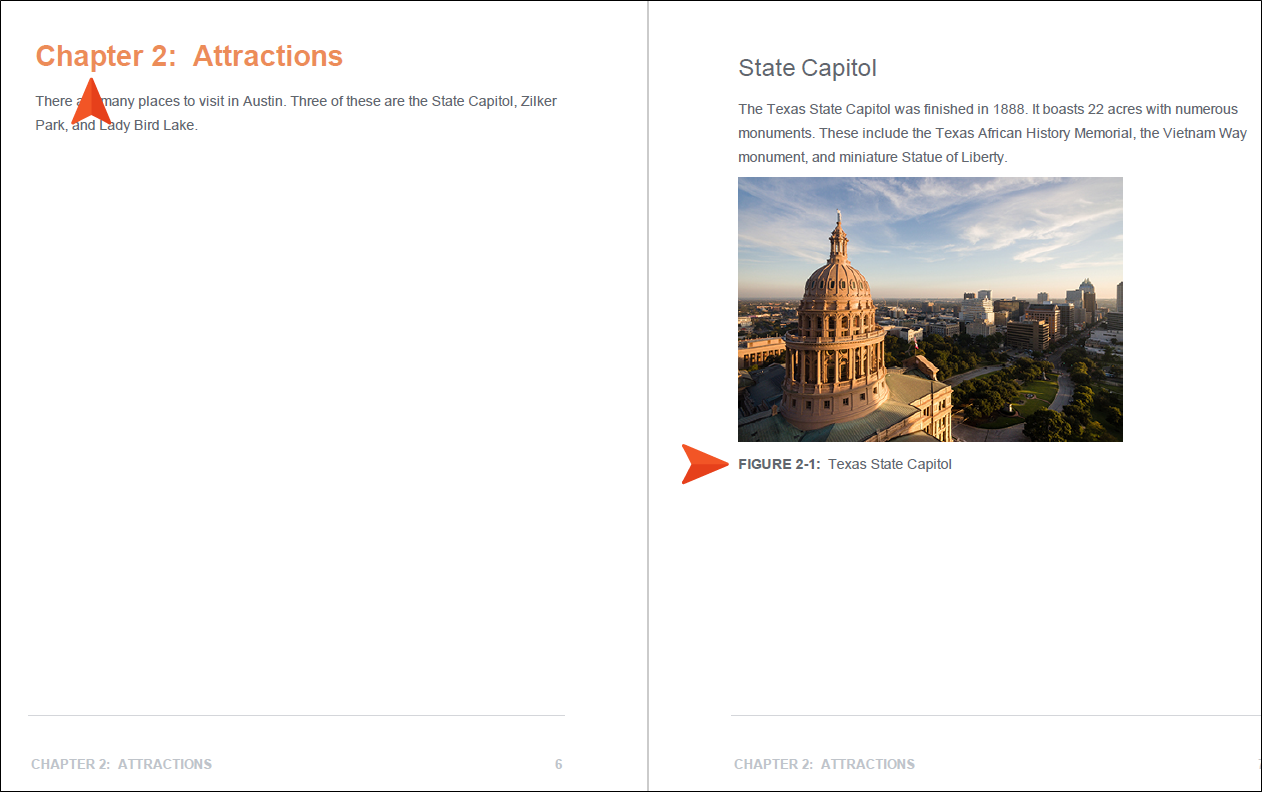
In the PDF output, scroll down and notice that each chapter has autonumbering in the main heading. When you get to the Attractions topic, notice the figure captions under each image. The numbering is a little different from the online output, with the autonumbering tied to the chapter number (e.g., Figure 2-1).
Note You might have noticed that the figure caption for the first image in Chapter 1 displays by itself at the top of a page. That happened because we ran out of room on the previous page to display it. But you can fix this by resizing the image so that there is room to display the caption under it.
- Close the PDF. Otherwise, Flare Desktop will be unable to build it again later.
