 AUTONUMBERS TUTORIAL
There are some images in our project, and we want to add captions below each one, with autonumbers at the beginning. This involves multiple activities to get it all set up, but once we're done, it's quite fast and easy to add the captions to images.
[Menu Proxy — Headings — Online — Depth3 ]
How to Create a Style Class With Autonumbering
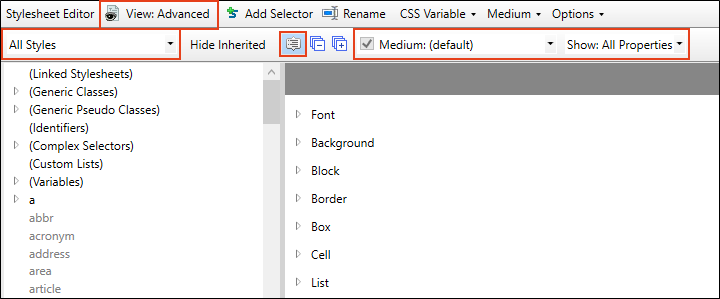
- From the Content Explorer, expand Resources > Stylesheets. Then double-click Styles.css.
-
Make sure the following are selected in the Stylesheet Editor.
- In the local toolbar, click Add Selector. The New Selector dialog opens.
- In the HTML Element field, select p.
-
In the Class Name field, enter Figure.
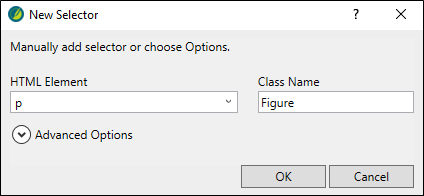
- Click OK.
-
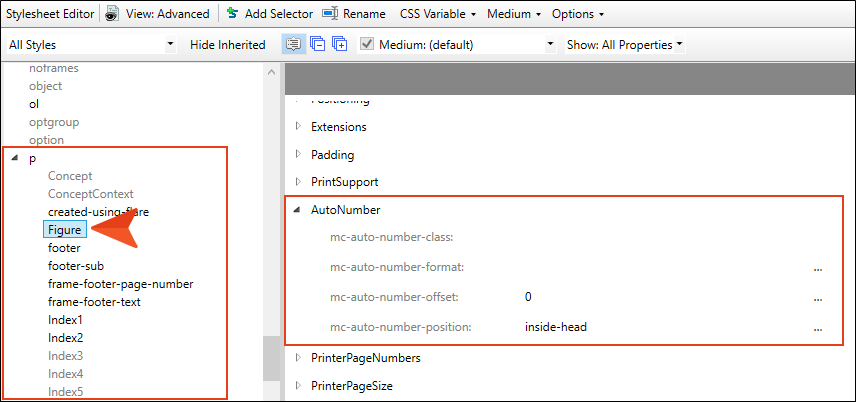
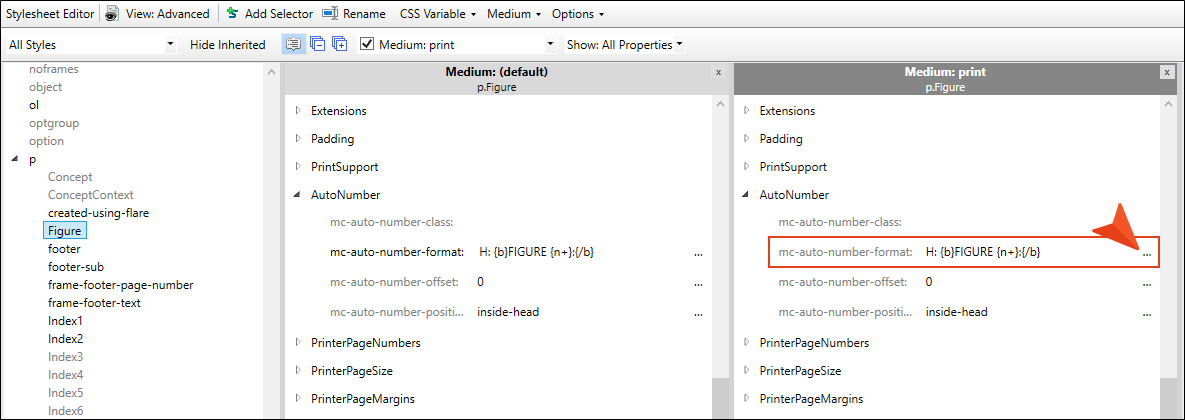
With that new style class chosen on the left side of the editor, expand the AutoNumber group on the right.
-
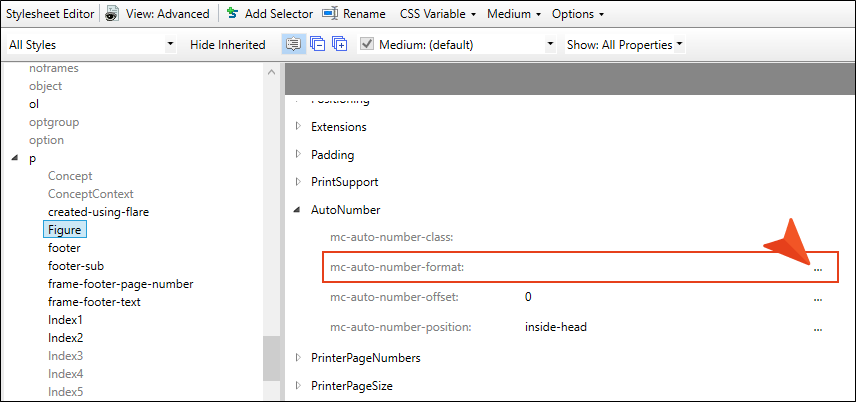
To the right of mc-autonumber-format, click
 .
.
-
Copy the following format, and paste it into the field at the top of the dialog. Add a couple of spaces at the end of the format (i.e., after {/b}).
H: {b}FIGURE {n+}:{/b}
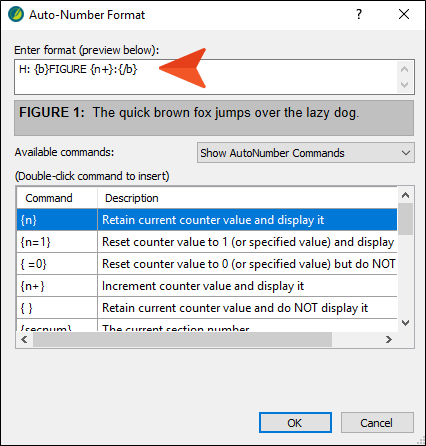
- Click OK.
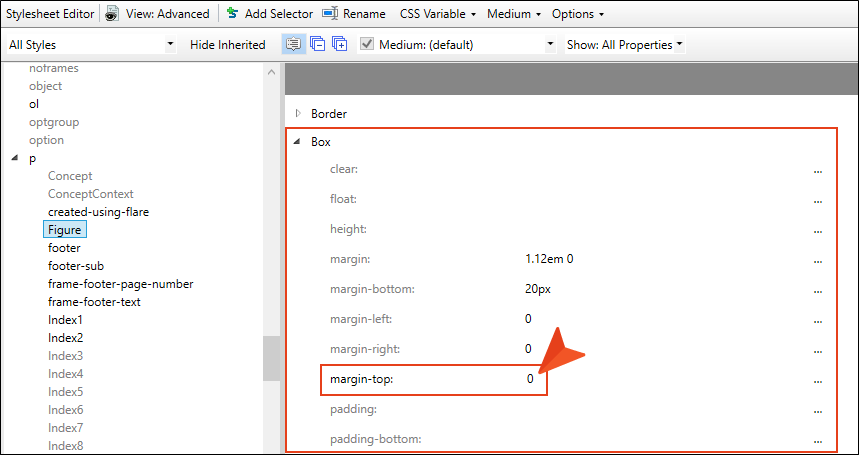
- Scroll up on the right side of the editor and expand the Box group.
-
Change the number in the margin-top field to 0. We're doing this to close the space between the image and the figure caption that we will add below it.
- Click
") to save your work.
to save your work.
How to Change the Autonumbering Format for Print Output
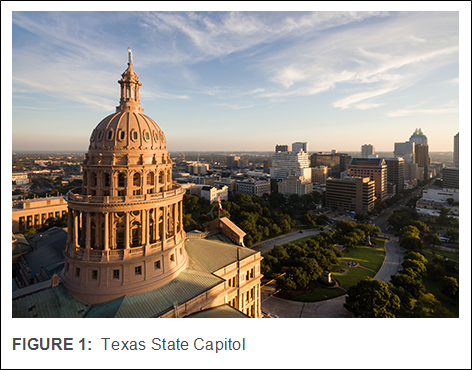
The autonumbering format that we just created will help us produce an image caption that looks as follows:

This is fine for online output. But for print-based output, but we want the autonumber to include the chapter number in each figure caption, as follows (where the 2 refers to Chapter 2):

So we're going to change the autonumber format in our stylesheet's Print medium, which is automatically set to be used for PDF output.
-
In the local toolbar of the Stylesheet Editor, click the Medium drop-down, and select the check box next to Medium: print.
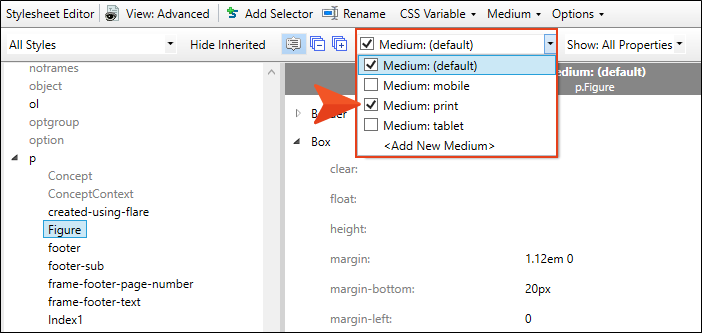
This displays a second set of properties on the right side of the editor. The properties on the left are for the Default medium, which is typically used for online output, and the properties on the right are for the Print medium.
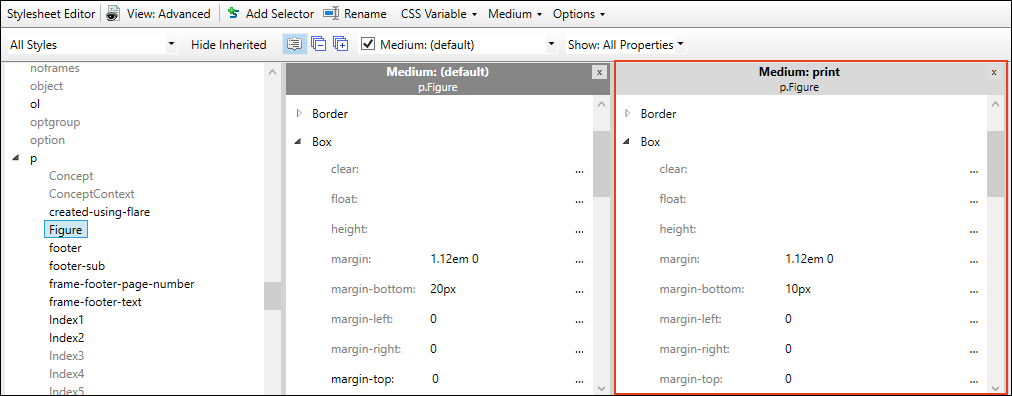
- Scroll down in the properties area to the AutoNumber group.
-
In the Medium: print section, to the right of mc-autonumber-format, click
.
-
Copy the following format, and paste it into the field at the top of the dialog. Add a couple of spaces at the end of the format (i.e., after {/b}).
H: {b}FIGURE {chapnum}-{n+}:{/b}
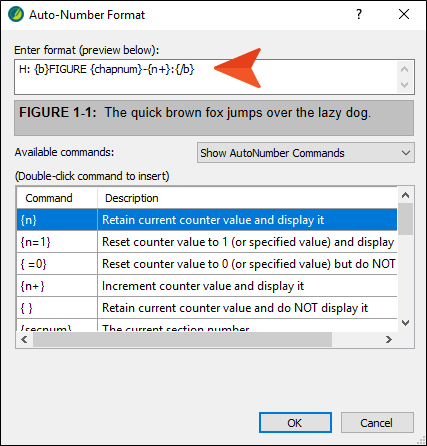
- Click OK.
- Click to save your work.
How to Create a Style Class for Paragraphs Holding Images
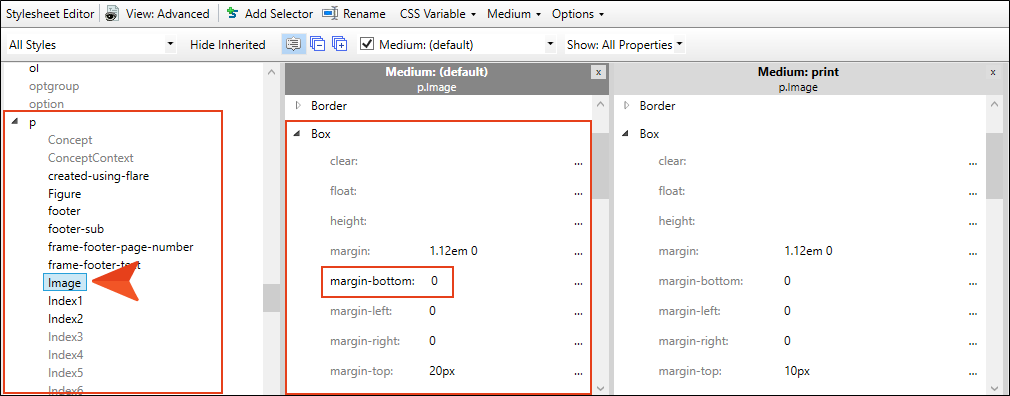
Before we create a figure caption in a topic, we're going to add one more style class to the stylesheet. Images are usually wrapped inside <p> (paragraph) tags, and the margin for paragraphs in our stylesheet is set to have a lot of space below them. Just as we reduced the margin on the Figure style class we just created, we're going to do the same for this new style class.
- In the local toolbar of the Stylesheet Editor, click Add Selector. The New Selector dialog opens.
-
In the HTML Element field, make sure p is selected, and in the Class Name field, enter Image.
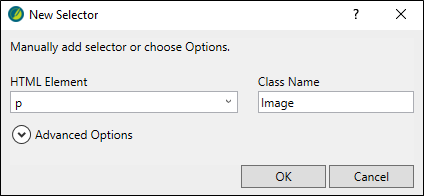
- Click OK.
-
In the Medium: (default) section, scroll up to the Box group, and change the margin-bottom value to 0.
- Click to save your work.
How to Create a Figure Caption With an Autonumber
- From the Content Explorer, open the Attractions.htm topic.
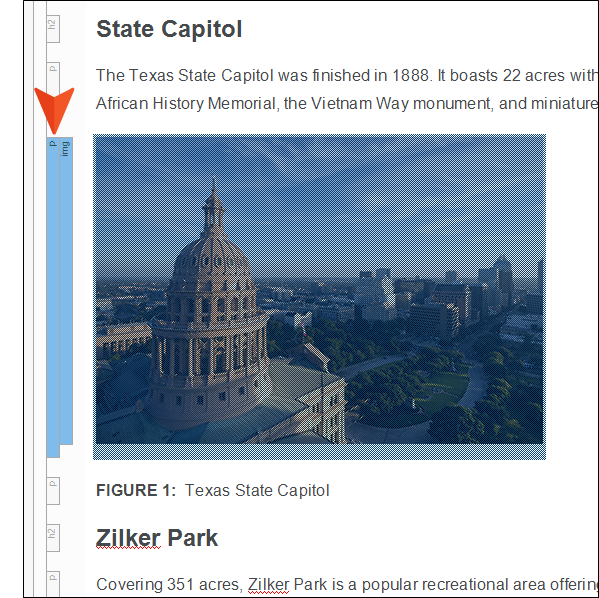
- Place your cursor to the right of the first image and press ENTER to create an empty paragraph under it.
- Type Texas State Capitol.
-
With your cursor still on that line of text, select the Home ribbon, and from the Style drop-down select p.Figure.
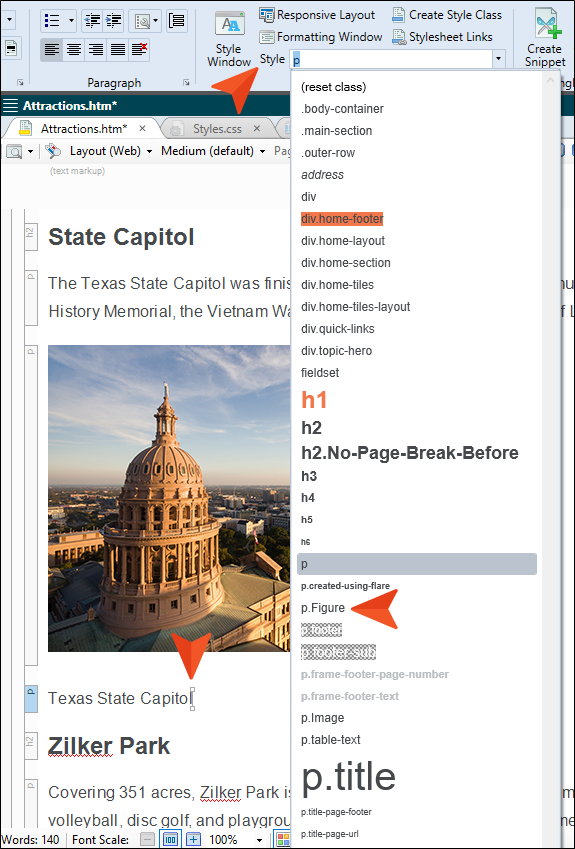
The autonumber is added to the beginning of the text you typed.
-
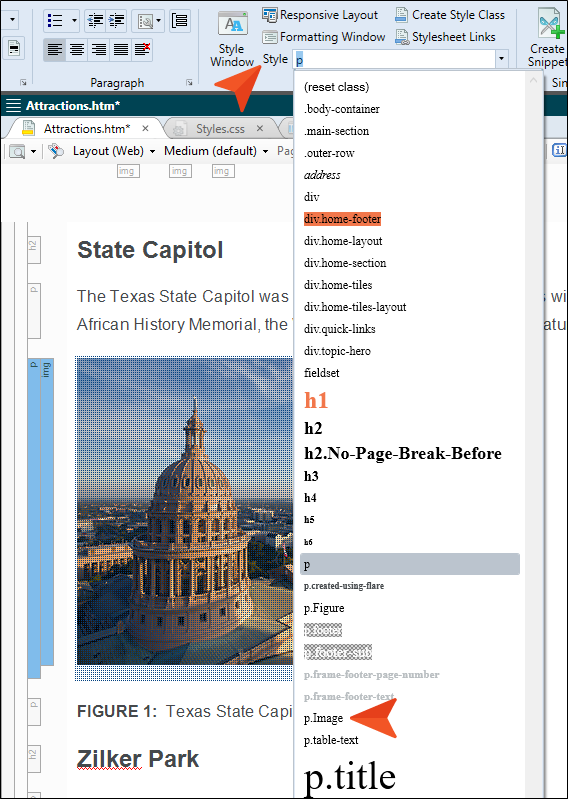
Click the p structure bar to the left of the image, thereby selecting the paragraph and the image within it.
-
From the Style drop-down, select p.Image.
The image and caption under it should now look like this.
-
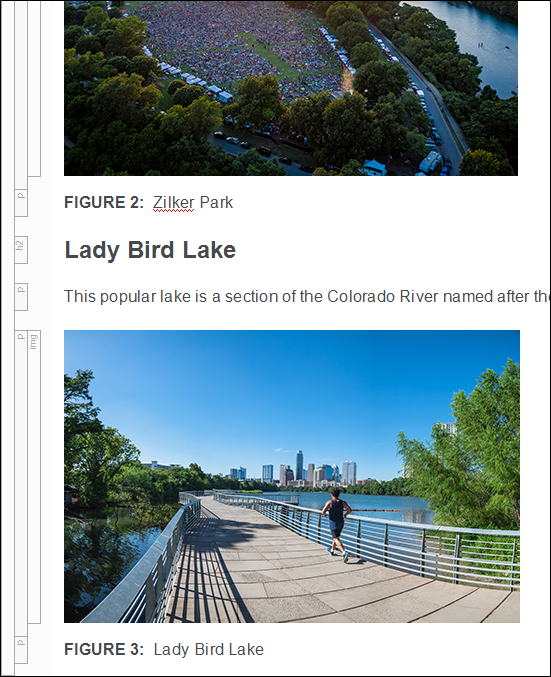
Repeat these steps for the other two images in the topic. Type Zilker Park for the first caption, and Lady Bird Lake for the other.
-
Open the Introduction.htm topic, and add a figure caption under the image, typing Downtown Austin.

- Click
 to save all files.
At the end of the next lesson, we will build and view the outputs to see the results, but first we need to create some chapter autonumbers for the main headings.
