 CONTEXT-SENSITIVE HELP TUTORIAL
There are a couple of files that are necessary when creating context-sensitive Help (CSH). One is called a "header file," and the other is called an "alias file."
A header file (sometimes referred to as a "map file") is a simple text file that works in conjunction with an alias file (i.e., as you edit the alias file, the header file is populated automatically) in context-sensitive Help. The header file contains basic information about connecting areas of an interface to the corresponding topics or micro content in online output. Both you and the software developer need access to this file, or at least to the IDs that will be used to connect various parts of the interface to specific areas of the documentation.
In this tutorial, we will add both of these files, as well as a special skin file. The skin file is optional; it's just a way to present your CSH with a different look than the regular documentation.
[Menu Proxy — Headings — Online — Depth3 ]
How to Add a Header File
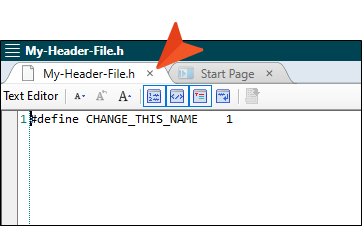
- In the Project Organizer, right-click the Advanced folder and from the context menu select Add Header File.
- In the File Name field, enter My-Header-File.
- Click Add. The header file is added to the Advanced folder in the Project Organizer (expand the folder to see it). The Text Editor opens to the right, with the page for the new header file (including an initial identifier) shown.
-
Close the Text Editor by clicking the x in the tab.
How to Add an Alias File
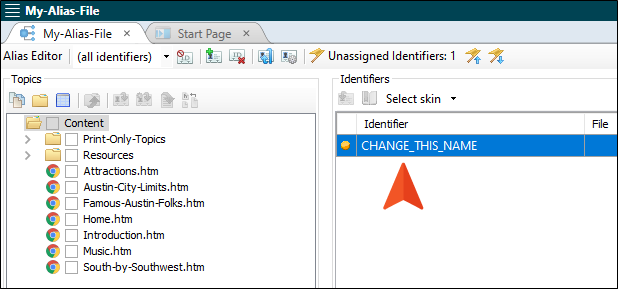
- In the Project Organizer, right-click the Advanced folder and from the context menu select Add Alias File.
- In the File Name field, enter My-Alias-File.
-
Click Add. The alias file is added to the Advanced folder in the Project Organizer. The Alias Editor opens to the right, with the page for the new alias file shown. The file includes an initial identifier for the header file that you created previously.
How to Create a Context-Sensitive Help Skin
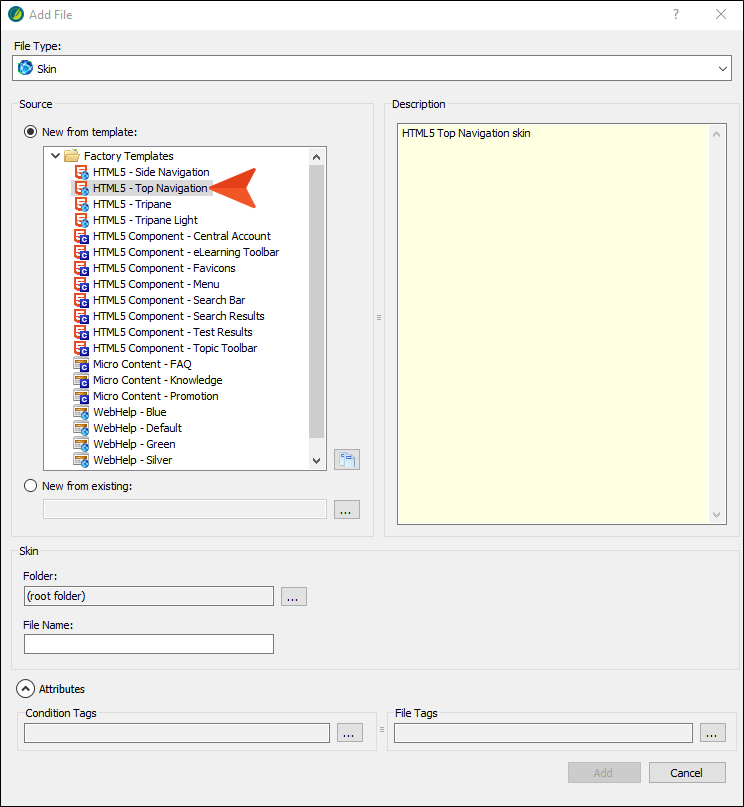
- In the Project Organizer, right-click the Skins folder and from the context menu select Add Skin.
-
From the list of Factory Templates, select HTML5 - Top Navigation.
-
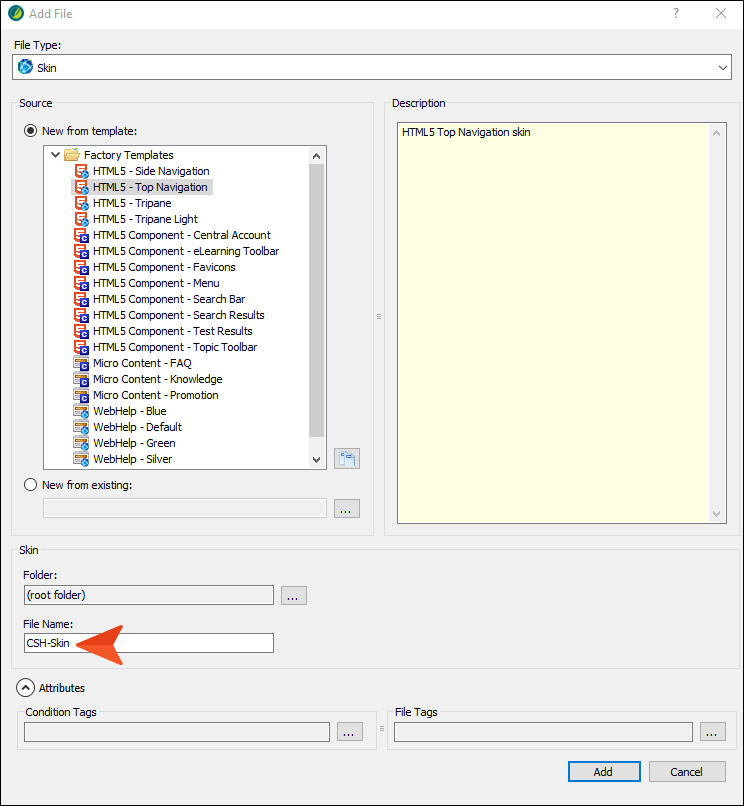
In the File Name field, type CSH-Skin.
- Click Add. The skin is added to the Skins folder in the Project Organizer.
-
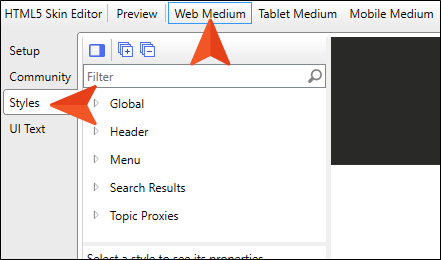
In the Skin Editor, select the Styles tab, and make sure Web Medium is selected at the top.
-
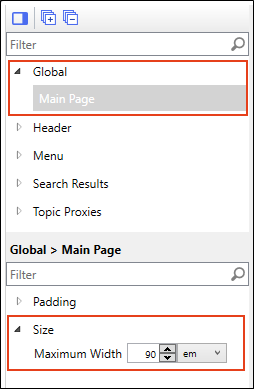
Let's make a few simple changes. On the left side listing the style groups, expand Global, and select Main Page. In the properties section, expand Size. Then set the Maximum Width field to 90 em.
-
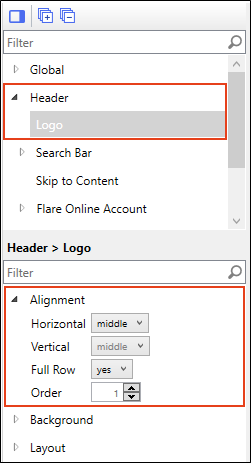
In the style groups section expand Header, and select Logo. In the properties section, expand Alignment. Then set the Horizontal field to middle, and set Full Row to yes.
-
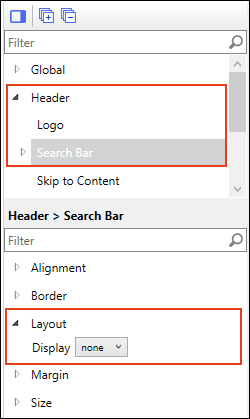
Under the Header style group, select Search Bar. In the properties section, expand Layout. Then set the Display field to none.
-
Under the Header style group, expand Flare Online Account, and select Element. In the properties section, expand Layout. Then set the Display field to none.

-
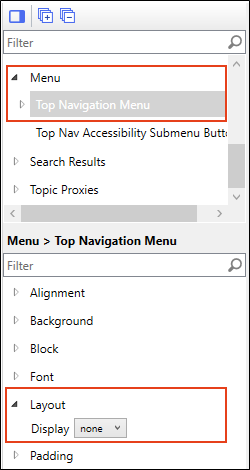
In the style groups section expand Menu, and select Top Navigation Menu. In the properties section, expand Layout. Then set the Display field to none.
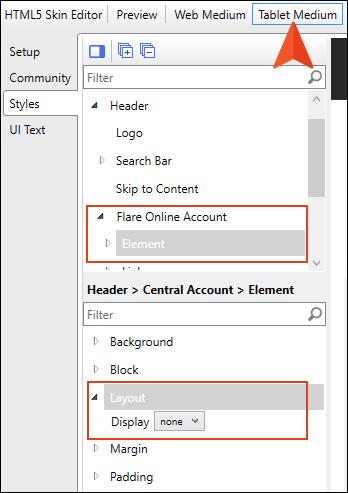
- At the top of the editor, select Tablet Medium.
-
Under the Header style group expand Flare Online Account, and select Element. In the properties section, expand Layout. Then set the Display field to none.
- Click
") to save your work.
to save your work.


