 MICRO CONTENT TUTORIAL—ADVANCED
We've added micro content to both search results and topics. It's all working, but we want to make some adjustments to the look of that micro content. In this lesson, we'll review how our micro content looks in both topics and search results, and then make edits in our main skin and smaller skin components to improve the appearance.
[Menu Proxy — Headings — Online — Depth3 ]
How to Review Micro Content in the Search Results
-
If necessary, build the First-HTML5-Target file, and when it is finished, open the output. Otherwise, just open the most recent output that you've generated.
-
Our project is set up to display four kinds of micro content in the search results:
-
Featured snippets content above the search results
-
Knowledge Panel content to the left of the search results
-
Promotion content to the right of the search results
-
FAQs (via a Knowledge proxy) to the right of the search results
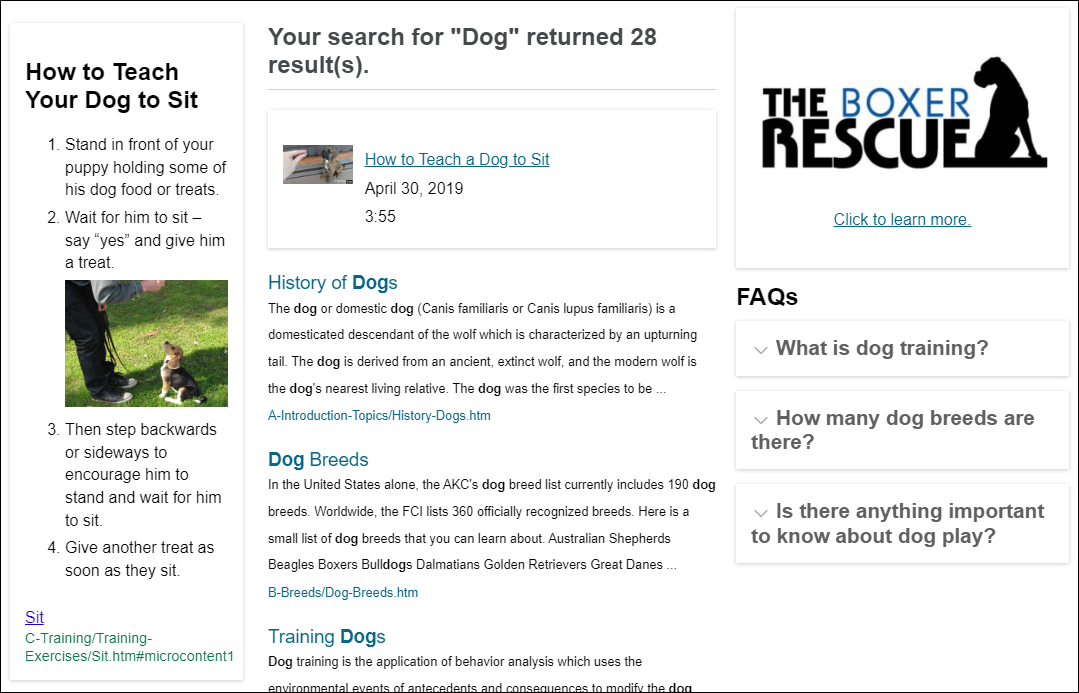
We want to see a search page showing all of these elements at once so we can make some decisions.
So to begin, search for Dog.
Here is what you should see.

Starting on the left, we want to make our set of steps a little wider. This is our Knowledge Panel, whose look is controlled in our main skin (Side-Navigation).
Our featured snippet content looks fine, but we might want there to be more space between it and the micro content on the right side. The same could be said for the space between the regular search results below and the micro content on the right. So we have a couple of choices. We could add some space on the right side of the featured snippets and regular search results, or on the left side of the promotion and FAQ micro content, or both. In this lesson, we'll adjust the space on the left side of the micro content shown on the right side of the page.
The promotion micro content looks okay, except for the space that we just talked about.
The FAQs would probably look better if the items appeared as drop-downs, with the question displayed as the hotspot. And of course we need to deal with the space on left side.
-
How to Adjust the Width of the Knowledge Panel
-
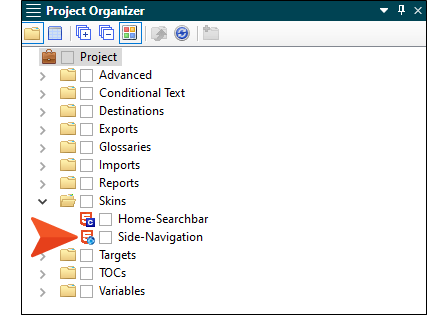
In the Project Organizer, expand the Skins folder and double-click Side-Navigation.
-
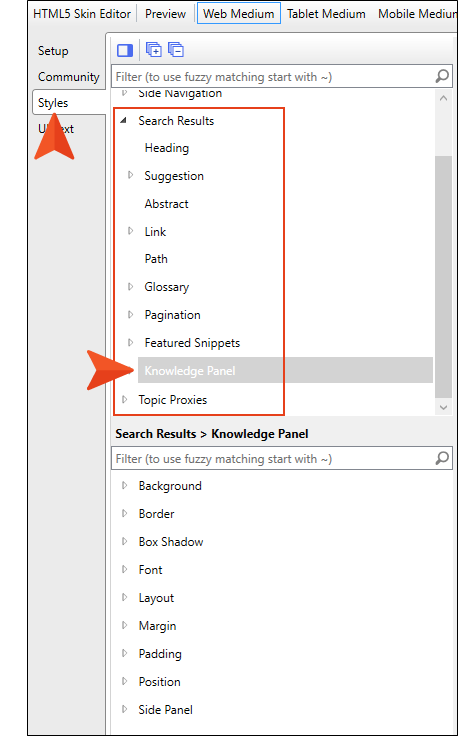
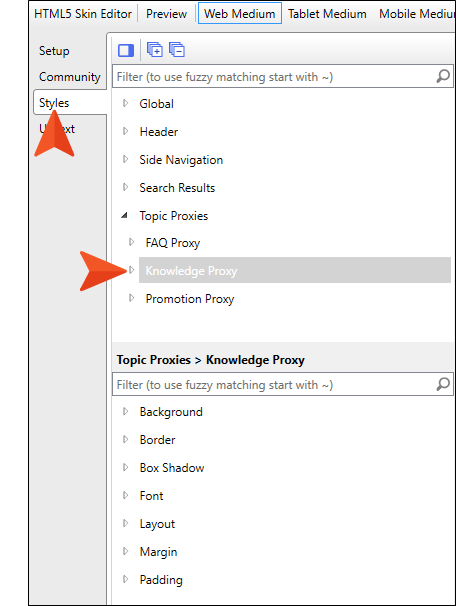
Select the Styles tab, expand Search Results, and select Knowledge Panel.
-
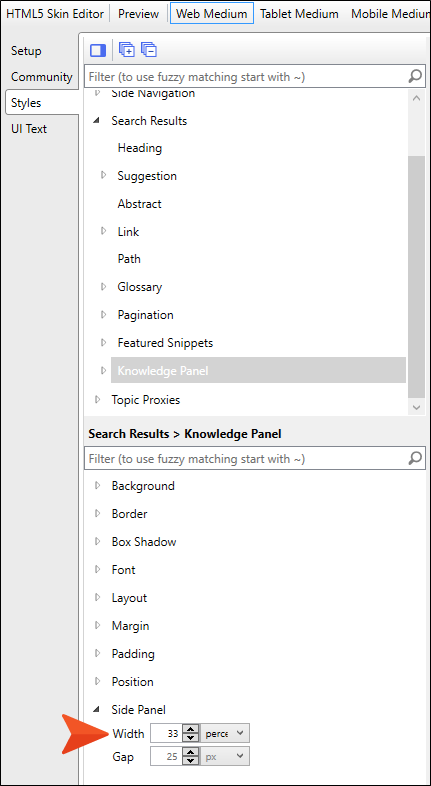
In the properties area at the bottom, expand Side Panel, and change the Width field to 33 percent.
-
Click
") to save your work.
to save your work.
How to Adjust the Space for the Promotion Micro Content
-
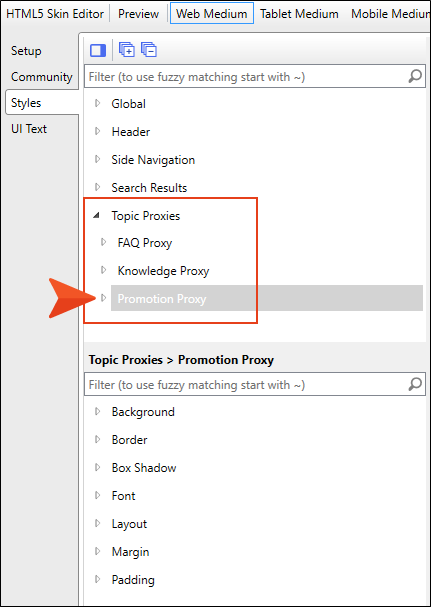
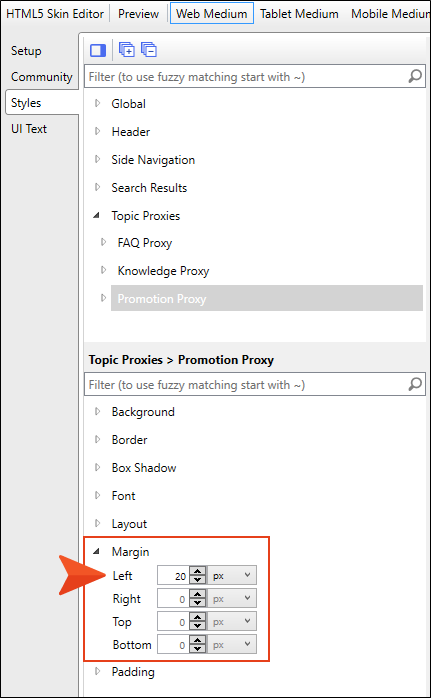
Collapse the Search Results section, expand Topic Proxies, and select Promotion Proxy.
-
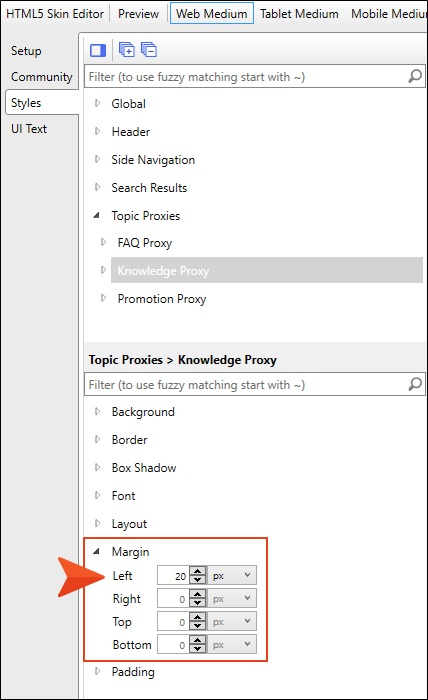
In the properties area at the bottom, expand Margin, and set the Left field to 20 px.
-
Click
to save your work.
How to Adjust the Appearance of the FAQs in Search Results
So far, we've only made changes in our main Side-Navigation skin. But now we're going to add a small skin component for our Knowledge proxy that is being used for the FAQs in search results. We're doing this because we have another Knowledge proxy that we've added to our template page, which is being used to display author information on certain topics. We want the author content to look one way, but we want our FAQs in the search results to look another way. So we're going to keep using the main Side-Navigation skin to control the look of the Knowledge proxy being used for the author content, but we'll rely on a new skin component to design the look of the FAQs.
-
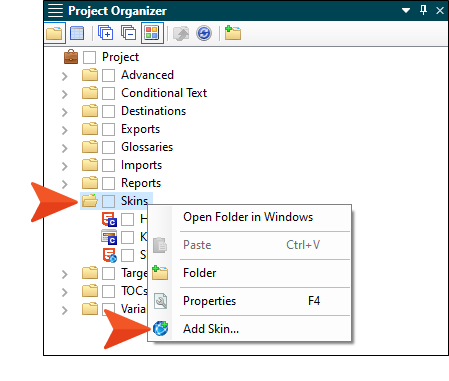
In the Project Organizer, right-click the Skins folder and select Add Skin.

-
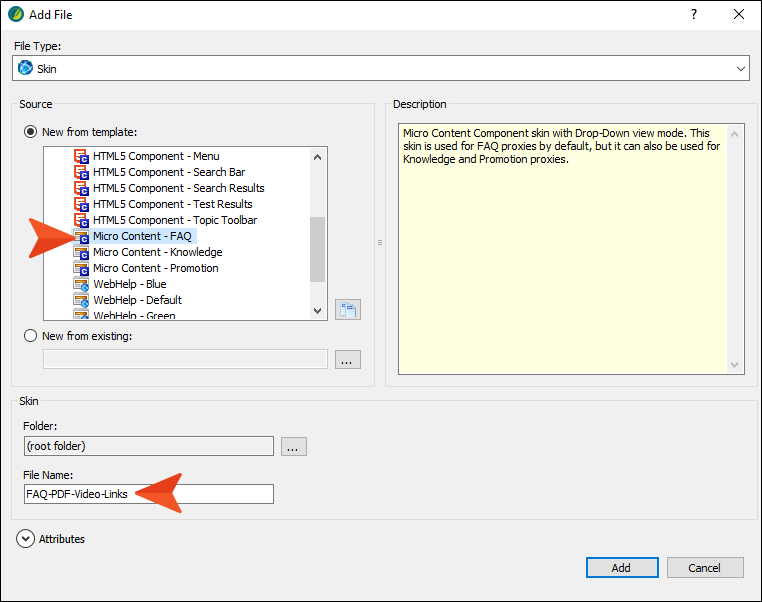
In the New from template section, select Micro Content - Knowledge, and in the File Name field enter Knowlege-FAQs.
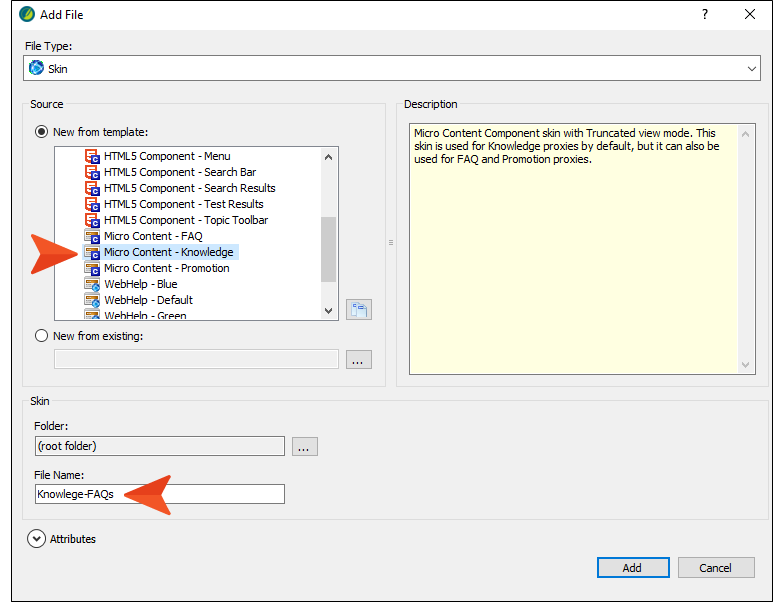
Note Even though our content is intended to be FAQs, we're using a Knowledge proxy, so that's the kind of skin component we want to select. Actually though, all three micro content skin components (FAQ, Knowledge, Promotion) have the same options available. The only difference is that certain settings have been preset in each to make it easier to work with them.
-
Click Add.
-
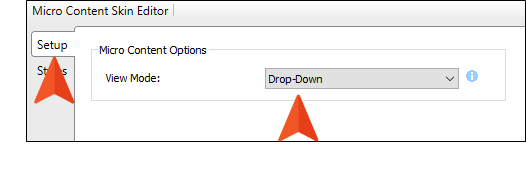
In the Micro Content Skin Editor, select the Setup tab, and in the View Mode field select Drop-Down.
-
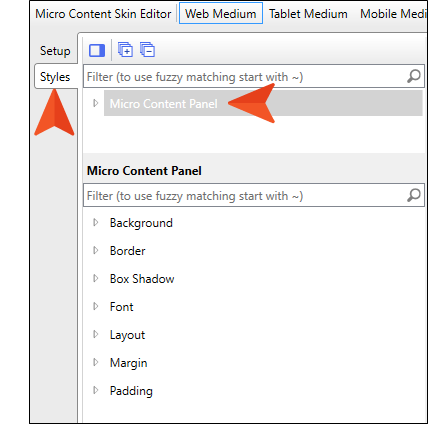
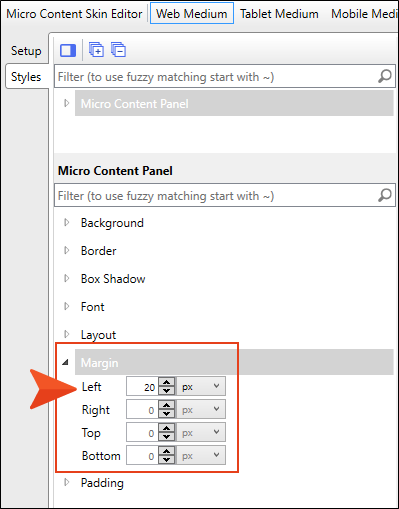
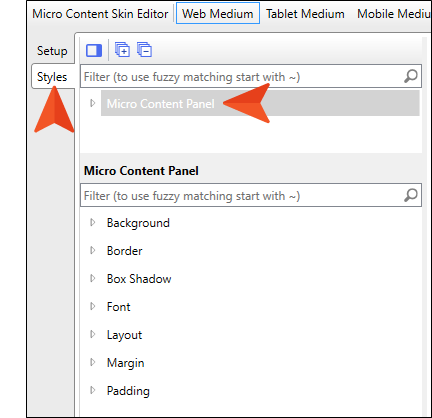
Select the Styles tab and select Micro Content Panel.
-
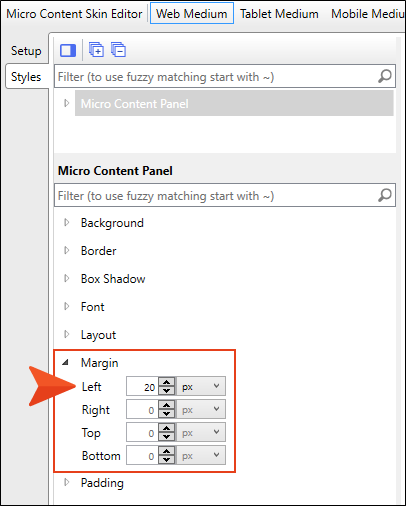
In the properties area at the bottom, expand Margin, and set the Left field to 20 px.
-
Click
to save your work. -
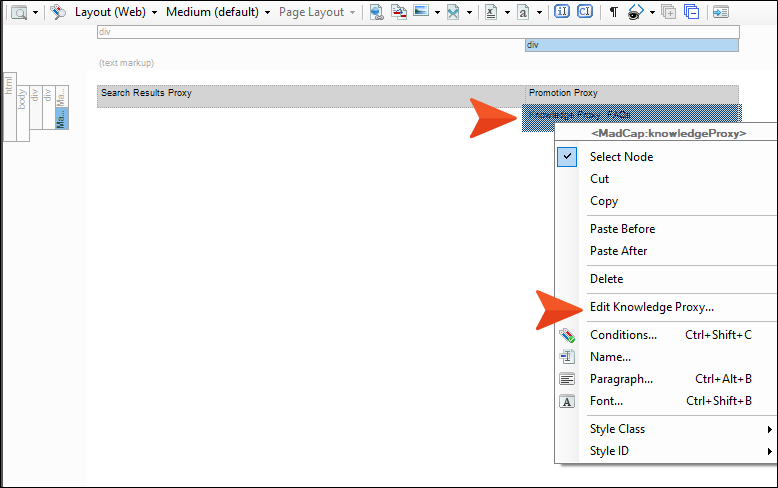
Now we need to make sure our proxy knows to use this skin component, instead of the main Side-Navigation skin. Open the Search-Results topic.
-
Right-click the Knowledge Proxy: FAQs bar, and select Edit Knowledge Proxy.
-
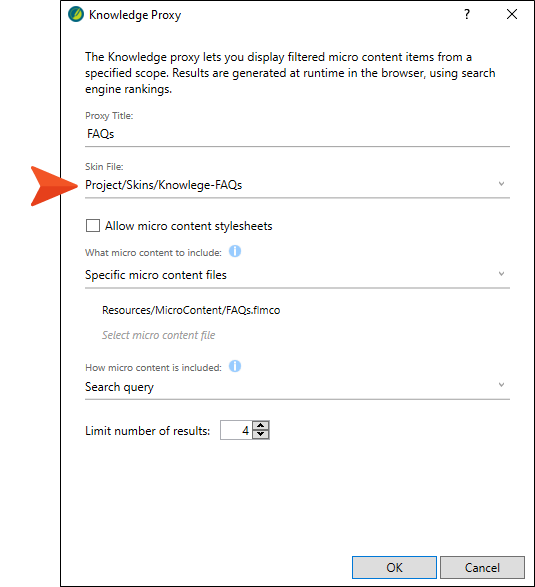
In the Skin File field, select Project/Skins/Knowledge-FAQs.
-
Click OK.
-
Click
to save your work.
How to Review Micro Content in Search Results and Topic Output
-
Build the First-HTML5-Target file, and when it is finished, open the output.
-
Search for Dog. Notice the micro content looks better in the search results.
-
As far as the micro content in topics is concerned, our project is set up to display four kinds of micro content:
-
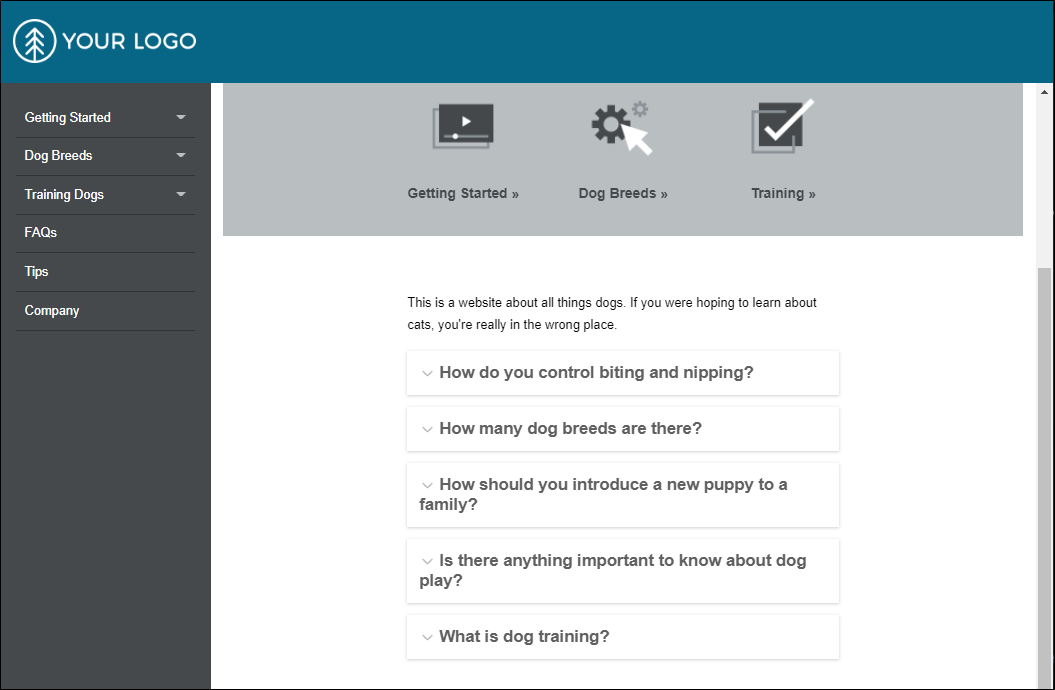
FAQs on the Home page
-
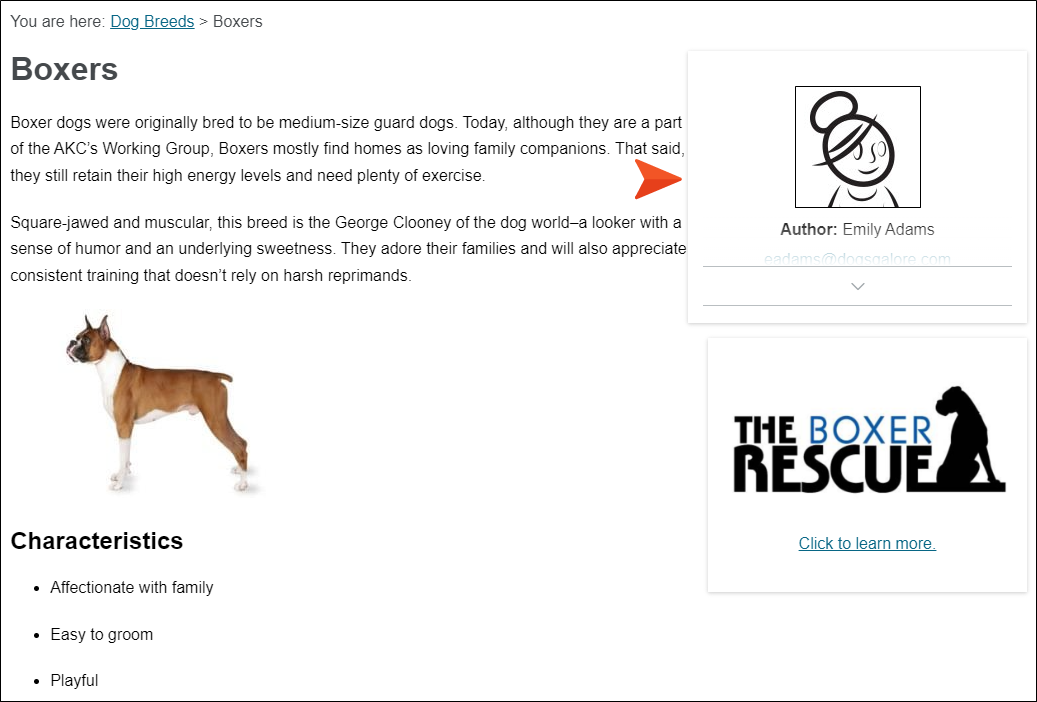
Author profiles on certain pages via a Knowledge proxy
-
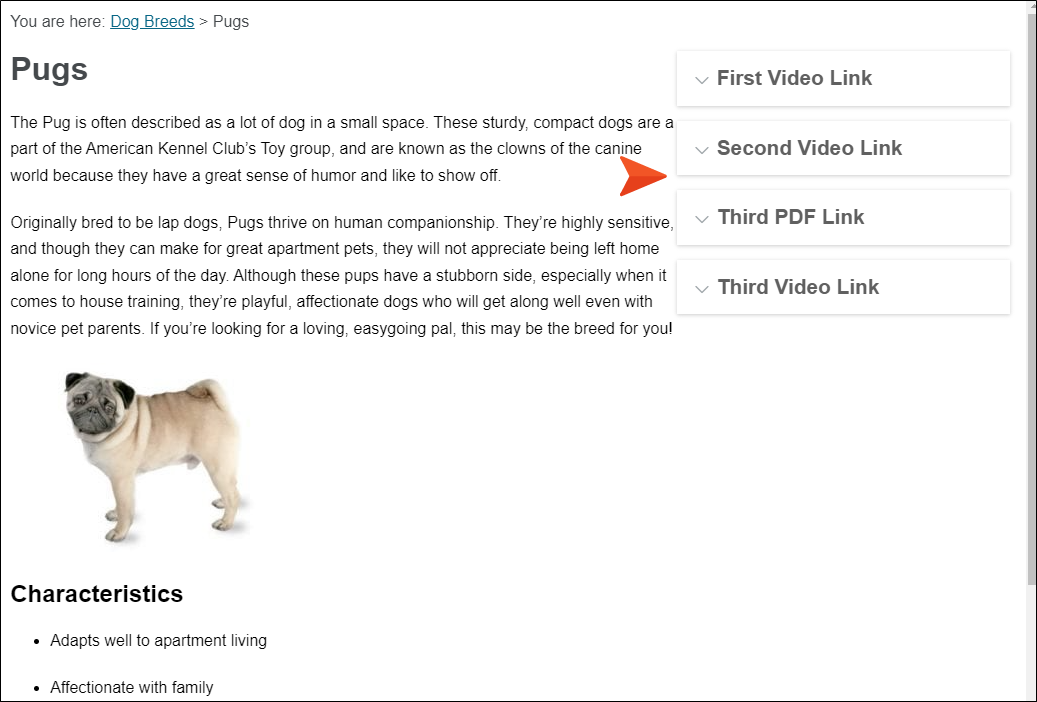
PDF and video links on certain pages via an FAQ proxy
-
Dog rescue content on certain pages via a Promotion proxy
So to begin, click the logo in the upper-left to go to the Home page. The FAQs look okay, so we won't make any changes to those.
-
-
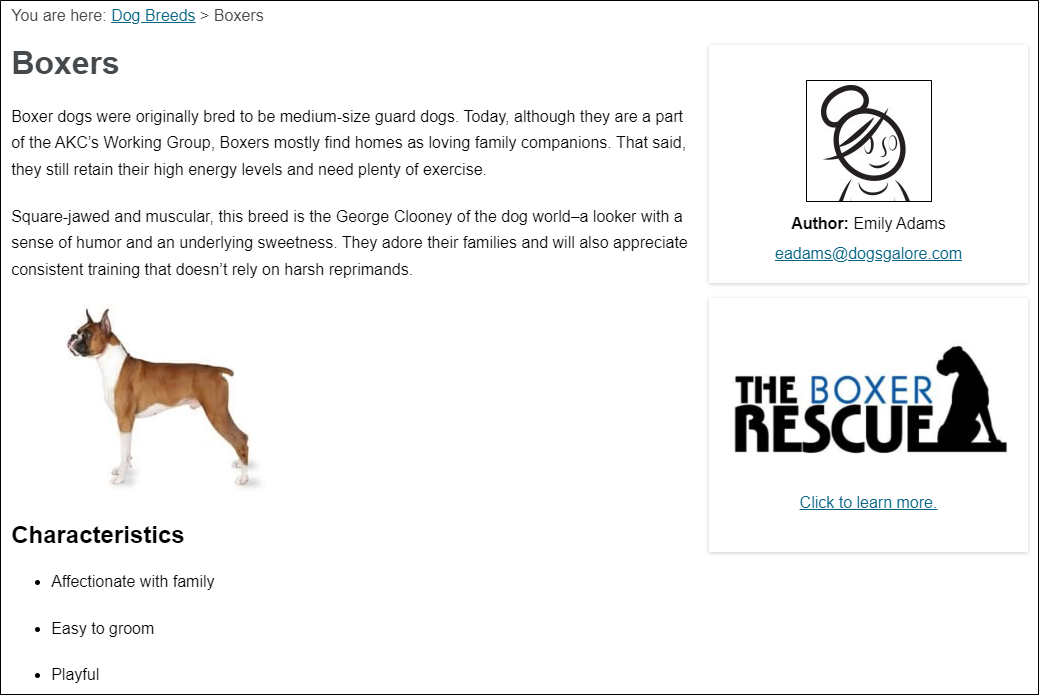
On the left side of the output, expand Dog Breeds and select Boxers.
Looking at the output, the author information can be adjusted to have more space on the left like the dog rescue content below it, which is using the same promotion skin settings that we adjusted previously for the search results. We can do this in the main Side-Navigation skin since our other Knowledge proxy (which is used for FAQs in the search results) is associated with a separate skin component. That way, we won't cause issues with that other micro content. We can also change the view mode for the Knowledge proxy so that users don't need to click the down arrow to see all of the content. We'll leave the dog rescue micro content as it is.
-
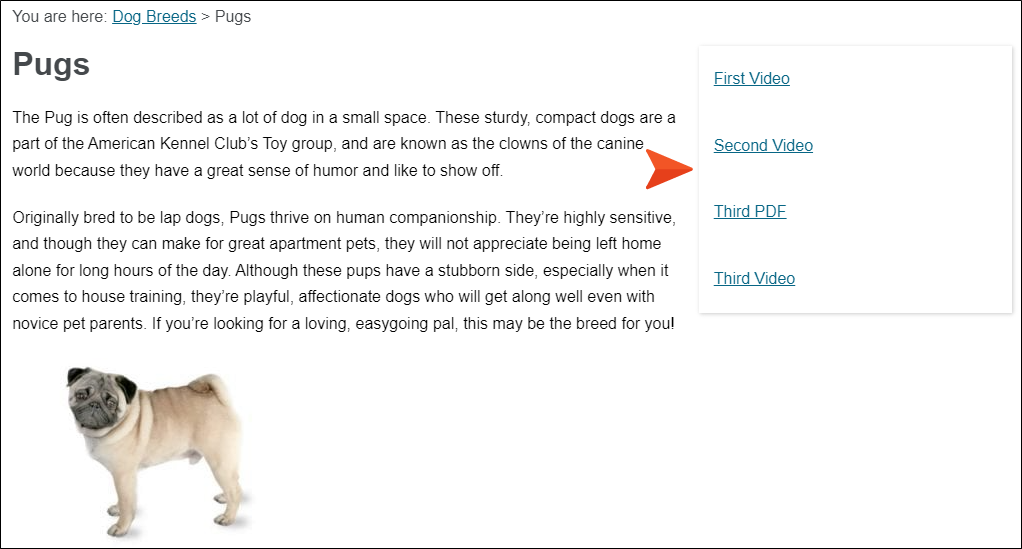
Open the Pugs page in the output.
We don't want our PDF and video links to be shown as drop-downs, and we could add some more space to the left, separating it from the regular topic content. Also, it might look better if all the links had just one border, instead of each having its own. This micro content is using an FAQ proxy, but we probably don't want to adjust the styles in the main Side-Navigation skin because that would affect our FAQs on the Home page. Instead, we'll add a new FAQ skin component and make our changes there.
How to Adjust the Author Profile Micro Content
-
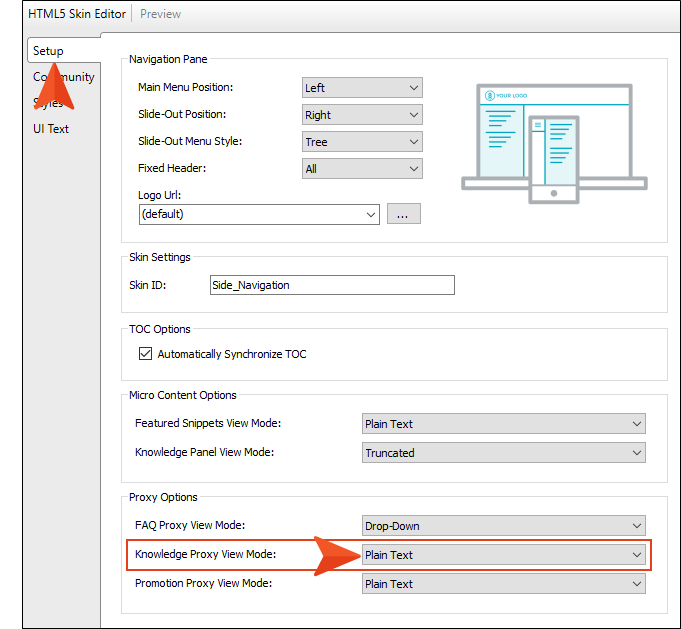
Open the main Side-Navigation skin.
-
Select the Setup tab, and in the Proxy Options section, set the Knowledge Proxy View Mode field to Plain Text.
-
Click the Styles tab, expand Topic Properties, and select Knowledge Proxy.
-
In the properties area at the bottom, expand Margin, and set the Left field to 20 px.
-
Click
to save your work.
How to Adjust the PDF and Video Link Micro Content
-
In the Project Organizer, right-click the Skins folder and select Add Skin.
-
In the New from template section, select Micro Content - FAQ, and in the File Name field enter FAQ-PDF-Video-Links.
-
Click Add.
-
In the Micro Content Skin Editor, select the Setup tab, and in the View Mode field select Plain Text.

-
Select the Styles tab and select Micro Content Panel.
-
In the properties area at the bottom, expand Margin, and set the Left field to 20 px.
-
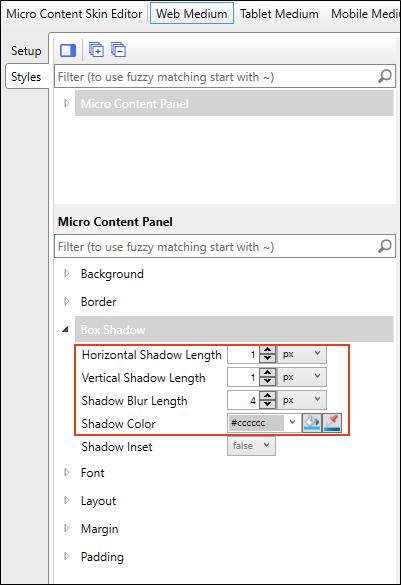
Expand Box Shadow and set the fields as follows.
-
Horizontal Shadow Length: 1 px
-
Vertical Shadow Length: 1 px
-
Shadow Blur Length: 4 px
-
Shadow Color: #cccccc
-
-
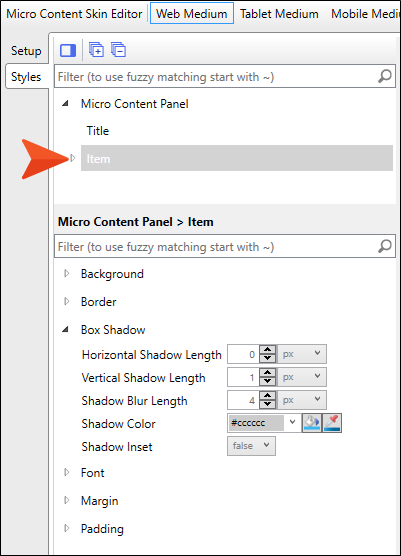
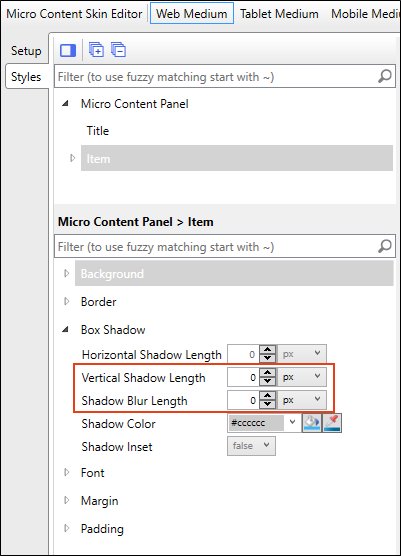
That adds a border (in this case, a box shadow actually) around all of the items displayed via the proxy. But now we want to remove the box shadow from the individual items. So in the top part of the tab, expand Micro Content Panel and select Item.
-
In the properties area below, set the Box Shadow fields as follows.
-
Vertical Shadow Length: 0 px
-
Shadow Blur Length: 0 px
-
-
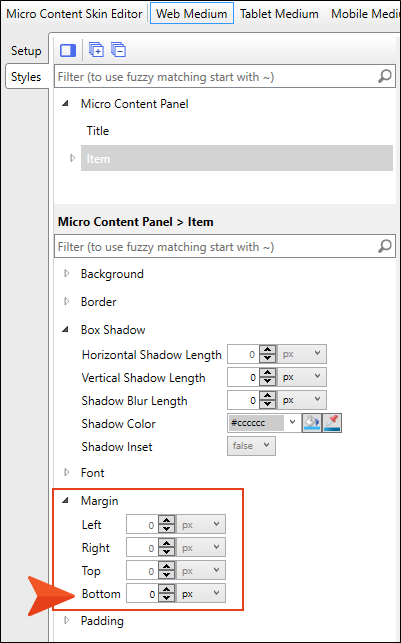
We also might want less space between our PDF and video links, so let's adjust that. Expand Margin, and set the Bottom field to 0 px.
-
Expand Padding, and set the Top and Bottom fields to 0 px.

-
Click
to save your work. -
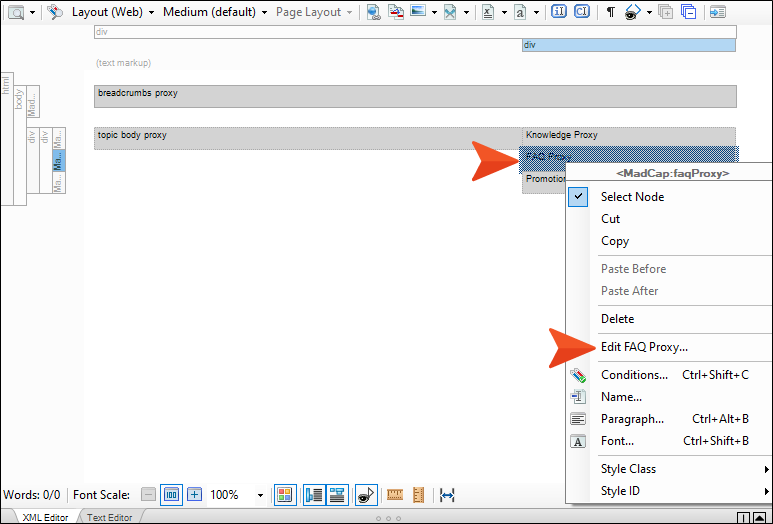
Now we need to make sure our proxy knows to use this skin component, instead of the main Side-Navigation skin. Open the Other-Topics template page.
-
Right-click the FAQ Proxy bar, and select Edit FAQ Proxy.
-
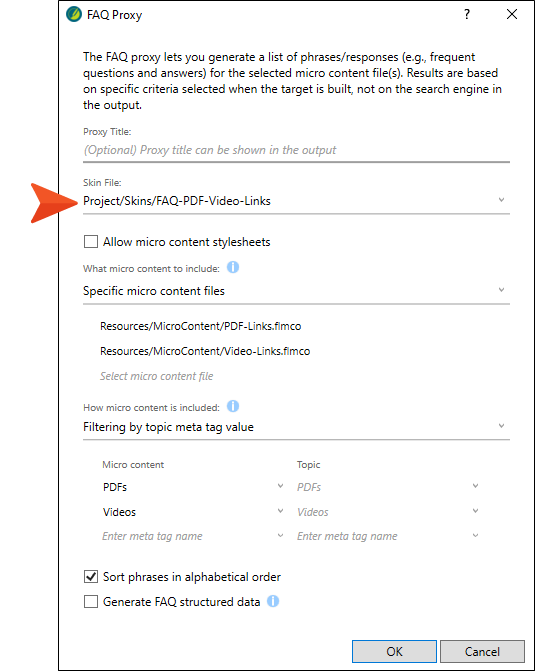
In the Skin File field, select Project/Skins/FAQ-PDF-Video-Links.
-
Click OK.
-
Click
to save your work.
How to Review the Topic Micro Content in the Output
-
Build the First-HTML5-Target file, and when it is finished, open the output.
-
On the left side of the output, expand Dog Breeds and select Boxers. The micro content on the right looks better now.
-
Open the Pugs page in the output. The PDF and video links now look the way we want.
What’s Noteworthy?
Note In this tutorial, we only made adjustments to the default Web medium to control how micro content looks on a large screen. However, you might want to also see how it all looks on a tablet and mobile screen and make necessary edits in those mediums as well.
Ta-Da!
Congratulations! You've reached the end of this tutorial. Be sure to check out others. See Tutorials.


