 ELEARNING TUTORIAL—BASIC
The pages that you saw in the output in the previous lesson are the result of topics (combined with other files) in Flare Desktop. By using this template, you just need to decide what you want to add, what you want to replace, and what you want to remove.
Let's start by removing some of the existing topics that we don't want to use. Then we'll replace the content in the ones we want to keep. Some of these topics just contain general information and various features, while other topics will include some interactive eLearning question sections.
[Menu Proxy — Headings — Online — Depth3 ]
How to Remove Topics
-
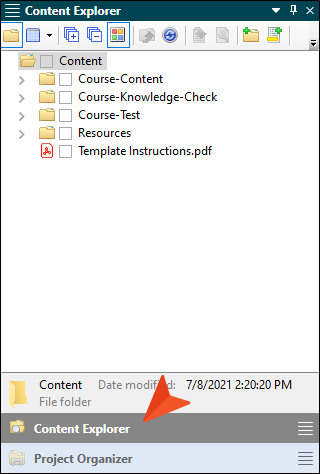
On the left side of Flare Desktop, select the Content Explorer accordion bar to open it.
-
In this template, the topics are all organized into separate folders in the Content Explorer. Expand the Course-Content folder.
-
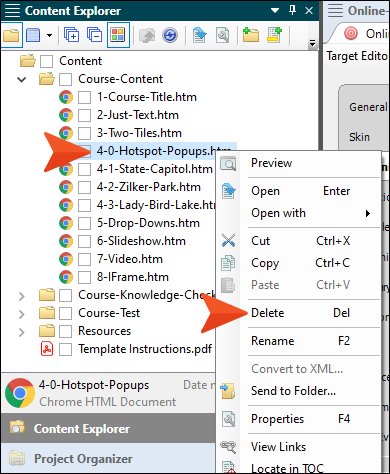
Let's say we don't want to use topics that include the following features: hotspot popups, slideshow, video. So let's delete them from the project. To begin, right-click the topic named 4-0-Hotspot Popups.htm, and from the context menu select Delete. In the dialog that opens, click OK.
-
All of these topics are linked in a table of contents (TOC) file, which is needed to provide the flow of the course (i.e., which topic is first, then what topic comes next, and so on). We don't want the topic that we're deleting to be part of the TOC anymore, so in the dialog that opens, click Remove Links.
-
We could repeat this same step for the other topics that we want to delete, but there's a faster way. In the local toolbar at the top of the Content Explorer, click
 . This splits the folders and files in the Content Explorer, so that whatever folder you select on the left side shows the contents on the right side.
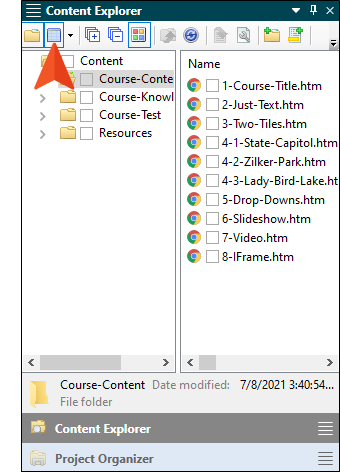
-
With the first folder selected on the left side, hold down your CTRL key and select the following topics on the right side:
-
4-1-State-Capitol.htm
-
4-2-Zilker-Park.htm
-
4-3-Lady-Bird-Lake.htm
-
6-Slideshow.htm
-
7-Video.htm

-
-
Press DELETE, and in the dialog click OK.
-
In the dialog that open, click Remove Links.
The topics are removed. You'll notice that the numbers in the remaining topic file names go 1, 2, 3, 5, 8. But that's okay. The topics were only named that way (with the numbers) in the first place so that you could see their intended order in the TOC. You can rename the topics to anything you want, and don't need to include numbers in the topic file names at all.
-
In the local toolbar of the Content Explorer, click
again to remove the split view.
How to Replace Topic File Names and Content
We'll get to some of the eLearning question sections in the project soon. But first, let's replace some informational content in some of the topics, and let's rename those topic files while we're at it.
-
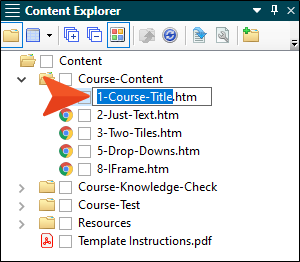
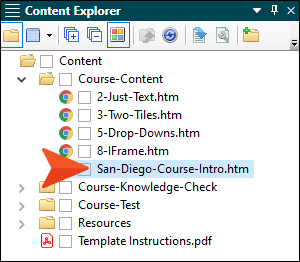
First, let's rename some of the topic files in the project. In the Content Explorer, under Course-Content, click once on 1-Course-Title.htm, and then press F2 on your keyboard. This highlights the file name text, but not the extension.
-
Type San-Diego-Course-Intro, and press ENTER.
-
In the dialog that opens, click Update Links. The Content Explorer should now look like this.
-
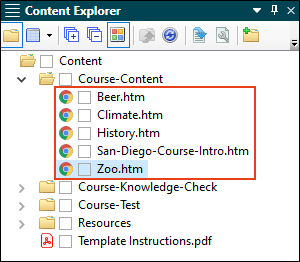
Repeat these steps to rename the other topics in that folder as follows. In the dialog that opens showing existing links that will be affected by the name change, click Update Links each time.
-
Rename 2-Just-Text.htm to History.
-
Rename 3-Two-Tiles.htm to Climate.
-
Rename 5-Drop-Downs.htm to Beer.
-
Rename 8-IFrame.htm to Zoo.
-
-
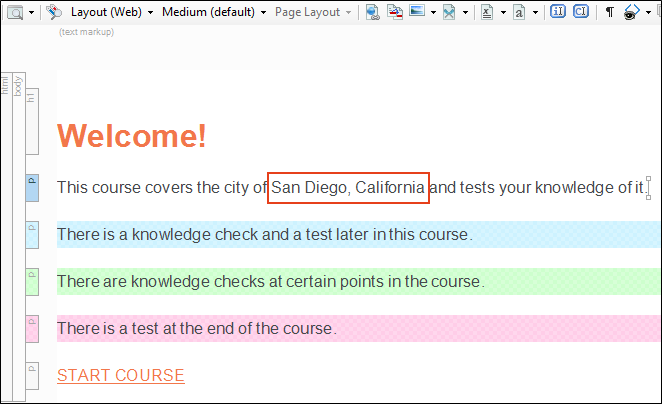
Double-click San-Diego-Course-Intro.htm to open the topic.
-
In the XML Editor, replace Austin, Texas in the first paragraph with San Diego, California. We'll leave the rest of the topic as it is.
Note In case you're wondering about the paragraphs with background colors, those paragraphs have something called a "condition" applied to each one. You won't need to worry about those in this tutorial, but if you work through the eLearning Advanced Tutorial, you'll learn more about them and how they can be very useful.
-
Click
") to save your work. This button is found at the very top-left of Flare Desktop.
to save your work. This button is found at the very top-left of Flare Desktop. -
In the Content Explorer, double-click History.htm to open that topic.
-
Change the heading to History, and copy and paste the following text to replace the paragraphs below the heading.
San Diego was incorporated in 1850, the same year California became a state. However, before that, it had been part of the Spanish Empire, First Mexican Empire, and Mexican United States.
Today, San Diego is the second-largest city in California and the eighth-largest city in the United States. It is known as "America's Finest City," partially because of its year-round warm climate and beautiful beaches. San Diego has a large defense and military sector, a thriving tourism industry, and many major research and manufacturing companies.
-
In the Content Explorer, double-click Climate.htm to open that topic.
-
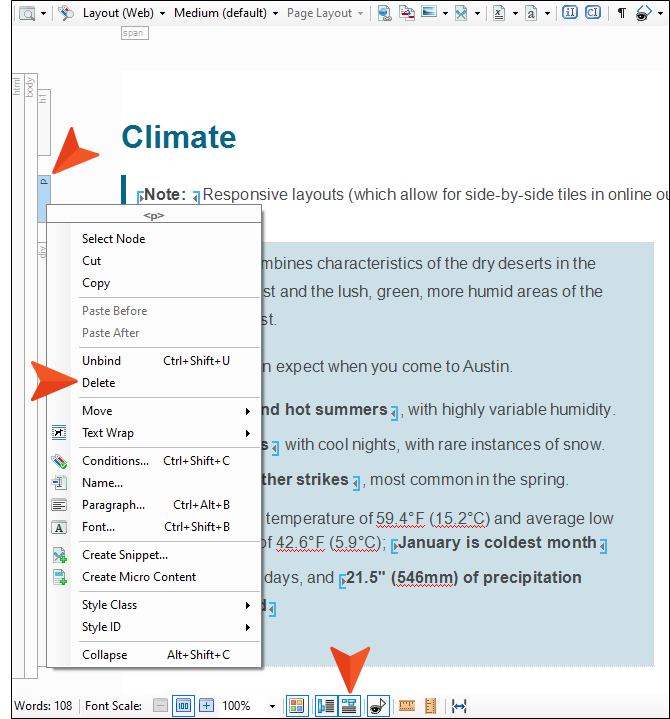
Change the heading to Climate.
-
If your structure bars (the vertical rectangle blocks) are not shown to the left of the content, click
 in the bottom toolbar.
 Let's get rid of the note just under the heading. Right-click the structure bar labeled p to the left of the note, and from the context menu click Delete.
-
Copy and paste the following text, replacing the existing text in the first tile. It might be easiest to replace the paragraphs first, and then each bullet item after that; if you copy and paste the entire text into the tile at once, you might need to reapply the bullets from the Home ribbon. Also, if the tiles seem to shift in the editor, don't worry about it; that can happen when your workspace is a certain size and the tiles can't be shown side-by-side as a result.
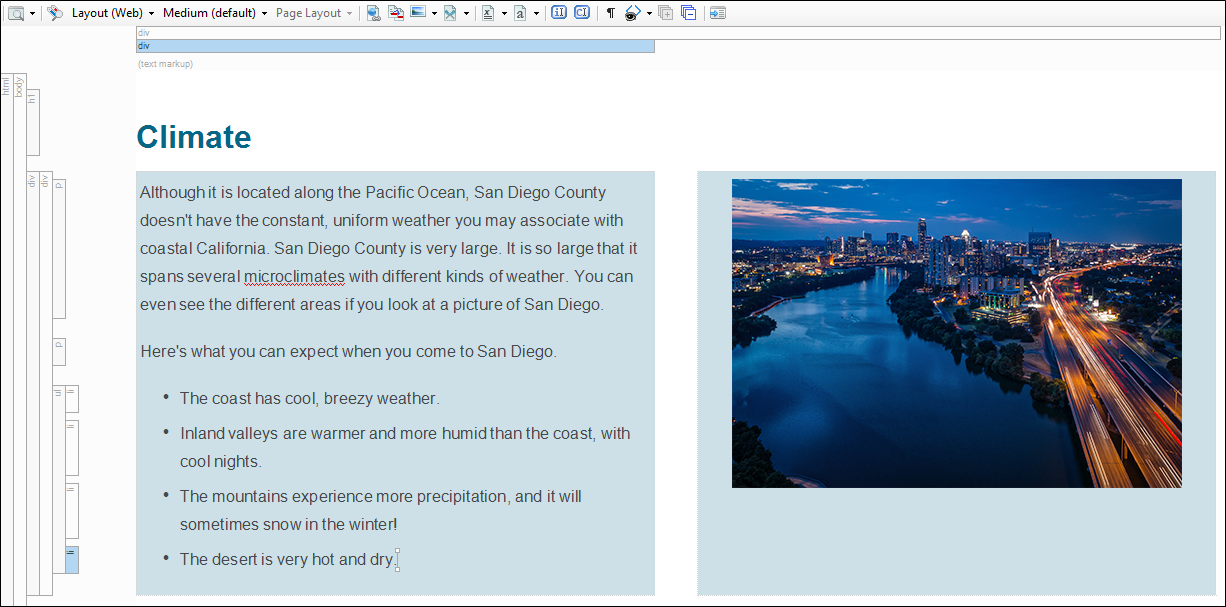
Although it is located along the Pacific Ocean, San Diego County doesn't have the constant, uniform weather you may associate with coastal California. San Diego County is very large. It is so large that it spans several microclimates with different kinds of weather. You can even see the different areas if you look at a picture of San Diego.
Here's what you can expect when you come to San Diego.
- The coast has cool, breezy weather.
- Inland valleys are warmer and more humid than the coast, with cool nights.
- The mountains experience more precipitation, and it will sometimes snow in the winter!
- The desert is very hot and dry.
-
Click the following to download a ZIP file containing some image assets. Then extract the images from the ZIP file and save them to a location on your computer (e.g., you can right-click the downloaded ZIP file, select Open in new window, then copy and paste the files wherever you want). You will use some of these images later. If you cannot download the ZIP file, you can just use any images you happen to have on your computer already just to finish the tutorial. Just keep in mind that if your images are different sizes than the ones in the ZIP file, your results will look different than what you see in the rest of this tutorial.

-
In the Climate topic in Flare Desktop, right-click the current image in the second tile, and from the context menu select Image Properties.

-
In the dialog that opens, click
 at the bottom of the Select File section, navigate to the location where you stored the images from the ZIP file, and double-click SD-Downtown.jpg to select it.
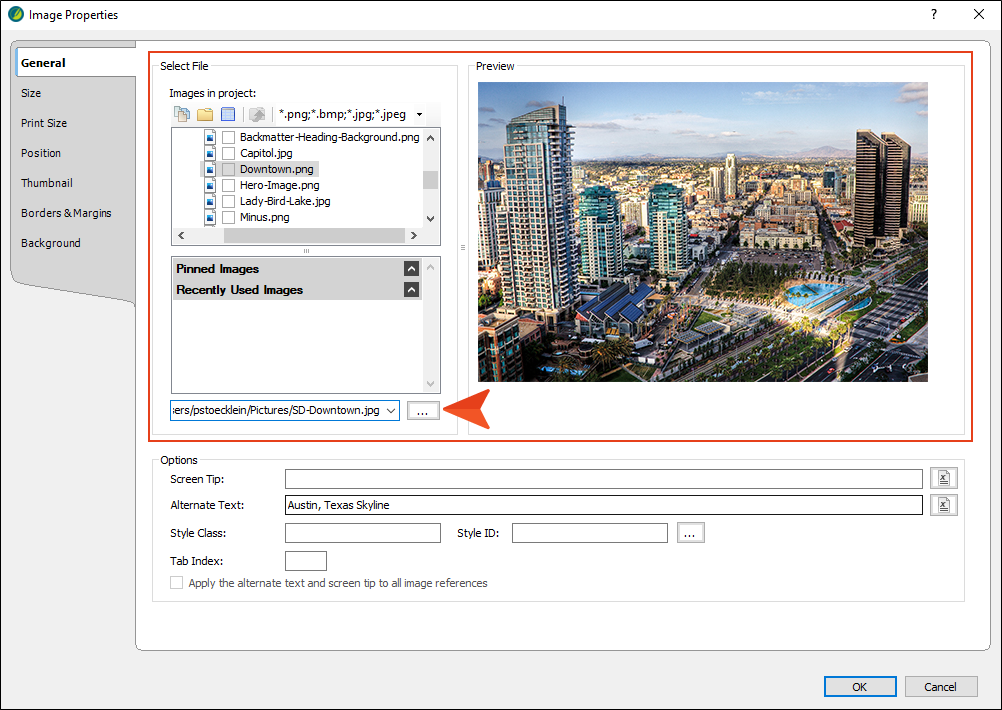
-
Click OK.
-
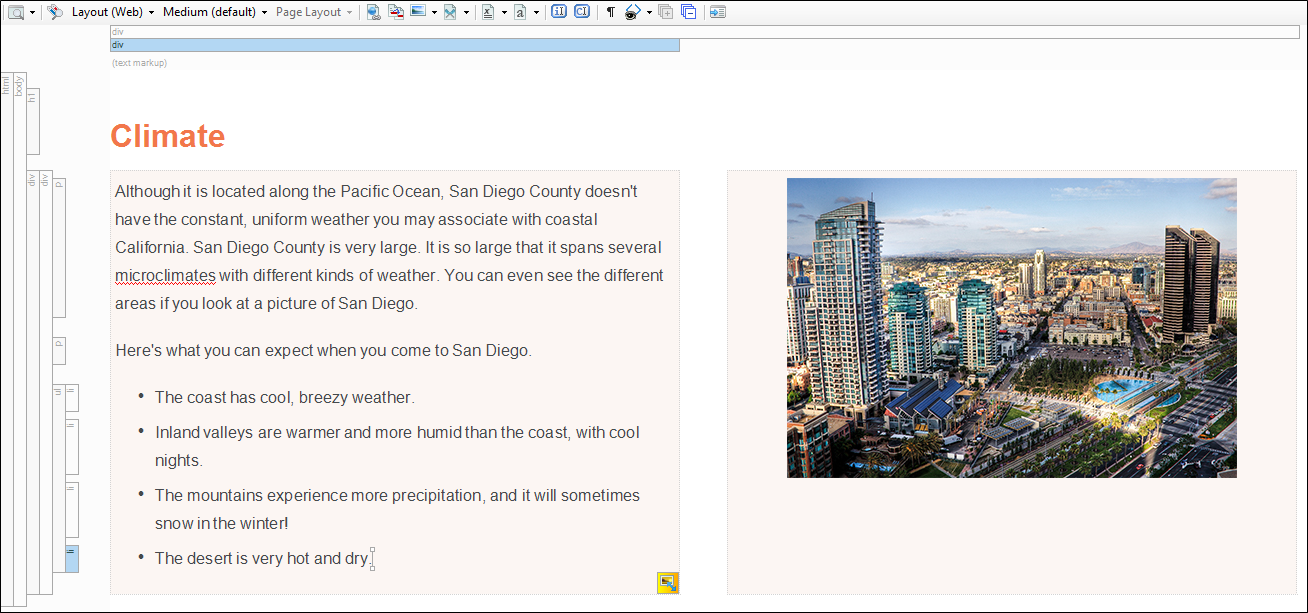
A dialog opens, letting you know the file will be copied to the project. Click OK. The topic should now look something like this.
-
In the Content Explorer, double-click Beer.htm to open that topic.
-
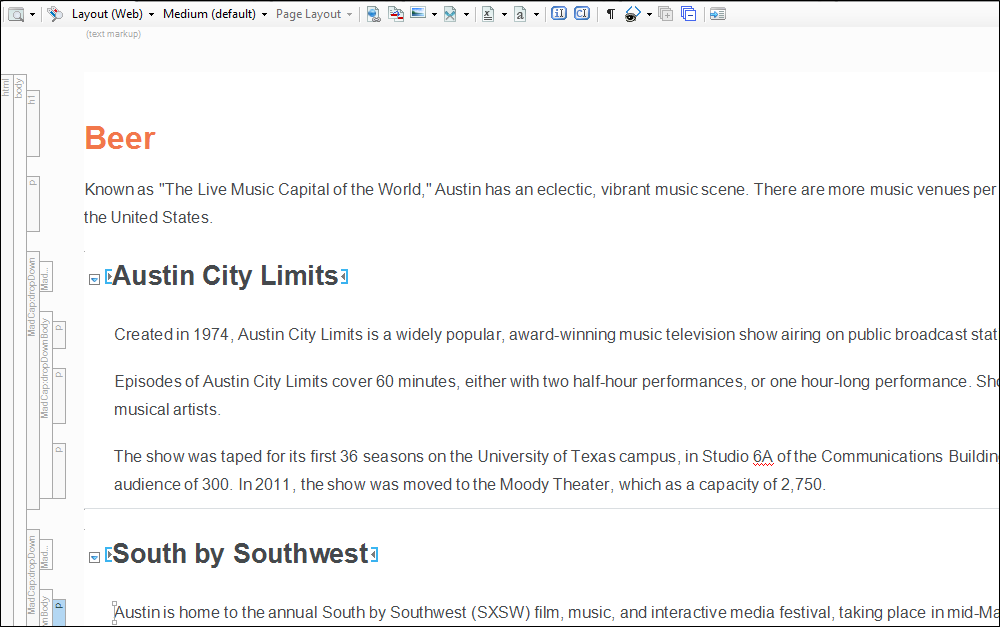
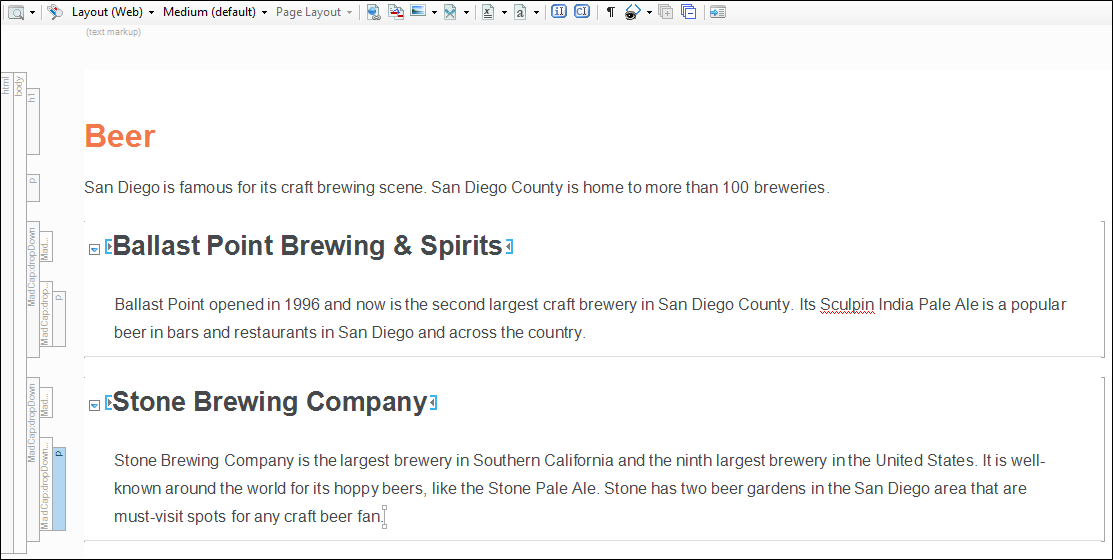
This topic is using some drop-down effects, where the content below a hotspot shows or hides in the output when learners click it. First, replace the heading with Beer, and remove the note under that heading.
-
Copy and paste the following text to replace the first paragraph.
San Diego is famous for its craft brewing scene. San Diego County is home to more than 100 breweries.
-
"Austin City Limits" is the hotspot for the first drop-down. Replace that hotspot with the text Ballast Point Brewing & Spirits. Then, copy and paste the following text to replace the paragraphs directly under that hotspot.
Ballast Point opened in 1996 and now is the second largest craft brewery in San Diego County. Its Sculpin India Pale Ale is a popular beer in bars and restaurants in San Diego and across the country.
-
Replace the "South by Southwest" hotspot with the text Stone Brewing Company. Then, copy and paste the following text to replace the paragraphs directly under that hotspot.
Stone Brewing Company is the largest brewery in Southern California and the ninth largest brewery in the United States. It is well-known around the world for its hoppy beers, like the Stone Pale Ale. Stone has two beer gardens in the San Diego area that are must-visit spots for any craft beer fan.
-
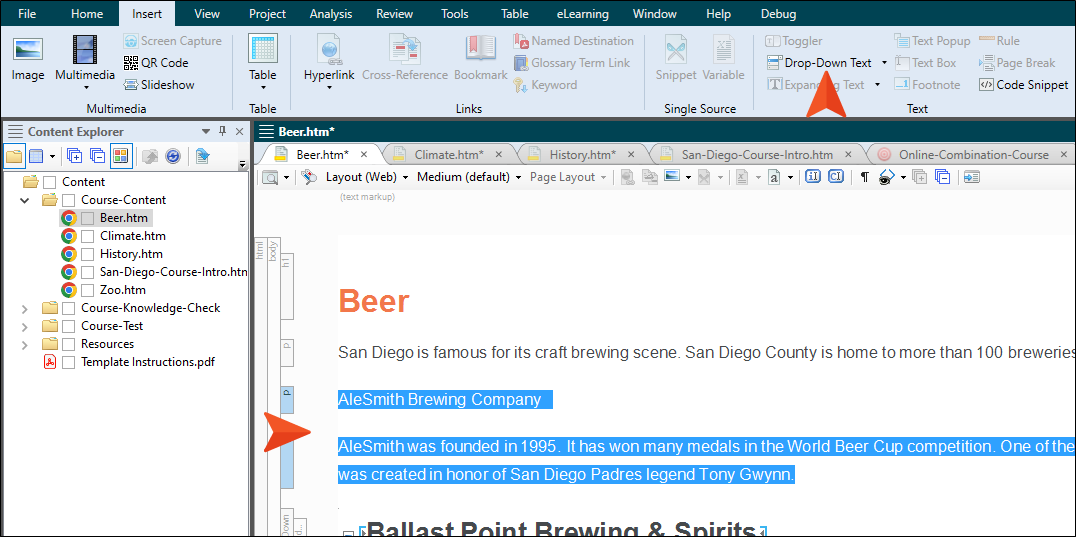
Let's add one more drop-down effect. We could do this by copying and pasting one of the current drop-downs and replacing the text. But let's insert a new drop-down manually. At the end of the first paragraph under the Beer heading, press ENTER to create a new empty paragraph.
-
Copy and paste the following text at that location.
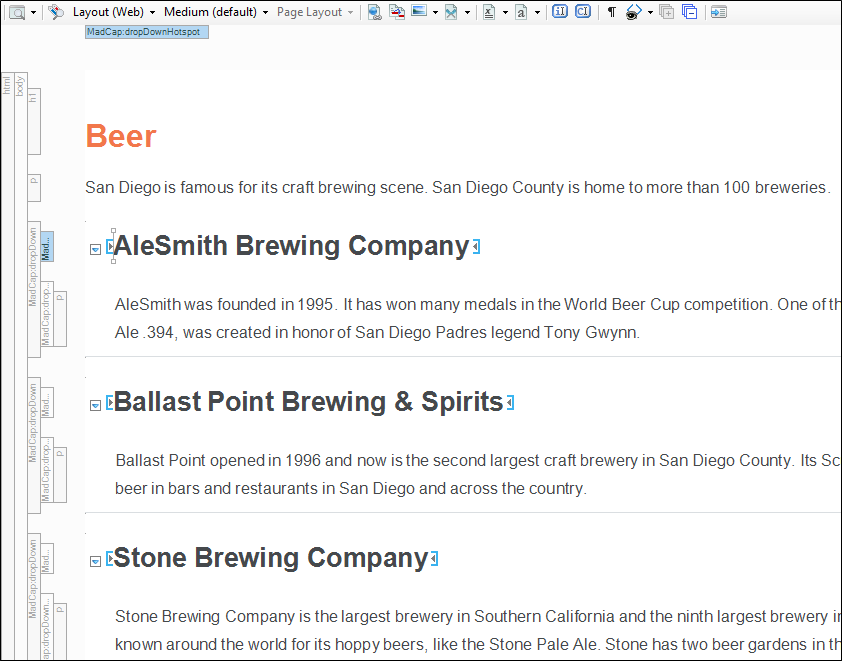
AleSmith Brewing Company
AleSmith was founded in 1995. It has won many medals in the World Beer Cup competition. One of their beers, the San Diego Pale Ale .394, was created in honor of San Diego Padres legend Tony Gwynn.
-
Now, highlight both of those new paragraphs, and in the Insert ribbon above, click Drop-Down Text.
Now we've got three drop-downs in the topic.
-
In the Content Explorer, double-click Zoo.htm to open that topic.
-
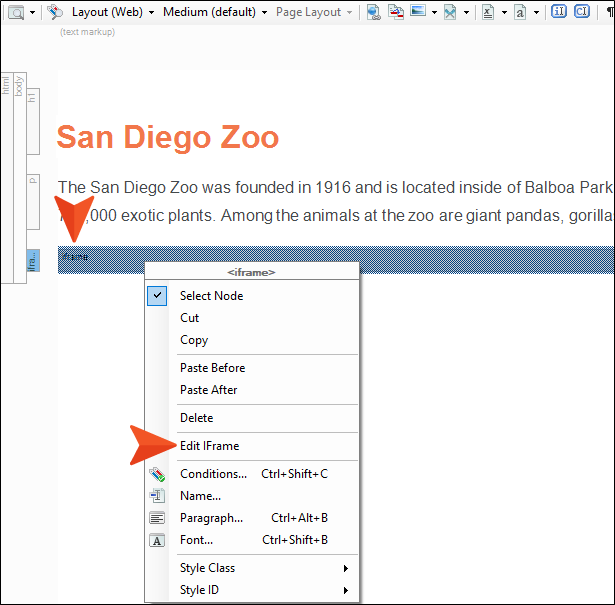
Replace the heading with the text San Diego Zoo, and remove the note directly under the heading. Then, copy and paste the following to replace the paragraph under the heading.
The San Diego Zoo was founded in 1916 and is located inside of Balboa Park. It is home to more than 3700 rare and endangered animals, and more than 700,000 exotic plants. Among the animals at the zoo are giant pandas, gorillas, koalas, and jaguars.
-
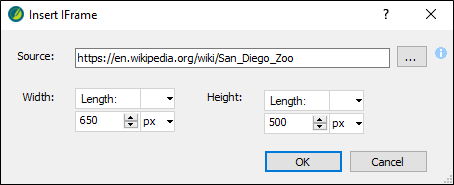
There is a gray bar at the bottom of the topic. This is a placeholder for an IFrame, which essentially lets you link to something, such as an external website, that people can scroll through from your own topic output. Currently, this IFrame is pointing to a web page about the city of Austin, Texas. Let's change that so it points to a web page about the San Diego Zoo. Right-click the gray IFrame bar, and from the context menu select Edit IFrame.
-
In the dialog that opens, replace the URL in the Source field with the following. Then, click OK.
https://en.wikipedia.org/wiki/San_Diego_Zoo/
-
We've changed multiple files but haven't saved our changes in awhile. Click
 in the upper-left corner to save all files.
 -
We also have a lot of files that we've opened so far in this tutorial. Let's close them all. Select the Window ribbon at the top of Flare Desktop, and click Close All Documents.
Note In this tutorial, we have only removed or changed existing topics, but you'll certainly be creating new topics over time as you work in your own projects. Creating a new topic is easy. You can simply right-click a folder or subfolder in the Content Explorer, and from the context menu select New > Topic. Then complete the fields in the dialog and click Add.
How to Replace and Add Knowledge Check Content
In addition to the Course-Content folder in the Content Explorer, this project template has a couple of other folders. One is currently holding topics for knowledge checks that can be added at various spots in the eLearning course to let learners check on their knowledge gained to that point. The question sections in these topics are not intended to be graded or part of a quiz.
-
In the Content Explorer, expand the Course-Knowledge-Check folder.
-
Double-click First-Knowledge-Check.htm to open that topic.
-
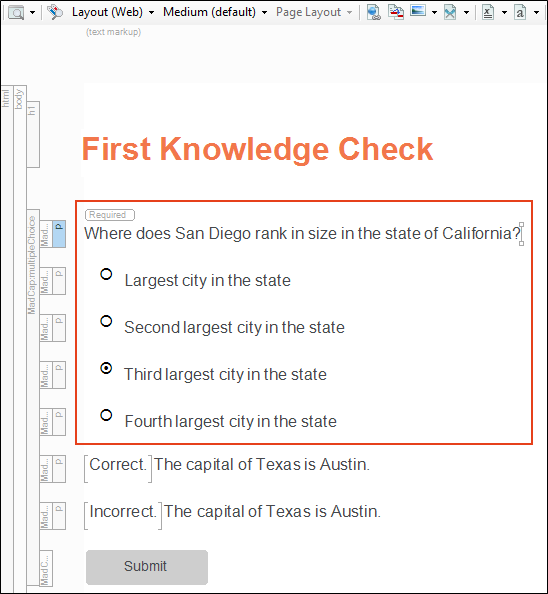
This topic has two knowledge check question sections, including multiple possible answers and instant feedback areas. Replace the question in the first section with the following:
Where does San Diego rank in size in the state of California?
-
This is a multiple choice question, where only one of the answers is correct. This is indicated by the use of radio buttons (circles) next to each answer. Replace the text for the three possible answers with the following.
Largest city in the state
Second largest city in the state
Third largest city in the state
-
Let's add one more possible answer. After the third answer, press ENTER and add the following text:
Fourth largest city in the state
-
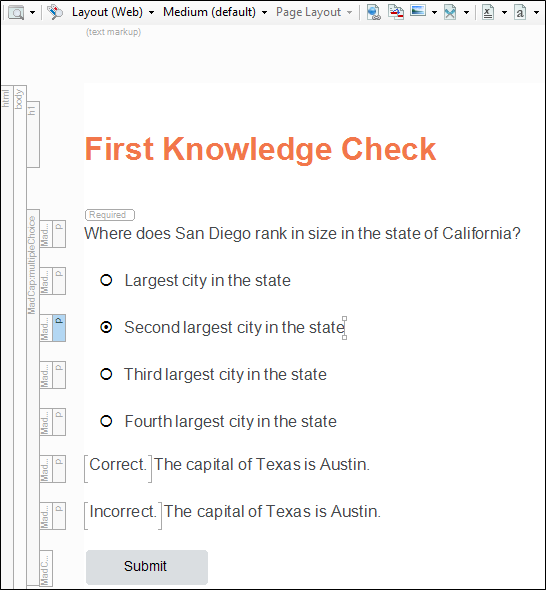
Click the circle next to Second largest city in the state to mark it as the correct answer.
-
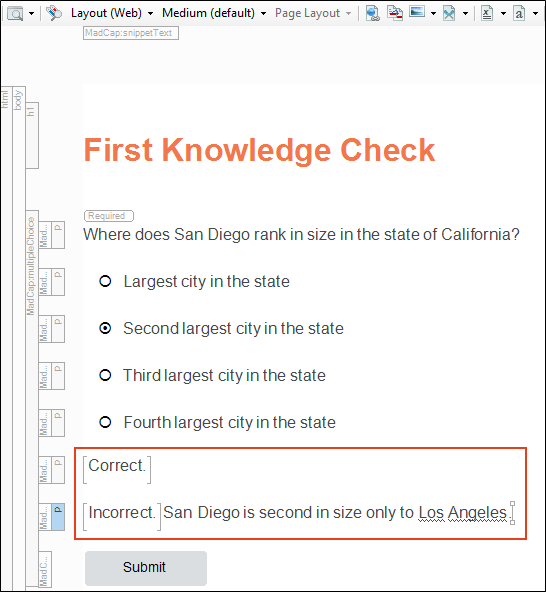
In the feedback area under the answers, delete the first instance of the text "The capital of Texas is Austin." Replace the second instance of this text with the following:
San Diego is second in size only to Los Angeles.
-
Remove the image under the first question section, then scroll down to the second question section.
-
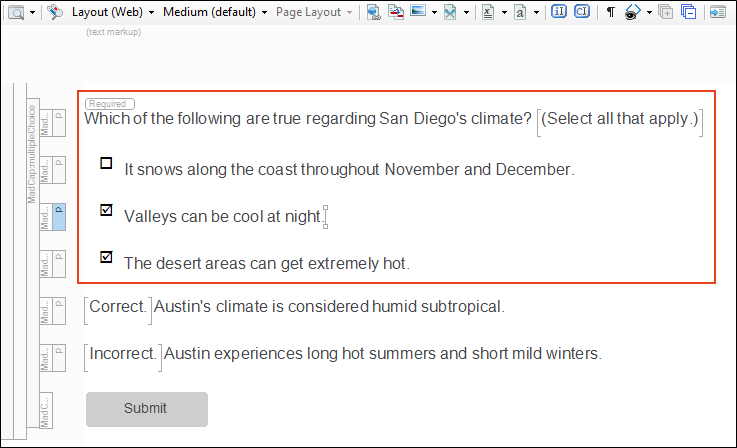
The second section is multiple response, which means that more than one answer can be selected as correct. This is indicated by squares next to each possible answer. Replace the question with the following, leaving the part after it that says "Select all that apply."
Which of the following are true regarding San Diego's climate?
-
Replace the answers with the following:
It snows along the coast throughout November and December.
Valleys can be cool at night.
The desert areas can get extremely hot.
-
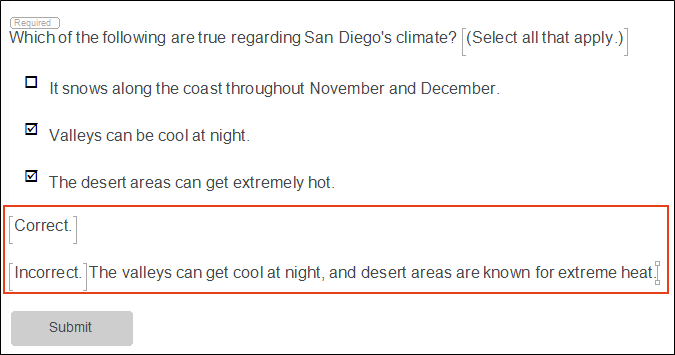
Select the second and third squares so that they have check marks in them. The first square should not be selected as a correct answer. When you are all finished, it should look as follows.
-
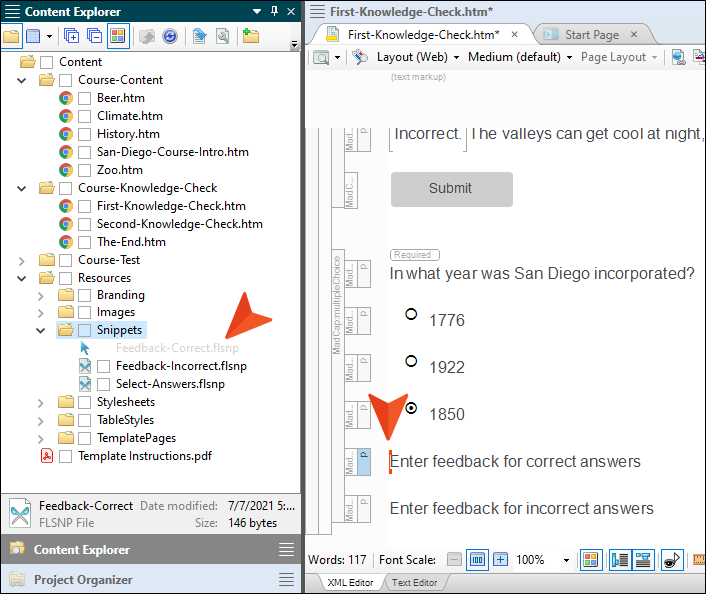
In the feedback area remove the sentence next to "Correct." Then, replace the text next to "Incorrect" with this:
The valleys can get cool at night, and desert areas are known for extreme heat.
-
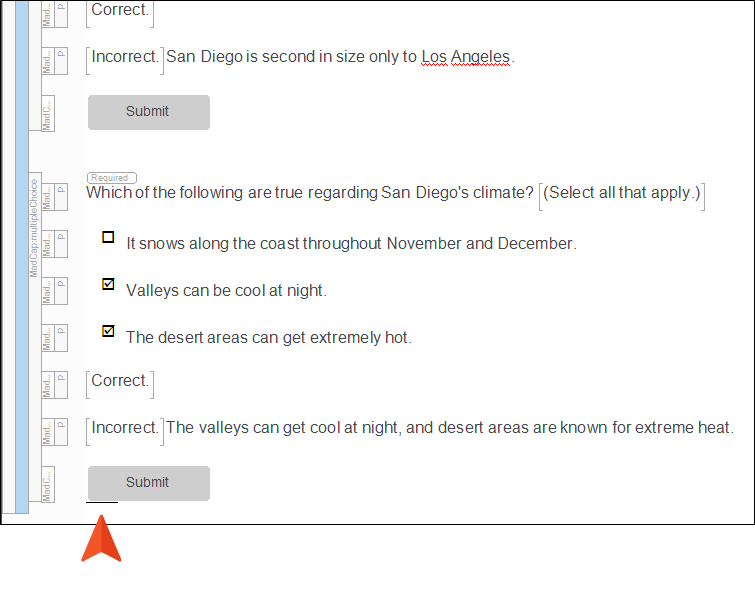
Let's add another multiple choice question. On your keyboard press your down arrow until you see a horizontal cursor under the Submit button.
-
Press ENTER to create a new empty paragraph.
-
In the eLearning ribbon at the top of Flare Desktop, click Multiple Choice (with the circles).

-
For the question, copy and paste this text:
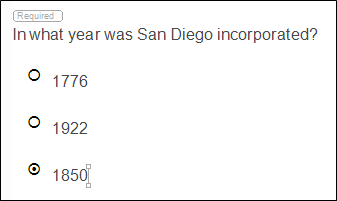
In what year was San Diego incorporated?
-
For the first answer, enter 1776, and press ENTER.
-
For the second answer, enter 1922, and press ENTER.
-
For the third answer, enter 1850. This time, do not press ENTER, since this is the last answer for the question.
-
Click the circle next to 1850, since that is the correct answer.
-
Now let's add some feedback, depending on whether the learner chooses the correct or incorrect answer. In the eLearning ribbon click Add Feedback.
Tip You can also right-click a MadCap structure bar to the left of the content to add feedback (or perform other eLearning tasks).
-
We're going to replace the first line of text with something called a snippet, which is a separate little file containing content that can be reused in multiple places throughout a project. In the Content Explorer, expand the Resources folder. Under that, expand Snippets. Then, click and drag the Feedback-Correct.flsnp file and drop it just before the placeholder text ("Enter feedback for correct answers"). A red bar will guide you as you drag the file, showing you where it will be placed when you release the mouse button.
-
Delete the placeholder text after the inserted snippet.
-
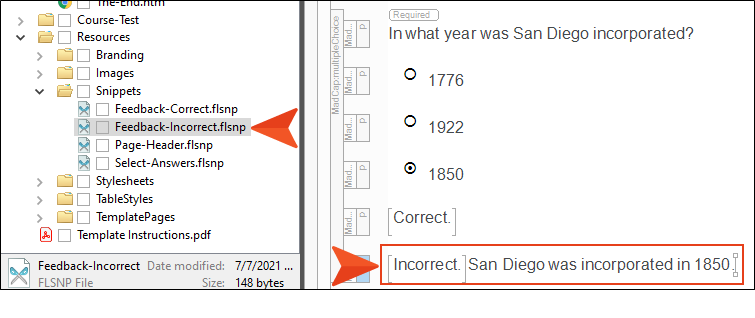
Drag the Feedback-Incorrect.flsnp snippet file in front of the other placeholder text. Then, press your space bar to add a space between the snippet and the placeholder text. Finally, replace the placeholder text with this:
San Diego was incorporated in 1850.
-
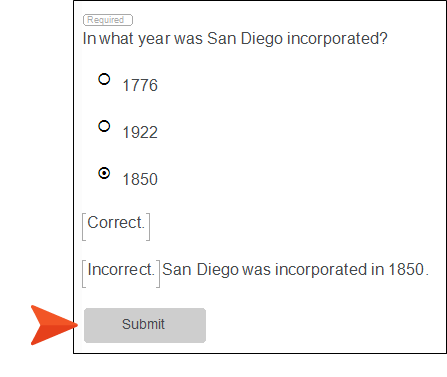
Next, we need a button so that learners can submit their answer. So in the eLearning ribbon click Add Submit Button. A button with the word "Submit" is added at the end.
-
Click
to save your work. -
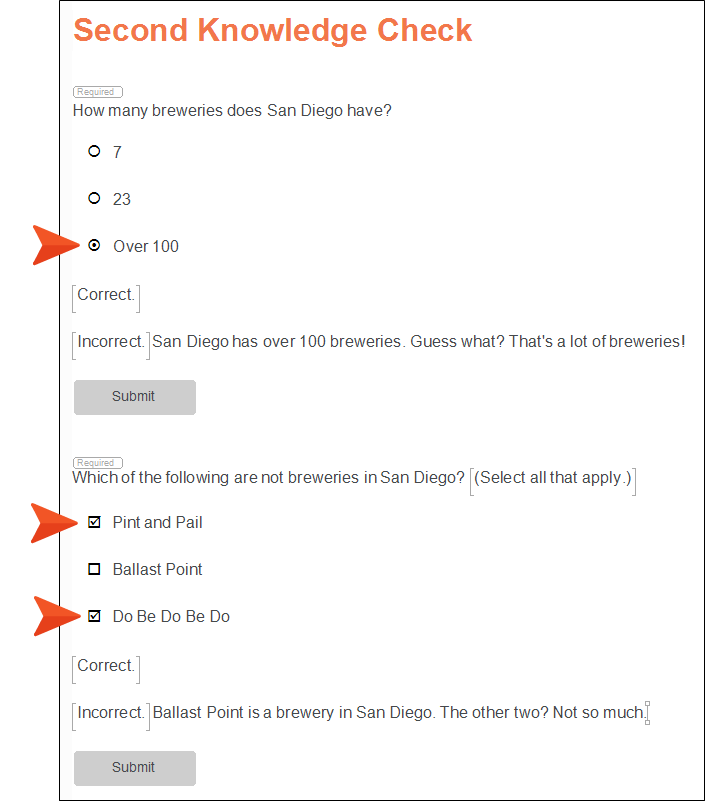
From the Content Explorer, open the Second-Knowledge-Check topic. In the same way as above, replace the two question sections with the following content, including the feedback snippets we used previously. The image below shows which answers you should mark as the correct ones.
First Question Section
How many breweries does San Diego have?
7
23
Over 100
Correct.
Incorrect. San Diego has over 100 breweries. Guess what? That's a lot of breweries!
Second Question Section
Which of the following are not breweries in San Diego? (Select all that apply.)
Pint and Pail
Ballast Point
Do Be Do Be Do
Correct.
Incorrect. Ballast Point is a brewery in San Diego. The other two? Not so much.
-
Click
to save your work. -
Open the topic called The End.htm. We're not going to add any question sections to this topic. We're simply going to use it to show that the learner has reached the end of the course. The only thing you need to do is replace the text Austin, Texas with San Diego, California.

-
Click
to save your work.
Note In this tutorial we are selecting options in the eLearning ribbon to add placeholder content for questions and answers. However, you also have the option of converting existing content into question sections. Just use your mouse to select the content and then select Multiple Choice or Multiple Response in the eLearning toolbar. The first paragraph of your selection will become the question and each paragraph under it will be an answer.
How to Replace and Add Test Content
Now we're going to turn our attention to the topics in the Course-Test folder in the Content Explorer. The purpose of these topics is to provide the contents of a quiz that people can take at the end of the course, and then view their test results.
-
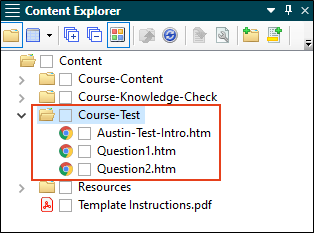
In the Content Explorer, expand the Course-Test folder.
-
Notice the introduction topic for the quiz, as well as five separate topics that hold question sections. For the purposes of this tutorial, let's get rid of some of the question topics. Delete Question3.htm, Question4.htm, and Question5.htm, so that you are left with just the following three topics. When you see the Link Update dialog, select Remove Links.
-
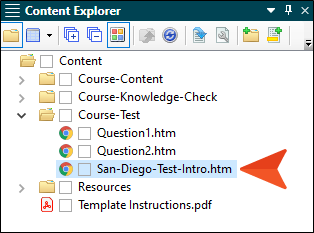
Rename the introduction topic to San-Diego-Test-Intro. When you see the Link Update dialog, select Update Links.
-
Double-click San-Diego-Test-Intro.htm to open that topic.
-
Change the heading to San Diego Test, and change the "Austin" text in the paragraph to San Diego.

-
Click
to save your work. -
In the Content Explorer, double-click Question1.htm to open that topic.
-
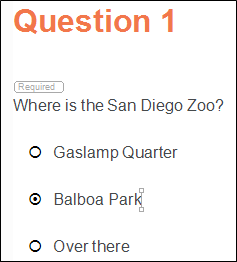
Replace the question with this text:
Where is the San Diego Zoo?
-
Replace the three answers with the following:
Gaslamp Quarter
Balboa Park
Over there
-
Select the circle next to Balboa Park to indicate it is the correct answer.
Note Notice that we do not have feedback areas or a Submit button for this question. We could add feedback, but even then we wouldn't want to add a Submit button because we don't want the results to be shown immediately. Instead, we want the individual to see the results for the entire quiz once it is all completed.
-
Click
to save your work. -
In the Content Explorer, double-click Question2.htm to open that topic.
-
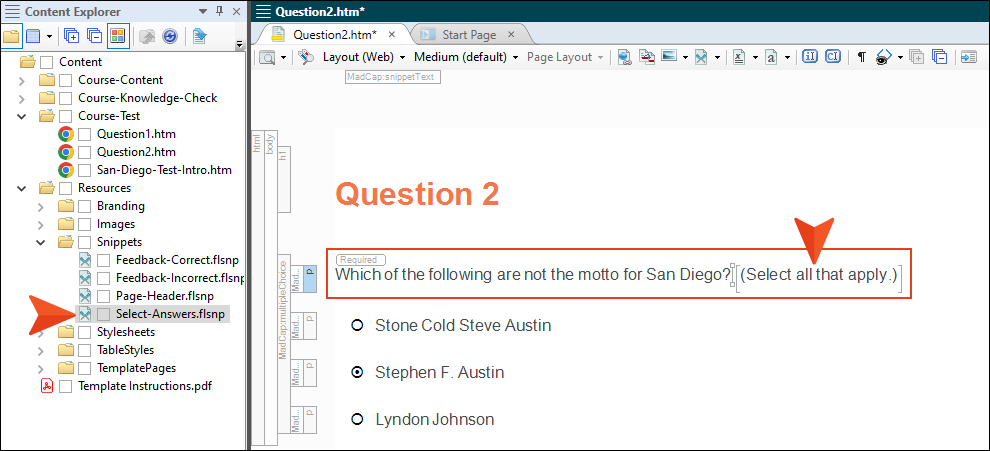
Replace the question with this text:
Which of the following are not the motto for San Diego?
-
From the Content Explorer, expand Resources > Snippets, and drag the file Select-Answers.flsnp directly after the question. Also, add a space between the question mark and the snippet.
-
Replace the three answers with the following:
"America's Finest City"
"You Can't Stop Progress"
"Surf and Chill"
-
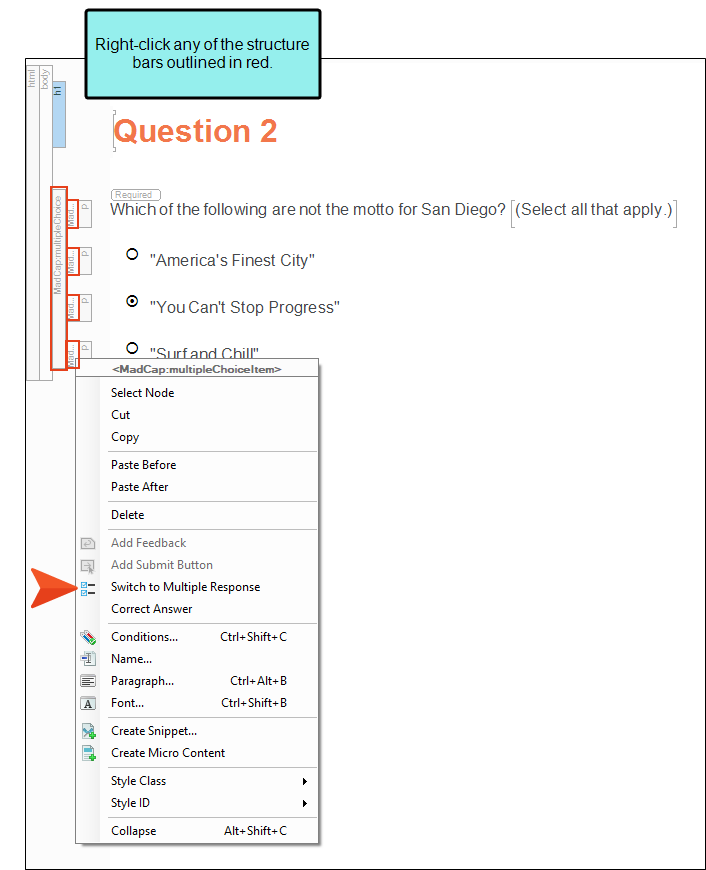
Currently, this is a multiple choice question, where only once answer can be selected. But we want it to be a multiple response question, where multiple answers can be selected. So let's change it. Right-click any of the eLearning structure bars to the left of the content. In other words, right-click one of the bars that corresponds directly to that question section, but don't right-click any of the bars that have the "p" (paragraph) label on them. Then, from the context menu select Switch to Multiple Response.
-
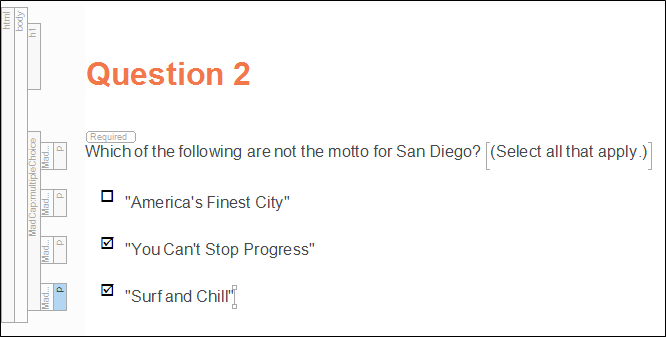
Select the second and third squares to add a check marks.
-
Click
to save your work.


