 ELEARNING TUTORIAL—ADVANCED
To this point, all of our output has been online. But let's say that you also want to generate some print-based output from the same source files. The good news is that the Austin template we're using is already set up for some PDF output. We just need to add our eLearning topics and make a few other adjustments.
Let's create two different PDFs—one designed for a teacher (where the answers are shown), and another for students (where the answers are hidden).
[Menu Proxy — Headings — Online — Depth3 ]
How to Rename a Target
-
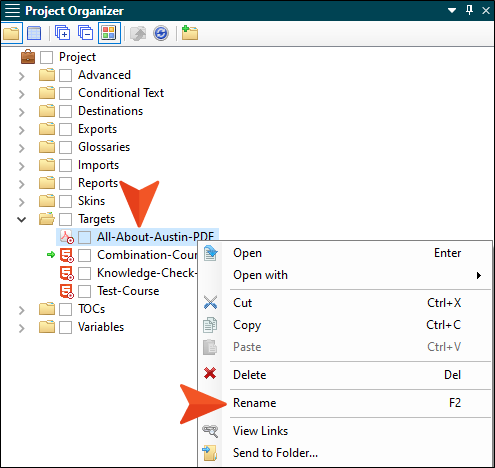
In the Project Organizer, expand the Targets folder, right-click All-About-Austin-PDF, and select Rename.
-
Enter Combination-Course-Teacher for the new name of the target, and press ENTER.
-
Double-click that target to open it.
-
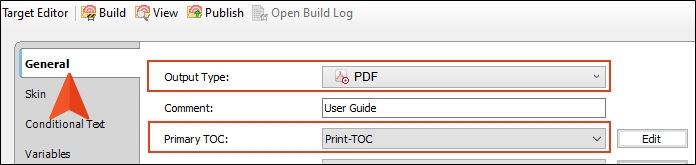
Select the General tab. Notice that the Output Type is set as PDF. Also, from the Primary TOC field, make sure Print-TOC is selected.
-
Select the Conditional Text tab.
-
This PDF is going to be the same as the online Combination Course, except that it is in PDF format. So set the conditions to match the online target for the Combination Course, as shown in the following image.
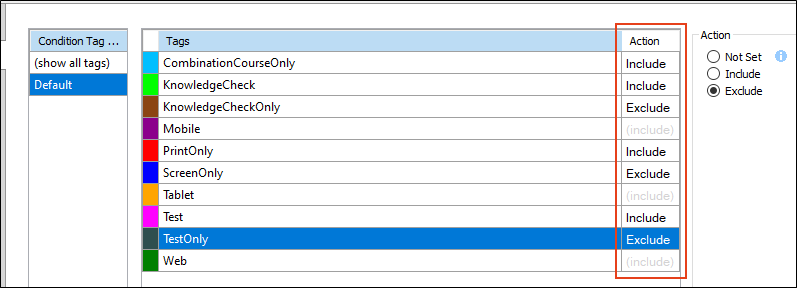
Notice that the Mobile, Tablet, and Web conditions are not explicitly set. That's because those are intended for online output only, where the size of screen changes and affects the content. In this case, we're creating PDF output, so these conditions aren't important to set.
Note You could create additional conditions if there is content that you want to separate for the teacher and student versions of the PDFs. However, we're not going to do that in this tutorial. There are a couple of places where the PDFs will differ in this tutorial. First, the subtitle will be different, and in one PDF the answers will be shown while they will be hidden in the other PDF. But we're going to handle that using a couple of other features, so we don't need any special conditions for those purposes.
-
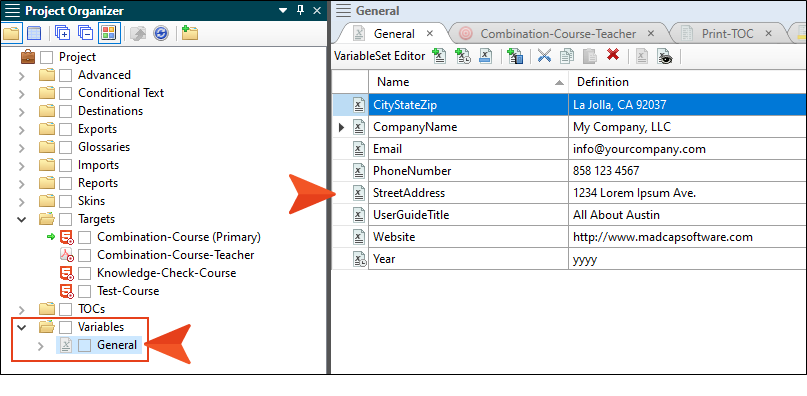
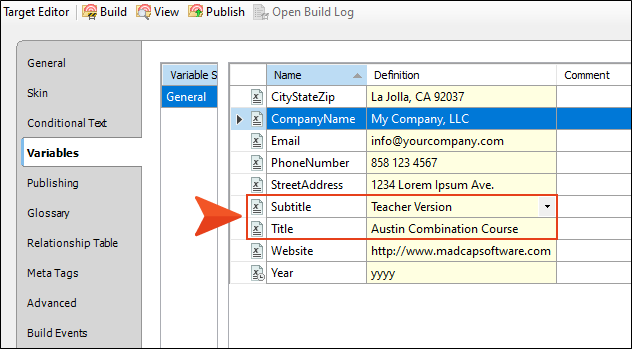
On the left side of the Target Editor, select Variables. There is an existing variable that we want to use, and another variable that doesn't exist yet, so we'll create it below and then come back to the target afterward.
-
Click
") to save your work.
to save your work.
How to Create a Variable
-
In the Project Organizer, expand the Variables folder.
-
Double-click General (which is the only variable set file that we currently have in the project; it contains all of the variables that we have so far). The Variable Set Editor opens to the right.
-
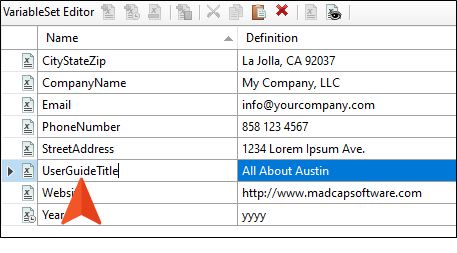
First, let's change the name of the existing variable that we want to use. In the grid, click UserGuideTitle and press F2 on your keyboard.
-
Replace the text with the more simple Title. Then, change the Definition cell to Austin Combination Course, and press ENTER.

-
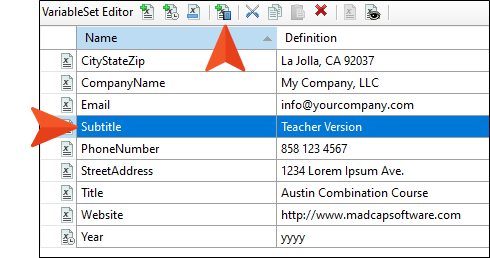
In the local toolbar, click
 . This adds a new row to the grid.
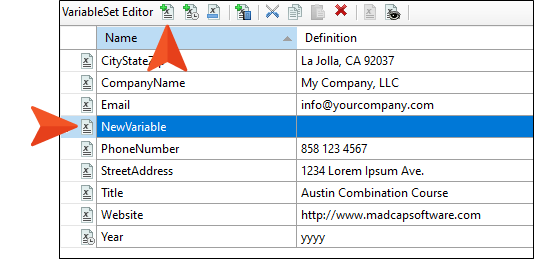
-
Replace the NewVariable text with Subtitle, and in the Definition cell enter Teacher Version.
-
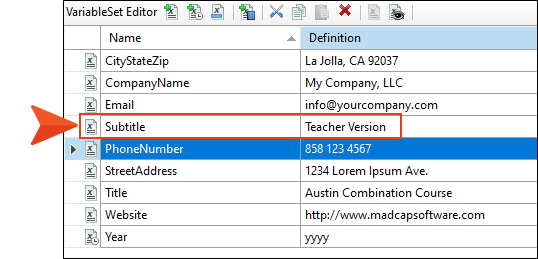
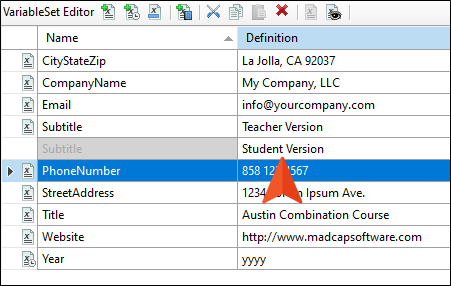
Now we're going to do something really cool and create an alternative definition for that variable. Select the Subtitle variable row, and in the local toolbar click
 .
.
-
In the empty cell that is created, enter Student Version and press ENTER.
-
Click
to save your work. -
Go back to the Combination-Course-Teacher target, and look at the variables on the Variables tab. Notice the new variable and the one that we renamed.
How to Adjust Other Target Settings
There are obviously a lot of settings that we could change in our PDF target, but we'll focus on just a couple more and then move on.
-
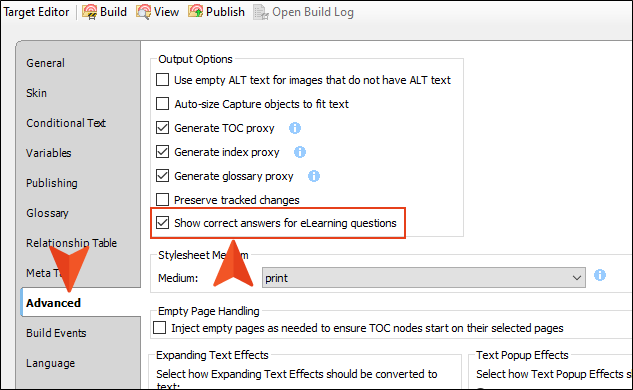
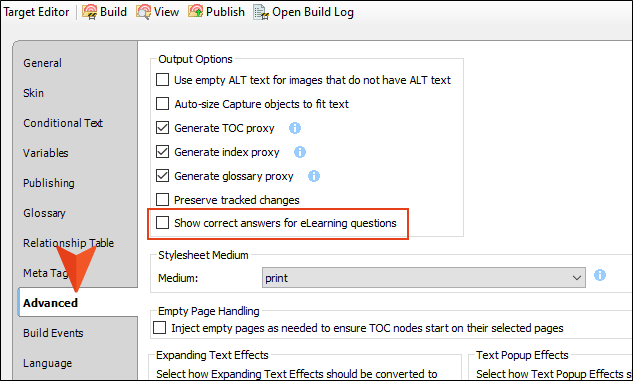
In the Target Editor, select the Advanced tab, and enable the option Show correct answers for eLearning questions.
-
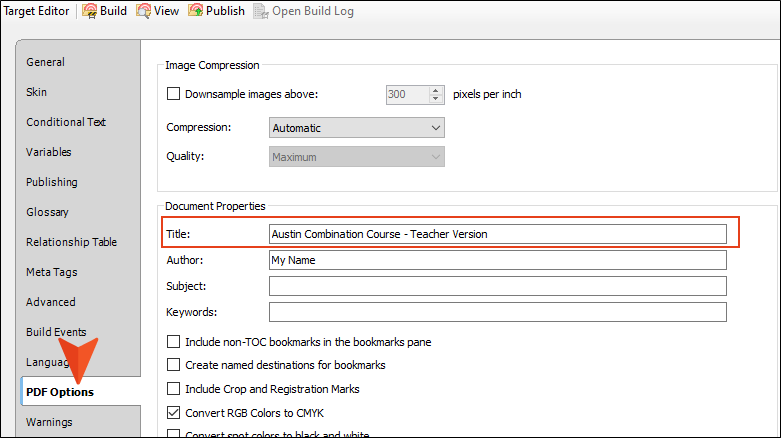
Select the PDF Options tab, and replace the text in the Title field with Austin Combination Course - Teacher Version. You can also replace the Author field text with your own name if you want. These will not be shown on any of the PDF pages, but they will be reflected in the PDF file properties.
-
Click
to save your work.
How to Edit the Table of Contents (Outline)
We already have a table of contents (TOC) file in this project designed for PDF outputs, so we can edit that and use it for both of our PDF outputs. Here is a very important thing to know, however: The TOC file does not actually generate the TOC for print-based outputs such as PDF. Instead, it functions more as an outline. When you generate a PDF target using that TOC file, Flare Desktop will stitch all of the topics together that are linked in that TOC, and it will do so in the order that they appear in the TOC Editor.
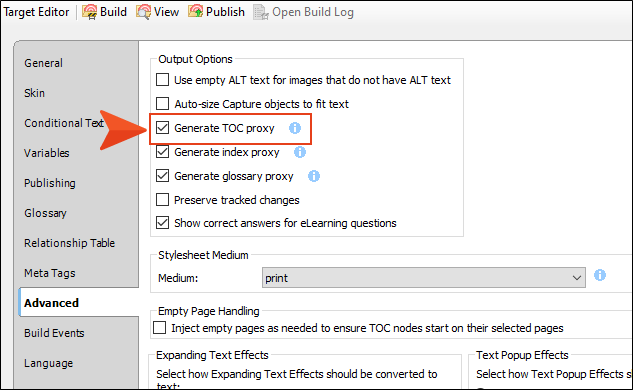
So what about the generated TOC in the output? There are a couple of ways to create that, and this project is set up to generate the TOC automatically. If you go back to the Target Editor, you can see this option on the Advanced tab.
-
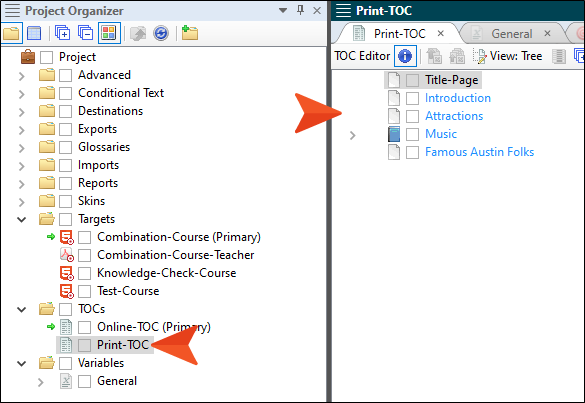
In the Project Organizer, expand the TOCs folder, and double-click Print-TOC to open it.
When we're done, this TOC (outline) will look much like the TOC being used for the online outputs. Sure, we could actually use the same TOC for both online and PDF outputs, but in this project we're separating them to make it clear what's going on. In your actual projects, you will find that there are times that it makes sense to use a single TOC, but other times when it's better to use multiple TOCs. A lot of that depends on how complex the TOCs can get over time.
In our print TOC file, there is one entry at the very top (Title-Page) that is unique to this TOC. This entry is connected to a print-only topic that we created; it is designed to show the first page of the PDF.
-
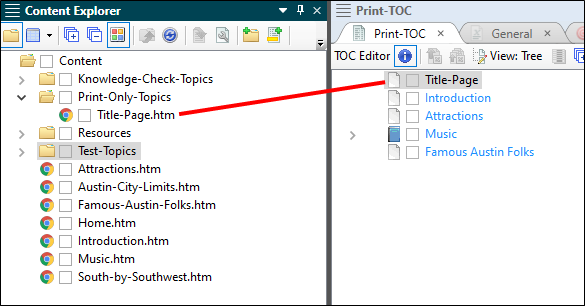
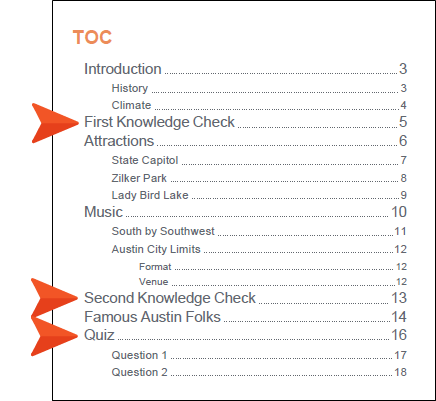
In the Content Explorer, expand the Knowledge-Check-Topics and Test-Topics folders. Then, drag the topics to the TOC file as shown in the following image. Unlike the TOC for the online output, however, this TOC does not need to have a test node, even though you are including the test topics. That's because the test node's functionality only kicks in for online HTML5 outputs.

-
Since we're dealing with pages in an PDF (which is often divided into chapters), instead of online topics, we also need to tell Flare Desktop where to start new chapter breaks. At the same time, we can specify which page layout to use for a particular entry in the TOC file. A page layout in print-based output is used to control page size, configuration, headers, footers, pages numbers, etc. To start, select the First Knowledge Check entry, and in the local toolbar click
 .
.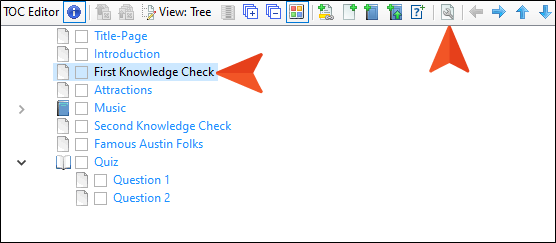
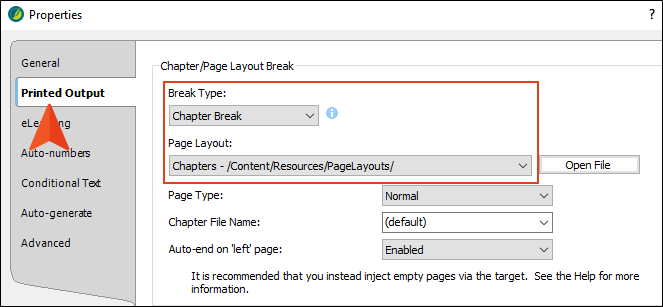
-
In the Properties dialog, select the Printed Output tab. From the Break Type field select Chapter Break, and from the Page Layout drop-down select Chapters. Then, click OK.
-
Repeat this step for the Second Knowledge Check and Quiz entries in the TOC. However, do not do it for Question 1 and Question 2, since they are not considered the start of new chapters.
-
Click
to save your work.
How to Create a Subtitle Style
We already have a style that controls the look of the title for our PDF outputs, but because we're adding a new subtitle, we want to create another style just for that.
-
In the Content Explorer, go to Resources > Stylesheets, and open the stylesheet.
-
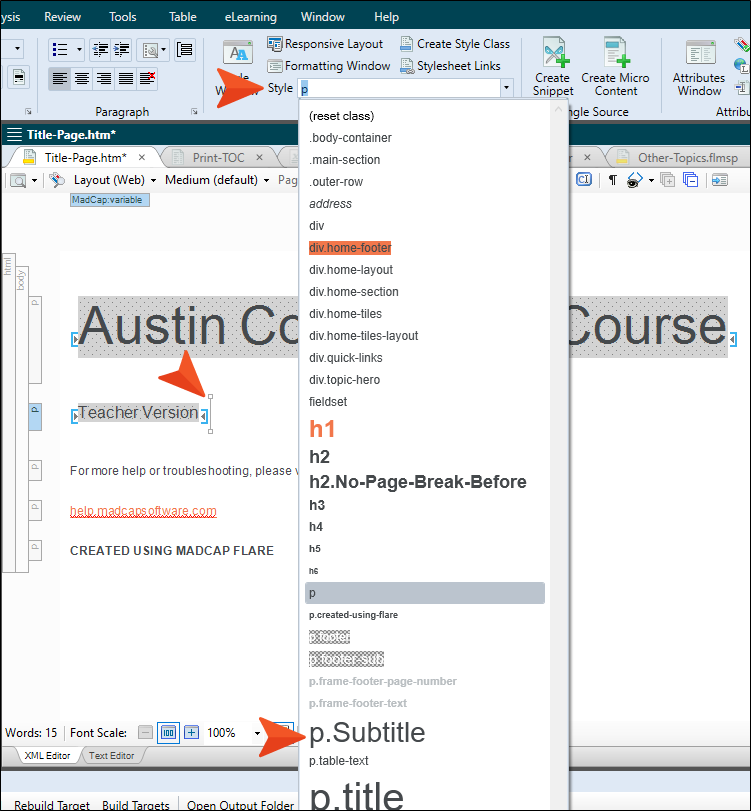
On the left side of the Stylesheet Editor, select the p style.
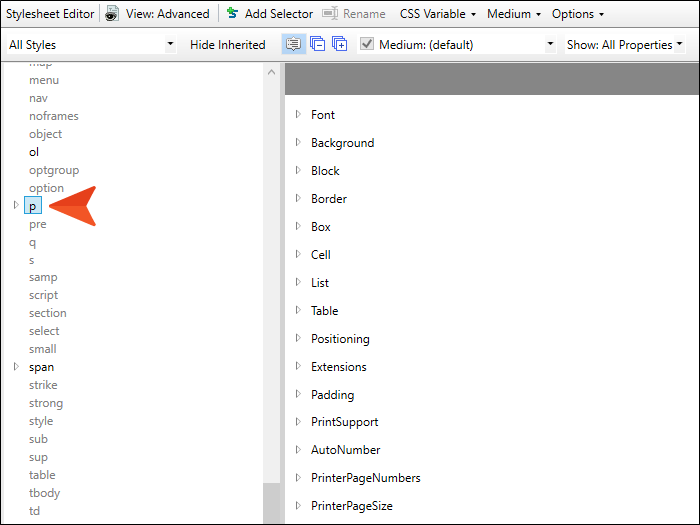
-
In the local toolbar, click Add Selector.
-
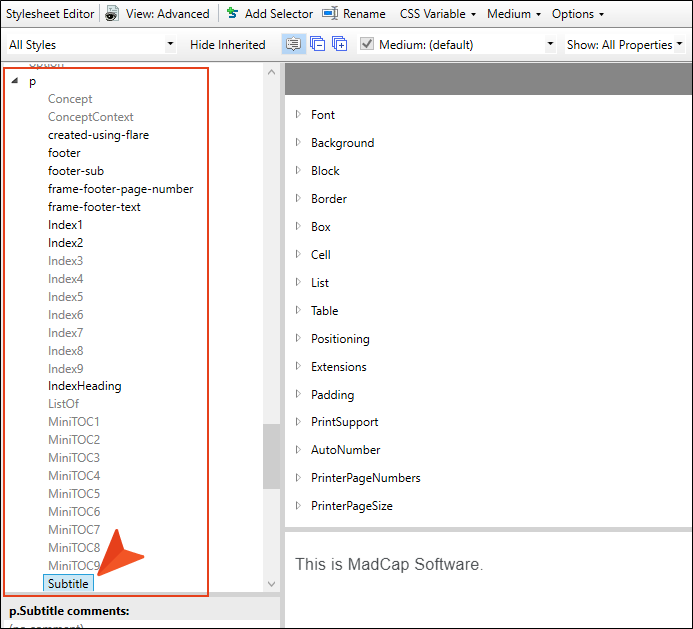
In the dialog, the HTML Element field is already set correctly. In the Class Name field, enter Subtitle. Then, click OK. This adds the new style class to the stylesheet.
-
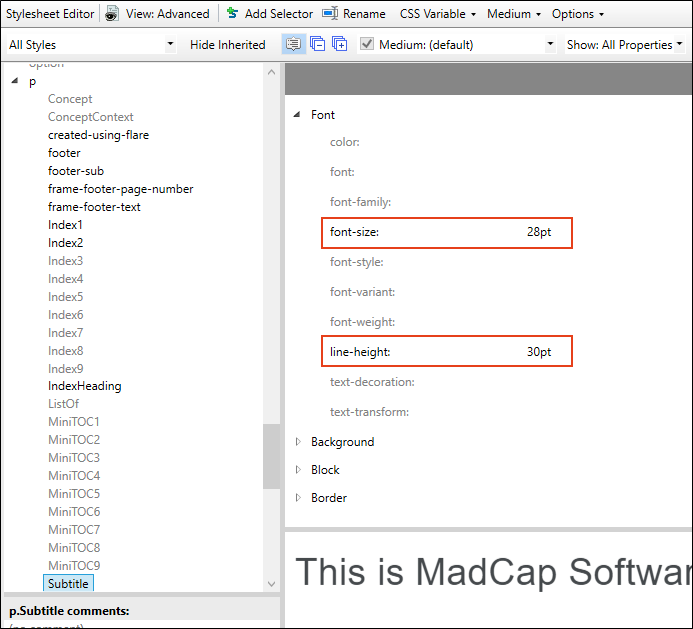
With that new class selected on the left, go to the properties area on the right and expand Font. Then, set the font-size to 28pt and the line-height to 30pt.
-
Click
to save your work.
How to Edit the Title Page
-
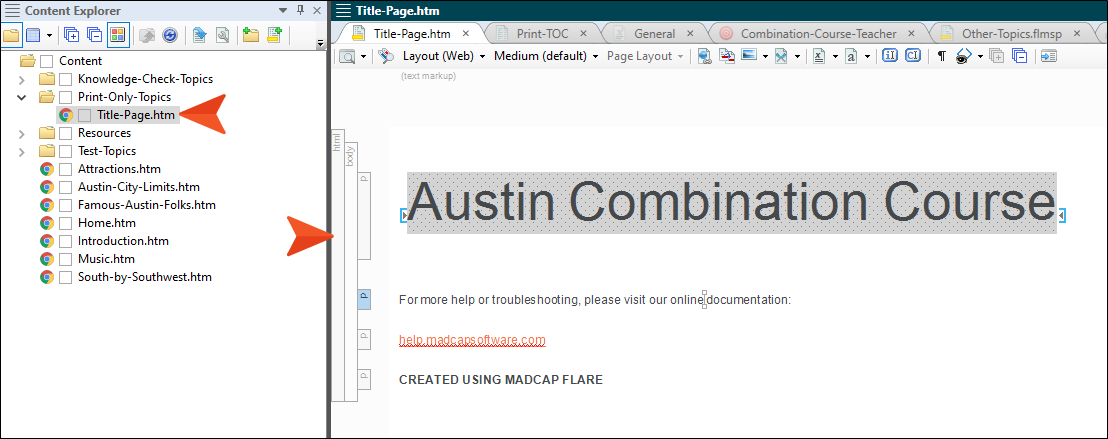
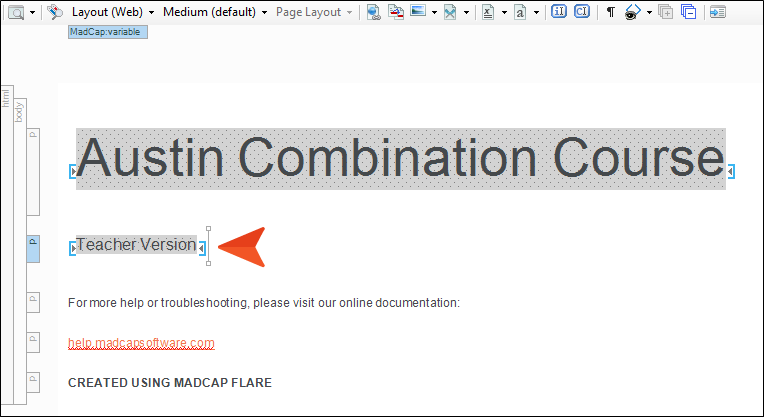
In the Content Explorer, expand the Print-Only Topics folder, and double-click Title-Page.htm to open it.
-
Click at the end of Austin Combination Course (which is a variable inserted into the topic), and press ENTER to create a new empty paragraph.
-
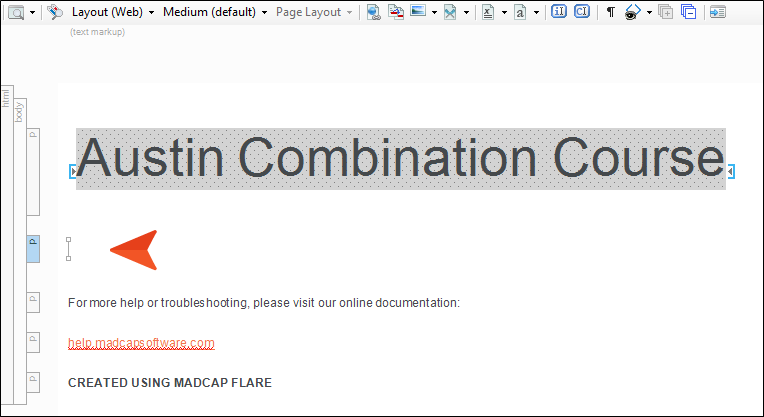
In the local toolbar, click
 (the face of the button, not the down arrow).
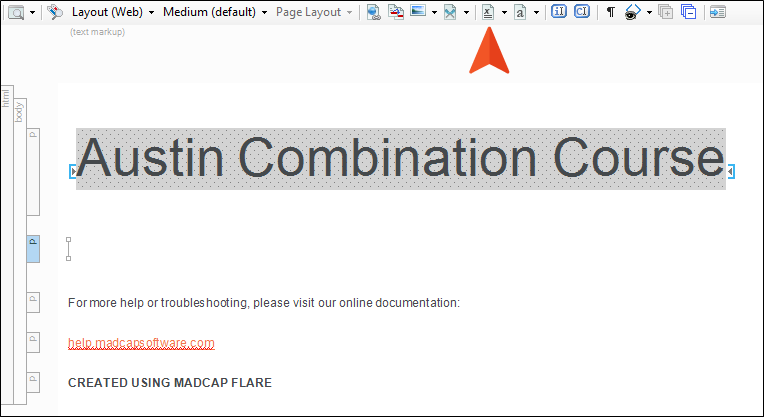
-
In the dialog, select the Subtitle variable, and click OK. This adds the variable to the topic.
-
With your cursor still located on the line where you inserted the variable, select the Home ribbon at the top of Flare Desktop. Then, from the Style drop-down, select p.Subtitle. The size of the variable text increases in the XML Editor.
-
Click
to save your work.
How to Create a New PDF Target
We already have our target for the teacher version of the PDF output. Now we just need a second target for the student version. The easiest way to do this, since the two targets share so many settings, is to make a copy of the first one.
-
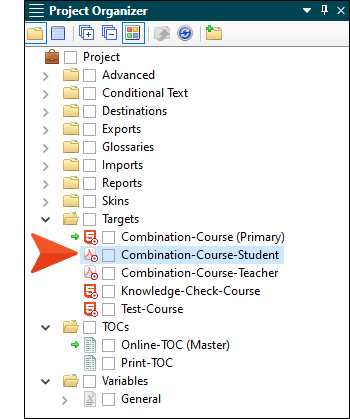
In the Project Organizer, expand Targets.
-
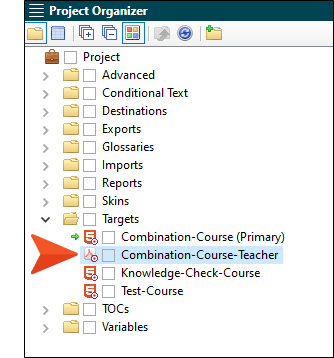
Select Combination-Course-Teacher and press CTRL+C on your keyboard. Then press CTRL+V.
-
Rename the copy of the target to Combination-Course-Student, and press ENTER.
-
Double-click that new target to open it.
-
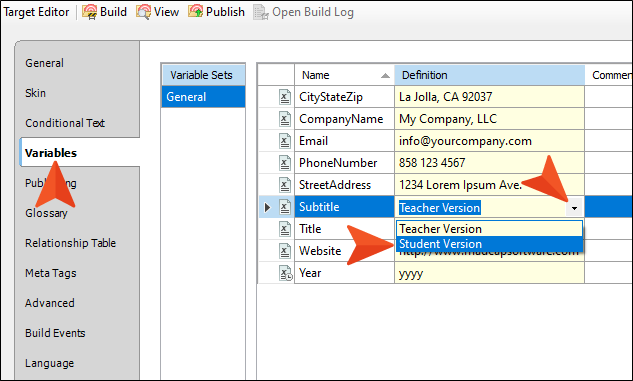
Select the Variables tab.
-
In the Subtitle row, click the down arrow and select Student Version.
-
Select the Advanced tab.
-
Remove the check mark from the option Show correct answers for eLearning questions.
-
Select the PDF Options tab.
-
Change the text in the Title field to Austin Combination Course - Student Version.

-
Click
to save your work.
How to Build and View the PDF Targets
-
In the local toolbar of the Combination-Course-Student target, click Build.
-
When the build finishes, double-click that row in the Builds window pane at the bottom of Flare Desktop.
-
On the first page, notice the subtitle is using the Student Version variable definition. The spacing between the wrapped title (Austin Combination Course) looks like it might be too much, but you can fix that by adjusting the line height for that p.title style class.

-
On the second page, notice the TOC was generated automatically, and the eLearning topics were recorded as separate chapters, because we told Flare Desktop to do that.
-
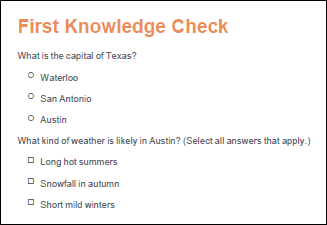
On page 5, notice that the answers for the First Knowledge Check are not shown, only the questions. If you scroll down, you'll see it's the same for the other knowledge check and the quiz pages.
-
Build and view the output for the Combination-Course-Teacher target.
-
Notice the subtitle on the first page is using the Teacher Version variable definition.

-
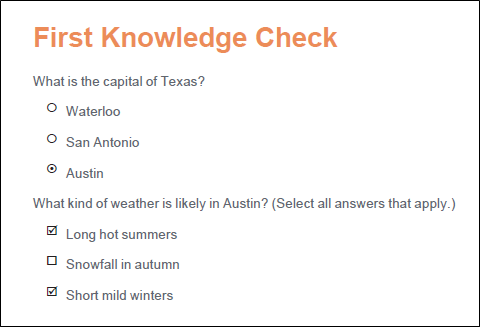
On page 5 (and on the other pages where questions occur), notice that the answers are shown.
-
Close the PDFs.
-
In Flare Desktop, we've opened a lot of files during the course of this tutorial. Let's close them all at the same time. Select the Window ribbon at the top of Flare Desktop, and select Close All Documents. Closing all of your files can help Flare Desktop to load faster next time if you have the application set to always automatically load the last files that you had open in a project (File > Options > General > Auto-Reload Documents).


