Creating Text File Filters
When creating a project in Lingo, you can use a filter to translate only specific content in a folder or in certain file types. Filters allow you to set restrictions on the content in a file that is available for translation. Once you create a filter, you can save it to reuse it later, and you can apply it to all other files of the same type in the project.
How to Create a Filter for Text Files
-
From the Filter drop-down, select Create New.
- Enter a name for your filter and click OK. The File Filters dialog opens.
- (Optional) You can do one of the following before saving your current filter:
- Import a Filter Click Import. In the dialog that opens, locate the filter you want to import, then click Open.
Export a Filter Click Export. In the dialog that opens, select the location you want to export the current filter, then click Save.
- Select a Filter From the Filter drop-down, select an existing filter.
- Create a New Filter Click
 .
. Delete a Filter Select a filter from the Filter drop-down, then click
 .
.Note If you delete a filter, it will be removed from all translation projects where it is currently in use.
-
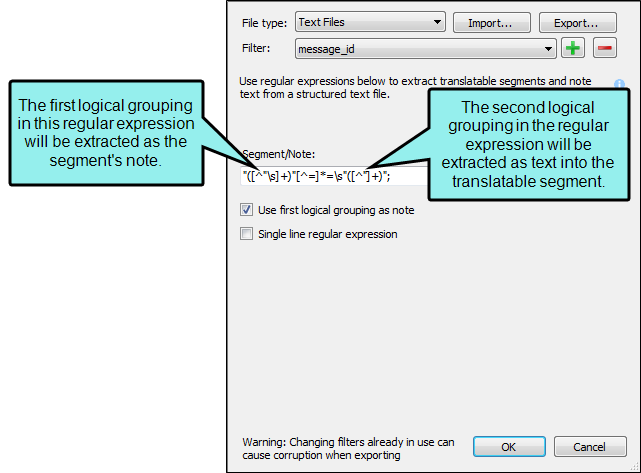
In the Segment field, enter a regular expression to identify the text you want to translate.
-
In the Note field, enter a regular expression to identify the text you want to include as a note for each segment.
Example
You have a text file that looks like this:
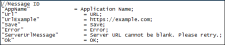
You want to include everything on the left side of the text file (between the quotation marks) as a note in your translatable file, and everything on the right side of the text file (after the equal sign) as the segment for translation.
To accomplish this, you would create a filter using regular expressions that look like this:

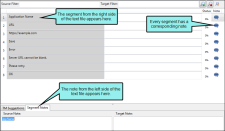
When you create the project, it will look like this:
- Click OK.