If you are translating a project into multiple languages, you may need to use different fonts for each language. For example, if you translate a document into French, Chinese, and Arabic, each language uses different character sets. Using fonts appropriate for the language's character set ensures that the characters display correctly when viewed in the output. You can use Lingo's font mapping feature to locate the fonts already used in the source Flare project and replace them with fonts that are supported by each target language. The mapped fonts will be used when the project is exported back to Flare.
You can create, edit, and delete font maps from the Manage Font Maps dialog.
Example
You are translating a Flare project that was originally written in English. You need to translate it into French and Arabic. You know that each of these documents will use different fonts in the final output, so you use Lingo to create a font map.
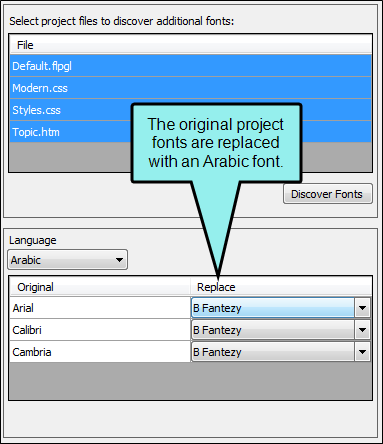
First you scan your project files for fonts. The files are currently using Arial, Calibri, and Cambria. This is fine for French, which does not need to display a special character set, and therefore does not need a special font. However, you need to use a different font for Arabic in order to support the language's character set. You switch the language to Arabic and map each of the fonts in your project to B Fantezy, which is an Arabic font.
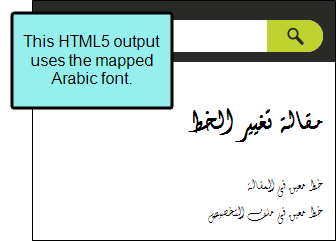
When the author exports the Arabic project back to Flare, the output uses B Fantezy and all of the characters are supported.
[Menu Proxy — Headings — Online — Depth3 ]
How to Create a Font Map
-
Select Resources > Manage Font Mapping.
The Manage Font Maps dialog opens.
- Click
 . The Create New Font Map dialog opens.
 - In the field, enter a name for the font map.
- Click OK.
- In the Font Map Files dialog, click OK to close the dialog, or edit the new font map to assign font mappings.
How to Edit a Font Map
-
Select Resources > Manage Font Mapping.
The Manage Font Maps dialog opens.
- Select the font map you want to edit.
- Click
 . The Modifying Font Map dialog opens.
 -
From the Language drop-down, select the target language for which you want to map fonts.
Note You can only select target languages currently associated with the project.
-
In the File grid, select the files that you want to scan for fonts.
Note Lingo scans the following file types for fonts:
- Page layouts (.flpgl)
- Snippets (.flsnp)
- Stylesheets and table stylesheets (.css)
- Template pages (.flmsp)
- Topics (.htm)
-
Click Discover Fonts. Lingo scans the file(s) you selected. Located fonts appear in the Original column of the grid at the bottom of the dialog.
- From the Replace drop-downs next to each Original font, do one of the following:
- Choose a New Font Select a named font if you want to use a different font for the selected target language.
- Keep the Original Font Select (none) if you want to keep the original font.
- (Optional) Repeat steps 4-7 for each additional target language.
- Click OK.
- (Optional) If you want to use this font map in your project, select the check box in the In Use column. You can use one font map per project.
- Click OK.
How to Delete a Font Map
-
Select Resources > Manage Font Mapping.
The Manage Font Maps dialog opens.
- Select the font map you want to delete.
- Click
 .
. -
When asked if you are sure you want to delete the font map, click OK.
Warning Deleting a font map is permanent. Deleted font maps are removed from all Lingo projects.
-
In the Font Map Files dialog, click OK.