Effects allow you to change the look of an object. Although the effect area can be spread out over the frame or moved off of the object completely, it is still associated with that object and is applied only to that object. If you delete an object to which an effect is applied, even if the effect area is not on top of the object, the effect is also removed.
[Menu Proxy — Headings — Online — Depth3 ]
Examples
Example — Opacity, Gray Scale, and Blur
You can associate opacity, gray scale, and blur effects with image objects.
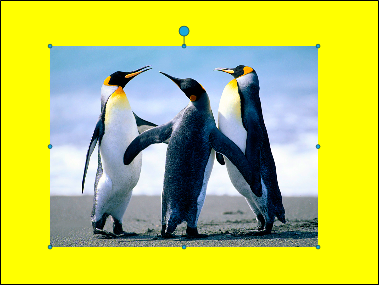
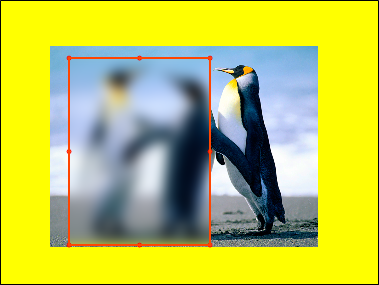
Here is an example of an image object on a frame with a yellow background without any effects applied.
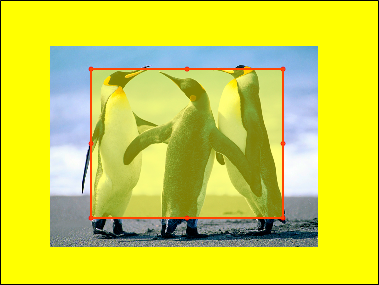
This is an example of an opacity effect with the mask set to inside. The area inside of the red effect area is a little more translucent than the rest of the frame, so you can see the frame's yellow background through the image object.
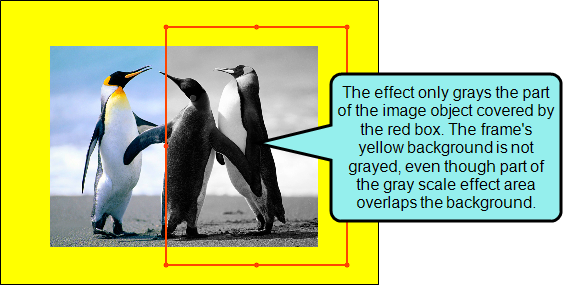
This is an example of a gray scale effect with the mask set to outside. Only the area outside of the effect area is gray. The effect only changes the color of the image object, so the frame's yellow background is not affected, even though it is outside of the red effect area frame.
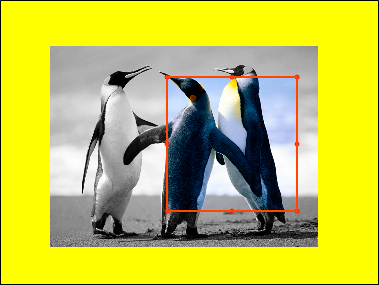
This is an example or a blur effect with the mask set to inside and the blur radius set to 20, meaning that only the two penguins on the left are blurred.
Example
You can associate a clip effect with any kind of object.
Let's say you want to show part of an object, then slowly widen that area to show more of the object until the entire object is shown. In other words, you want to do a big reveal. To do this, you would use a clip effect.
First, add an object to the frame.
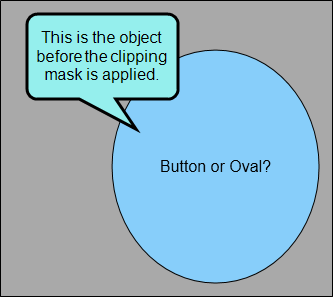
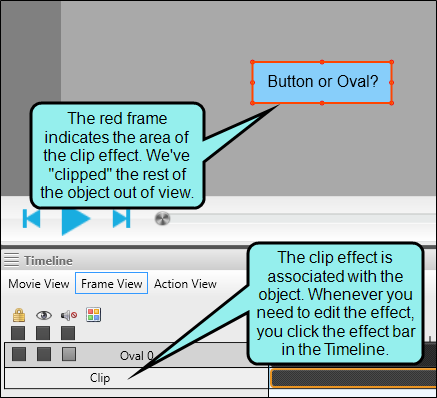
Now select Home > Effects > Clip. In this example, everything except the part of the object covered by the mask, or the red rectangle, will be "clipped" out of the frame.
You can now add size and position keyframes to the clip effect in order to slowly widen the mask area and reveal more of the frame.
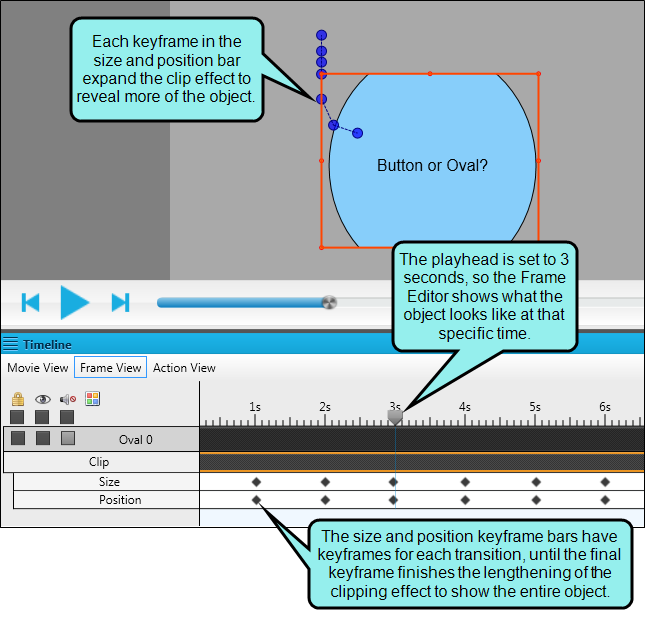
You can preview your progress as you work by pressing the Play button in the preview bar, or by dragging the playhead to the specific keyframe you want to check.
How to Add an Effect
- Open a movie that contains objects, or add an object to a frame.
- Double-click the object. The Object Properties window pane opens.
-
In the Timeline window pane (View > Timeline), do one of the following:
- For all standard object types, click Frame View. Any action objects converted to objects will also be in this view.
- For action object types, click Action View. Any objects converted to action objects will also be in this view.
-
Select the Home ribbon. In the Insert section, select Effects, then select one of the following effect types:
-
Clip Adds a clipping mask that lets you hide part or all of the frame. You can apply clip effects to any object type.
- Opacity Sets the level of transparency of the effect area. You can apply opacity effects to image objects.
- Gray Scale Changes the effect area to shades of gray. You can apply gray scale effects to image objects.
-
Blur Blurs the effect area. You can apply blur effects to image objects.
After an effect is selected, a red effect area frame appears on the object that was selected, and the effect bar appears on the Timeline. Additionally, the Object Properties window pane will change to the Effect Properties window pane.
-
-
In the Effect Properties window pane, do the following, if necessary.
To Change the Position and Size of the Effect Area
- Expand the Object Layout section and make the desired adjustments:
- Position Select a different position on the frame for the effect area. The first field sets the horizontal position, and the second field sets the vertical position. Manually change the position of the effect area by clicking on the red effect area frame and dragging it to a new place in the Frame Editor.
- Size Select a different size for the effect area. The first field sets the width, and the second field sets the height. Manually change the size of the effect area by clicking on the edges of the red effect area frame and dragging them to the desired height or width.
To Change the Direction of the Effect Area
- Expand the Mask section and select from the following:
- Inside Everything inside of the red effect area frame will have the effect applied to it.
- Outside Everything outside of the red effect area frame will have the effect applied to it.
Note Masks are not available for clip effects. You can only clip inside the red effect area frame.
To Change the Mask Properties
The mask properties are only applicable to blur and opacity effects.
- Opacity Expand the Opacity Mask section and drag the slider to the desired percentage. The higher the percentage, the more opaque the effect area will become. In other words, if you set the opacity to 100%, the object will be displayed as a fully opaque object. If you set the opacity to 50%, the background will show through the object. If you set the opacity to 0%, the object will be completely transparent, and you will be able to clearly see the background.
- Blur Expand the Blur Mask section and enter a number in the Blur Radius field. The higher the number, the more blurred the effect area will become.
- Expand the Object Layout section and make the desired adjustments:
-
Click
") to save your work.
to save your work.
What’s Noteworthy?
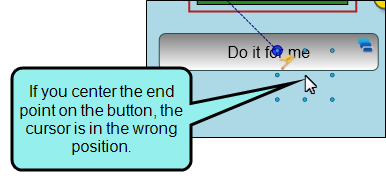
Tip When applying position keyframes to an object or effect, the position keyframe location is placed at the upper left corner of the object. Depending on the type of path you are drawing, you may want to slightly adjust the object's trajectory to account for the space between the upper left corner of the object and the middle of the object.
For example, if you have a cursor object and you need it to "click" a button, you may want to position the trajectory slightly above and to the left of the button, so it appears that the cursor is in the middle of the button.

Note You can add clip and shadow effects to any object type. You can add opacity, gray scale, and blur effects to image objects.
Note You can only apply one clipping effect per object.
Note The shadow effect is applied using the Object Properties window pane. See Adding Shadow Effects.
Note When applying position keyframes to an object or effect, the position is measured from the upper left corner of the object.
Note Each effect area is tied to a particular object and does not affect other objects or background elements. Although you can move the red effect area frame completely off the object, the effect is still only applied to the object itself. For example, if you apply an inside gray scale effect to an image object and move the effect frame partially off the image object, the effect will gray the area of the object it covers, but the background covered by the effect is not grayed.