You can set anchors on many objects that you add to
[Menu Proxy — Headings — Online — Depth3 ]
How to Set Object Anchors
- Open a frame containing an object you want to anchor.
- Select Tools > Anchors. If the box is checked, the anchors are visible. If the box is unchecked, the anchors are hidden.
- Click on the object so that you can see the anchor arrows. Then click on any arrows on the sides of the object that you want to lock.
- Click
") to save your work.
to save your work.
Note You can also set anchors on the Rectangle section of the Object Properties window pane. Simply click the object and then expand the Rectangle section.
Example
Example
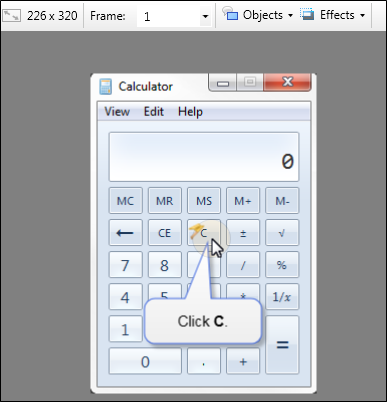
Let's say that you have added a bubble callout to a frame, like this:
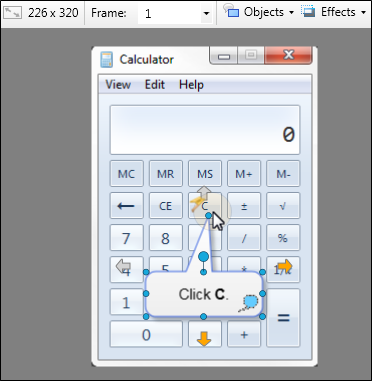
If you were to resize the movie, decreasing its size without any anchors on the callout, the results would look like this:

Notice that the position of the callout stayed exactly as it was.
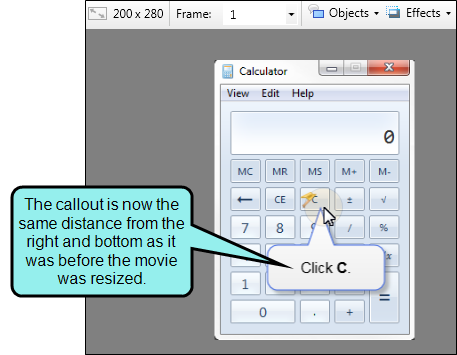
Let's say that you want the callout to remain the same distance from the right and bottom sides of the frame when it is resized. In order to achieve this, you would first select the option to show object anchors by selecting the Tools ribbon and in the Object section, checking the Anchors check box. Now when you click on the object, you will see arrows on each side of the object.
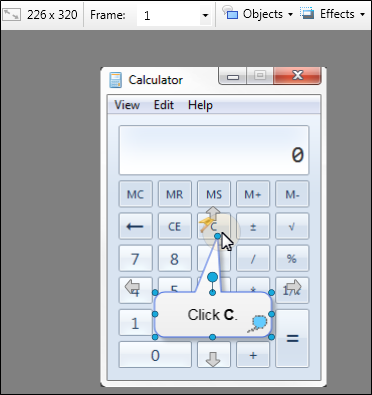
To set anchors on the right and bottom sides, you would click those arrows so that they become colored.
Now when you resize the movie, the callout maintains the same distance from the right and bottom sides of the frame.