After you create a movie, you may want to enlarge or reduce the size of the frames. This is easily done by adjusting the settings in the Movie Properties dialog. All frames in the movie will be resized according to the settings you provide. Any objects on the frames (e.g., callouts, shapes, lines) will remain their original size.
[Menu Proxy — Headings — Online — Depth3 ]
How to Resize a Movie
-
Select Movie > Properties.
The Movie Properties dialog opens.
- Select the Movie Size tab.
-
You can resize the movie either by entering the size values manually or by using the screen rectangle to draw the new size.
To Enter Size Values Manually
Change the values in the appropriate field(s)
- X Enter the distance (in pixels) that you want the frame to be located from the left edge. This field can be used if you always want to record from a specific position on the screen.
- Y Enter the distance (in pixels) that you want the frame to be located from the top edge. This field can be used if you always want to record from a specific position on the screen.
- Width Enter the new width (in pixels) for the frames.
- Height Enter the new height (in pixels) for the frames.
To Use the Screen Rectangle
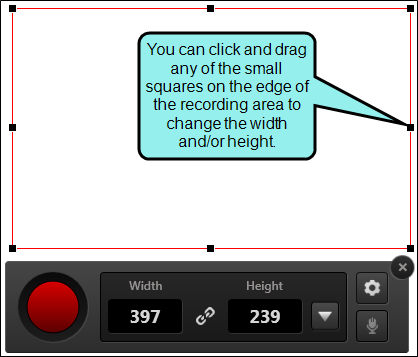
- Click Pick Screen Rectangle. A rectangle with a red border appears on your screen, along with a task bar. The task bar displays the current width and height values (in pixels).
-
Adjust the movie size. You can use several methods and features to do this.
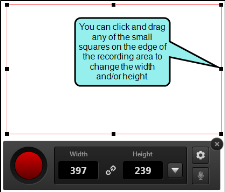
Drag Edge
You can resize the area manually by clicking any of the handles (small squares) around the edge of the rectangle and dragging them to resize the width and/or height.
Move Entire Recording area
You can move the entire area by clicking the size-all icon in the center of the area
 and dragging the area to a new location on your screen.
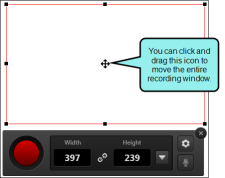
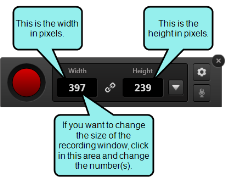
Type Width or Height
You can click in the number fields in the task bar to manually change the width and/or height of the window in pixels.
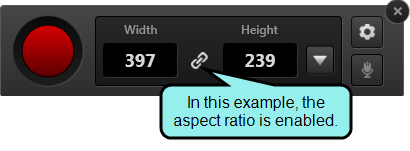
Maintain Aspect Ratio
You can click the chain button in the task bar to maintain the aspect ratio when you change the width or height of the area.
When this feature is disabled, the button displays as an broken chain image. If you then change one dimension of the capture window, the other dimension will not be resized automatically. For example, if you drag the window border to the left (to increase the width), the height will remain the same size.

When this feature is enabled, the button displays as a chain image. If you then change one dimension of the window, the other side will be resized automatically. For example, if you drag the window border to the left (to increase the width), the height will be resized accordingly.

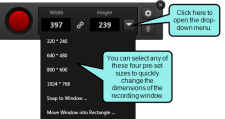
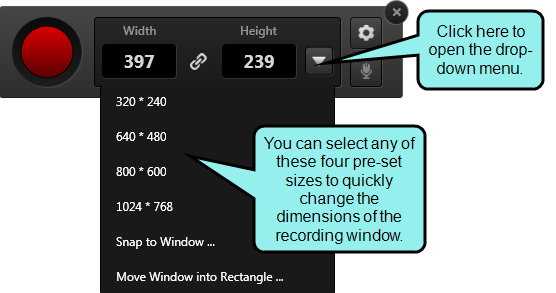
Choose Pre-Set Size
You can click the drop-down in the task bar and choose one of the pre-set window sizes.
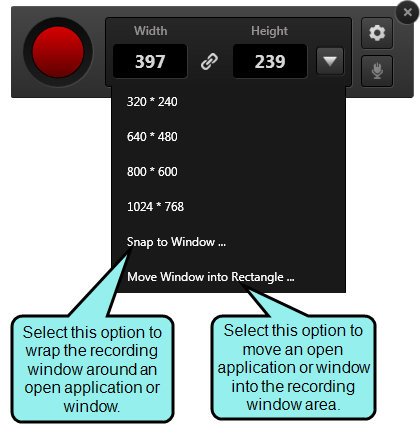
Snap/Move Into Rectangle
If you have a particular application or window open, and you want to capture it, you can choose an option to snap the window around that element, or you can choose to move the element into your window. When you use one of these options, the Select Window dialog opens. You can then choose any of the applications or windows that you have open.

Note If you are using a newer operating system, you may need to enable window-based recording optimization.
- When you are finished resizing the rectangle, click the red button in the task bar to accept the new recording area.
- In the Movie Properties dialog, click OK. All frames in the movie are resized.
- Click
") to save your work.
to save your work.


Note You can also resize individual objects. See Resizing Objects.
What’s Next?
If necessary, you can continue enhancing the movie. Otherwise, you can finalize the movie by building and distributing it. See Editing a Movie and Building Movie Output Using the Interface.
