When you create a movie, it consists of one or more frames. A frame can be blank, display a background color or gradient, or it can have an image assigned to its background.
[Menu Proxy — Headings — Online — Depth3 ]
How to Set the Background Color for a Frame
You may find it necessary or useful to select a specific color for a frame's background.
Example
Let's say you have inserted a blank frame into a movie. If you do not then add a background image or objects to cover all of the frame, the background is exposed in the default color (which you may not like). Therefore, you can set the background color as necessary.
- Double-click the frame. The Frame Properties window pane opens.
- Expand the Frame Appearance section.
- Use the Background section to set the color properties.
- Type Select either "Solid" or one of the directional patterns (e.g., Top to Bottom, Left to Right) if you want to create a gradient background that progresses in a certain direction from one color to another.
- Color/Gradient Click the down arrow to select a color for the background color. If you selected a gradient background, you can select two colors, so the frame background will transition the first color to the second color.
How to Set a Frame Image by Picking a File
When you record a movie, images are automatically added to each frame, based on your actions during the recording. If necessary, you can manually set the image, whether you are replacing an existing image or assigning a new one to a blank frame. When you set an image, it is either stretched or shrunk (if necessary) to fit the size of the frame.
You can select any image that has a supported file type (PNG, BMP, JPG, JPEG, TIF, TIFF, GIF).
- Double-click the frame. The Frame Properties window pane opens.
- Expand the Frame Appearance section.
- In the Background section, click Image File.
- In the Open dialog, locate and double-click the image file.
- Click
") to save your work.
to save your work.
How to Set a Frame Image by Capturing One
Mimic lets you capture an area on your screen and produce an image as a result.
- Open the window(s) with regions that you want to capture and/or arrange your desktop exactly as needed. When you initiate a region capture, the Mimic application will be minimized, allowing you to capture a region for whatever is directly behind it.
- In Mimic, open the frame.
- Double-click the frame. The Frame Properties window pane opens.
- Expand the Frame Appearance section.
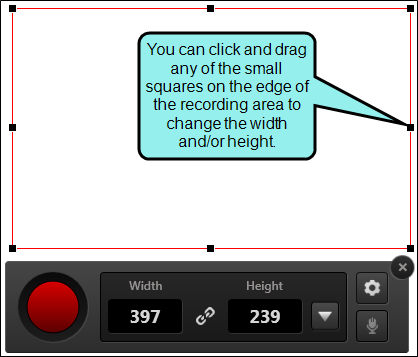
- In the Background section, click Screen Capture. Mimic minimizes and a rectangle with a red border appears on your screen, along with a task bar.
-
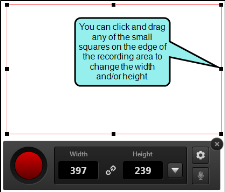
(Optional) Rearrange the capture area. You can use several methods and features to do this.
Drag Edge
You can resize the
Move Entire Capture Area
You can move the entire
 and dragging the area to a new location on your screen.
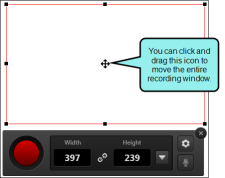
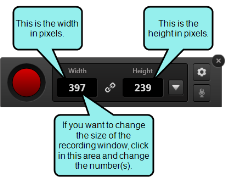
Type Width or Height
You can click in the number fields in the task bar to manually change the width and/or height of the
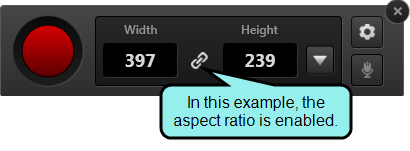
Maintain Aspect Ratio
You can click the chain button in the task bar to maintain the aspect ratio when you change the width or height of the
When this feature is disabled, the button displays as an broken chain image. If you then change one dimension of the capture window, the other dimension will not be resized automatically. For example, if you drag the window border to the left (to increase the width), the height will remain the same size.

When this feature is enabled, the button displays as a chain image. If you then change one dimension of the

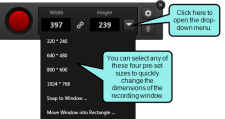
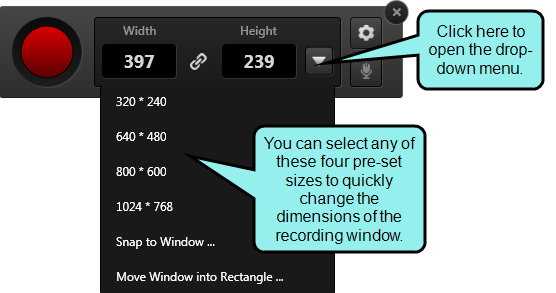
Choose Pre-Set Size
You can click the drop-down in the task bar and choose one of the pre-set window sizes.
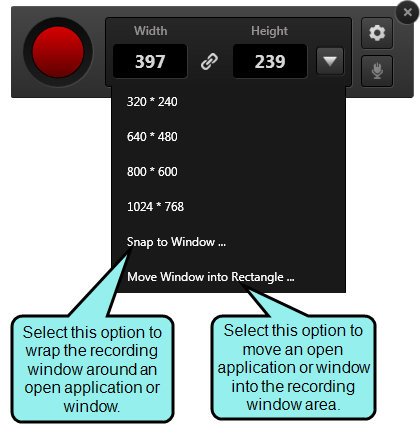
Snap/Move Into Rectangle
If you have a particular application or window open, and you want to capture it, you can choose an option to snap the

Note If you are using a newer operating system, you may need to enable window-based recording optimization.
- Click the red button on the task bar. The image is added to the frame.
- Click to save your work.


How to Set a Frame Image by Using the One From the Previous Frame
This option removes the current image and replaces it with the image from the previous frame. For example, if you are setting the properties for frame #12 in the movie and click this check box, the background image will be removed and replaced with the one from frame #11.
When you use this option, both frames use the same image (rather than each frame having its own copy of the image). The current frame simply points to the image that is used for the previous frame.
- Double-click the frame. The Frame Properties window pane opens.
- Expand the Image section.
- Click Use same background image as previous frame.
- Click to save your work.
What’s Next?
If necessary, you can continue enhancing the movie. Otherwise, you can finalize the movie by building and distributing it. See Editing a Movie and Building Movie Output Using the Interface.
