In addition to creating a movie by recording your actions, you can also create a movie by capturing an image on your screen. This will create a movie with one frame that is the same size as the screen capture. You can then insert additional frames into the movie and add objects, text, images, and effects to the frames.
[Menu Proxy — Headings — Online — Depth3 ]
How to Create a Movie From a Screen Capture
- Prepare your screen or workspace for capturing. This includes opening the application window(s) that you want to capture and/or arranging your desktop exactly as needed.
- (Optional) If you want the movie to be part of a collection, first create the collection and make sure it is open (see Creating a Movie Collection). Otherwise, if you want to create a standalone movie, skip to the next step.
- Select File > New.
- Click Movie From Screenshot.
-
(Optional) Rearrange the capture area. You can use several methods and features to do this.
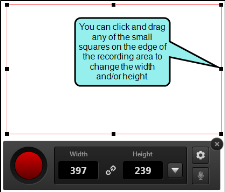
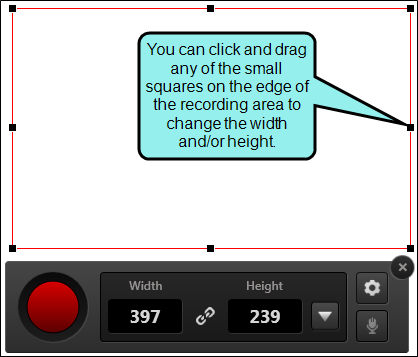
Drag Edge
You can resize the
Move Entire Capture Area
You can move the entire
 and dragging the area to a new location on your screen.
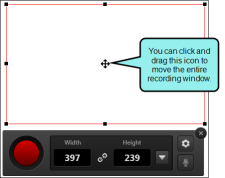
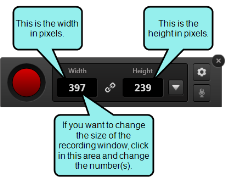
Type Width or Height
You can click in the number fields in the task bar to manually change the width and/or height of the
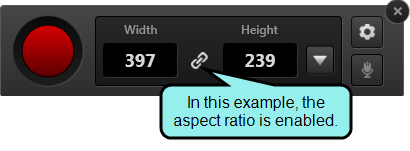
Maintain Aspect Ratio
You can click the chain button in the task bar to maintain the aspect ratio when you change the width or height of the
When this feature is disabled, the button displays as an broken chain image. If you then change one dimension of the capture window, the other dimension will not be resized automatically. For example, if you drag the window border to the left (to increase the width), the height will remain the same size.

When this feature is enabled, the button displays as a chain image. If you then change one dimension of the

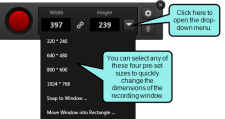
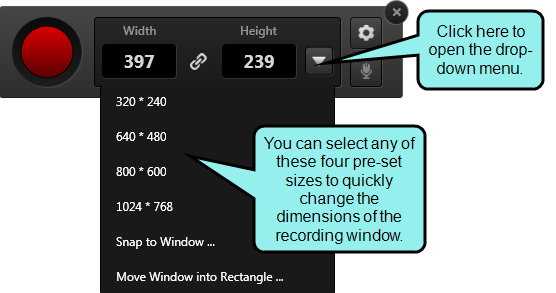
Choose Pre-Set Size
You can click the drop-down in the task bar and choose one of the pre-set window sizes.
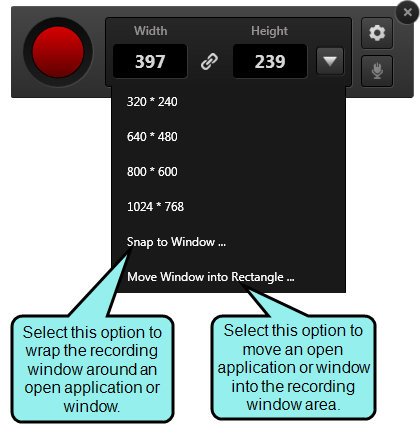
Snap/Move Into Rectangle
If you have a particular application or window open, and you want to capture it, you can choose an option to snap the

Note If you are using a newer operating system, you may need to enable window-based recording optimization.
- Click the red button on the task bar.
-
If the new movie is part of a collection, the Accept New Movie dialog opens. Enter a file name for the movie and click OK.
If you captured an image for a standalone movie, navigate in the dialog to a location to store the movie, in the File name field type a name for the movie, and click Save.
The movie is loaded into Mimic.


Note You can also capture new frames, inserting them into an existing movie.
What's Next?
After you add the single-frame movie, you can enhance it in several ways (e.g., inserting additional frames, adding effects, adding objects). When you are finished enhancing the movie, you can build it. See Editing a Movie and Building Movie Output Using the Interface.

