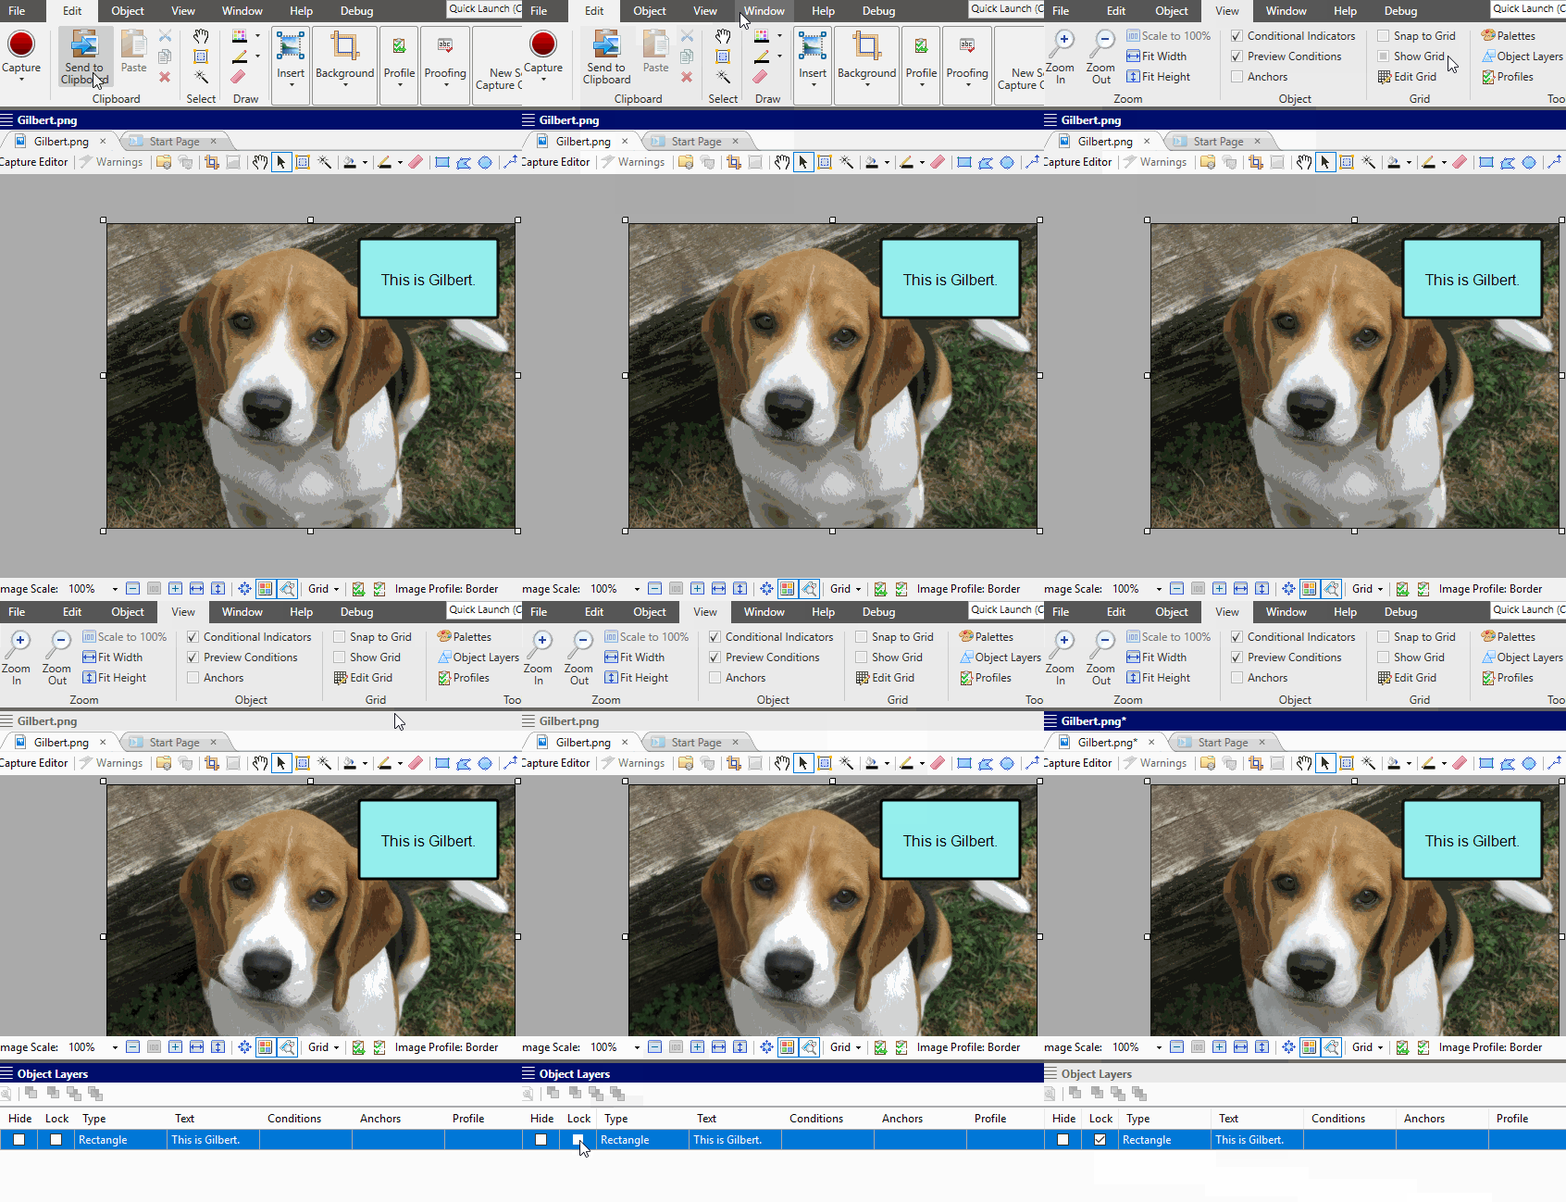
You can lock an object in place so that it cannot be moved on the image. Later, you can always unlock the object if necessary.
How to Lock Objects
- Open an image to which you have added objects.
-
Select View > Object Layers.
The Object Layers window pane opens, with each object represented by a different row. The object on the top layer is in the top row; the object on the bottom layer is on the bottom row.
- (Optional) You can click on a row and the related object will be selected in the Capture Editor. This is a good way to make sure you are selecting the correct object (e.g., if you have five rectangles in the image and you are not sure which row goes with which object).
- In the appropriate object row, click Lock so that it contains a check mark. If you later want to unlock the object, remove the check mark.
- Click
 to save your work.
Note Similar to locking objects, you can also set anchors on objects. Anchors lock any of the sides of an object in place, in relation to the edge of the image. See Setting Object Anchors.

