
An annotation is an open-backed bracket with pointers that direct the user to information on an image. They can be used in place of bubbles for calling out specific context. See Adding Graphics to Images.
[Menu Proxy — Headings — Online — Depth3 ]
How to Adjust the Pointer
- Open an image that has an annotation shape added to it.
- Double-click the annotation shape.
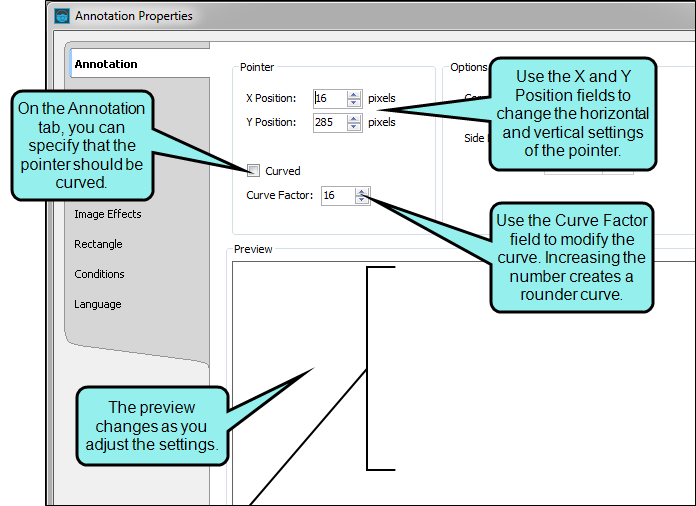
- In the Annotation Properties dialog, select the Annotation tab.
- Click Curved.
- To adjust the amount of curve, change the number in the Curve Factor field. The higher the number, the greater the curve. You can also enter negative numbers.
- You can change the numbers in the X Position and Y Position fields to alter the distance of the pointer horizontally and vertically. You can also enter negative numbers.
-
As you make changes, watch the Preview area at the bottom of the tab to see the results.
- Click OK.
- Click
 to save your work.
Example
When you first draw an annotation, it might look something like this:

After double-clicking on the shape, the Annotation Properties dialog opens. You can select the Annotation tab and make the necessary changes in the Pointer section.
How to Adjust the Bracket
- Open an image that has an annotation shape added to it.
- Double-click the annotation shape.
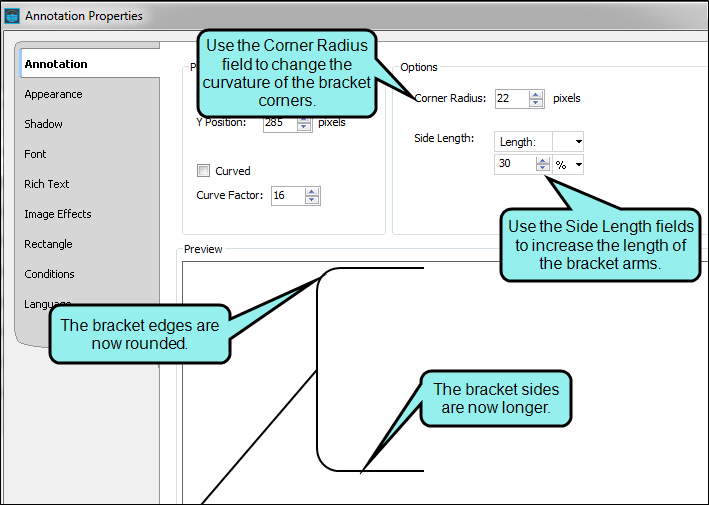
- In the Annotation Properties dialog, select the Annotation tab.
-
You can add a curve to the bracket or lengthen the arms.
Add Curve to the Bracket
- To adjust the amount of curve, change the number in the Corner Radius field. The higher the number, the greater the curve. You can also enter negative numbers .
Add Length to the Arms
- To change the arm length, in the Side Length field enter a number and select a unit of measurement. The higher the number, the longer the arms. You can also enter negative numbers.
- As you make changes, watch the Preview area at the bottom of the tab to see the results.
- Click OK.
- Click to save your work.
Example
When you first draw an annotation, the default settings include straight corners and short bracket arms:
After double-clicking on the shape, the Annotation Properties dialog opens. You can select the Annotation tab and make changes to the bracket style in the Options section.
Note A very useful tool when working with objects is a palette, which lets you store objects for future use. For example, if you are including callouts with some
What's Next?
If necessary, you can continue editing the image (e.g., adding objects, effects, a callout; cropping the image; resizing the image). Otherwise, you can finalize the image by saving it. See Editing Images.