Adding Graphics to Images
You can add graphics to images using the Capture Editor or the Profiles Editor. Use the Capture Editor if you want to add graphics to a single image only. Use the Profiles Editor if you want to add graphics to a profile, which can be used when capturing future images.

How to Add Graphics to Images
- Open or capture an image.
-
Do one of the following, depending on the part of the user interface you are using:
-
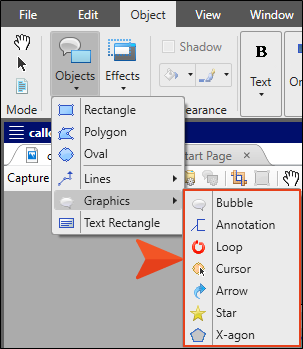
Ribbon Select Object > Objects > Graphics.
- Capture Editor In the local toolbar, select the down arrow from beside
 .
. - Profile Select View > Profiles, and from the drop-down on the left side of the local toolbar, choose the profile. Select the Shapes tab. Select the down arrow from beside .
-
-
Select the appropriate option (e.g., bubble, annotation, loop).
-
Bubble
 This is an object consisting of a somewhat rectangular area with a pointer. A bubble is especially useful for creating callouts in an image. The rectangular area can hold any text that you add, and you can move the pointer so that it draws the user's eye to an area of the image that you want to explain. See Adding Bubble Callouts.
-
Annotation
 This is an object consisting of a bracket with a pointer. An annotation is especially useful for creating callouts in an image. The bracket area can draw attention to text, and you can move the pointer so that it draws the user's eye to an area of the image that you want to explain. See Setting the Shape of an Annotation.
-
Loop
 This option lets you draw a loop. This is useful for circling areas of an image that you want to draw interest to. See Setting the Coordinates for a Loop and Setting the Thickness for a Loop.
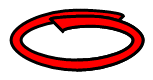
-
Cursor
 This object displays a bitmap of a cursor. You might use this object, for example, if you are explaining to users that a particular button should be clicked. By adding a cursor next to the button in the image, users may have an easier time understanding your point. See Adding Cursors.
-
Arrow
 This option lets you draw a stylized arrow. See Setting the Shape of an Arrow. This is different than adding lines. Lines can have multiple segments and can be several styles, including straight, wavy, zig zag, or curved. See Adding Lines.
-
Star
 This option lets you draw a star shape. The shape area can hold any text that you add. The star can support from 3 to 100 arms. See Setting the Shape of a Star.
-
X-agon
 This option lets you draw a polygon. The shape area can hold any text that you add. The x-agon can support from 3 to 100 sides. See Setting the Shape of an X-Agon.
-
-
Click on the image and drag the mouse to draw the shape.
If you are drawing an arrow, click once in the frame where you want to start the shape. Without clicking your mouse button, move your cursor in the direction where you want the arrow. Click the mouse again to complete the shape.
Release the mouse button when you are finished.
Note If you have drawn the shape outside the current boundaries of the image, padding is automatically added to compensate for the space needed. Double-click the image (not the shape) to open the File Properties dialog. Then, on the Appearance tab, use the fields in the Background section as necessary.
- Click
 to save your work.
Note A very useful tool when working with objects is a palette, which lets you store objects for future use. For example, if you are including callouts with some