Adding Shapes to Images
You can add shapes to images using the Object ribbon or the Profiles Editor. Use the ribbon if you want to add shapes to a single image only. Use the Profiles Editor if you want to add shapes to a profile, which can be used when capturing future images.

How to Add Shapes to Images
-
Open or capture an image and do one of the following:
- Ribbon Select Object > Objects.
-
Profile Select View > Profiles, and from the drop-down on the left side of the local toolbar, choose the profile. Select the Shapes tab.
-
Choose one of the following:
- Rectangle
 .
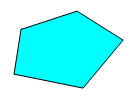
. - Polygon
 .
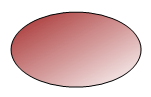
. - Oval
 .
. - Text Rectangle

- Rectangle
-
Click in the image and draw the shape.
- Rectangle/Oval If you are drawing an oval or rectangle, click in the image and drag the mouse to draw the shape somewhere in the image. Press and hold SHIFT to draw a perfect square or circle. Release the mouse button when you are finished.
- Polygon If you draw a polygon, click once in the image where you want to start the shape. Without clicking your mouse button, move your cursor to draw a line segment. When you want the line segment to end, click once again on the image. Then move the mouse to draw another line segment. Continue this until you have drawn the shape that you want. When you want to close the image, double-click on the image.
- Text Box If you draw a text box, you'll need to provide text for the shape and then click outside of it.
Note If you have drawn the shape outside the current boundaries of the image, padding is automatically added to compensate for the space needed. Double-click the image (not the shape) to open the File Properties dialog. Then, on the Appearance tab, use the fields in the Background section as necessary.
- Click
 to save your work.


Note A very useful tool when working with objects is a palette, which lets you store objects for future use. For example, if you are including callouts with some