
When applying image properties, you must first select the medium you want to use: web (default), print, or custom. The image properties you select are saved for each medium type and used in Flare outputs associated with that medium.
[Menu Proxy — Headings — Online — Depth3 ]
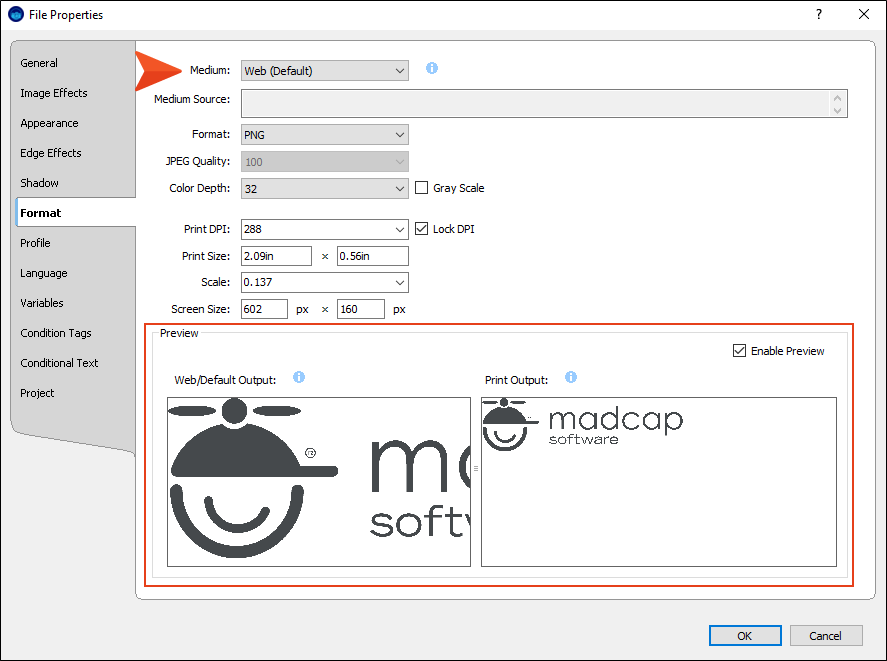
How to Set Image Properties Using Mediums
- Open the image, and double-click it.
- In the File Properties dialog, select the Format tab.
-
From the Medium drop-down, select the medium you want to want to edit (i.e., print, web, custom). If you selected a custom medium, the Medium Source field displays the location of the stylesheet file associated with that medium.
Note If you have more than one custom medium with the same name, you will only see one instance of the medium name in the Medium drop-down. If more than one stylesheet contains a medium with the same name, you will see each of the stylesheets listed in the Medium Source field. As a best practice, choose unique names when creating custom mediums.
-
(Optional) If the settings for the medium are disabled, select Enable Format to enable changes.
Note You can enable settings for different mediums (i.e., other than the Web (Default) medium) only if the image in question already exists in a MadCap Flare project.
- Make changes to the properties settings.
-
In the Preview section, view your settings. You can click Enable Preview to toggle the Preview section on or off.
- Click OK.
- Click
 to save your work.
More About Image Previews and Mediums
When you preview an image on the Format tab, the preview changes based on the medium you select. You will see a preview of how the image will appear when you generate web-based and print-based output in Flare.
However, not all mediums support both of these output types, and settings are applied differently depending on if a medium is enabled or disabled. The table below shows the ways your settings are applied in each situation.
|
Medium Type |
Enabled/Disabled |
Preview Type |
Result |
|---|---|---|---|
|
Web (Default) |
N/A (cannot be disabled) |
Web/Default |
The image will look like the Web/Default preview if the image is saved to disk or if the Web (Default) medium is used to generate web-based output in Flare. |
|
Web (Default) |
N/A (cannot be disabled) |
|
The image will look like the Print preview if the Web (Default) medium is used to generate print-based output in Flare, but only if the Print medium is disabled. |
|
|
Enabled |
Web/Default |
The Print medium has no effect on web settings. The preview uses the Web (Default) settings. |
|
|
Enabled |
|
The image will look like the Print preview if the Print medium is used to generate print-based output. |
|
|
Disabled |
Web/Default |
The Print medium has no effect on web settings. The preview uses the Web (Default) settings. |
|
|
Disabled |
|
The image will use the Web (Default) settings to generate print-based output. |
|
Custom |
Enabled |
Web/Default |
The image will look like the Web/Default preview if you use this custom medium to generate web-based output in Flare. |
|
Custom |
Enabled |
|
The image will look like the Print preview if you use this custom medium to generate print-based output in Flare. |
|
Custom |
Disabled |
Web/Default |
The image will use the Web (Default) settings to generate web-based output. |
|
Custom |
Disabled |
|
The image will attempt to use the Print medium settings to generate print-based output. If the Print medium is also disabled, the image will use the Web (Default) settings to generate print-based output. |