You can resize images in different ways.
[Menu Proxy — Headings — Online — Depth3 ]

Resizing Images
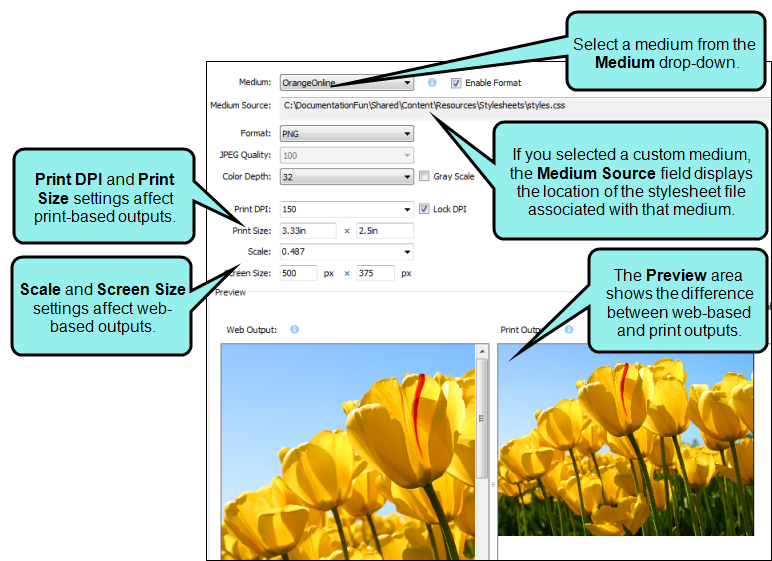
You can specify the scale and size for images on output. You can set image size for printed outputs, web-based outputs, and for outputs that use custom mediums (which might be print- or web-based). These options are available in the File Properties dialog.
Example
You capture a screen shot and insert the image into a Flare project. Suppose you plan to generate WebHelp (online) output as well as PDF (print) output from that project. For the online output, let's say that you want the image in online output to be displayed in the original size (i.e., the same size as it was when you captured it). However, let's say that for the print output, you want the image to be displayed a bit smaller at a specific size. In that case, you can open the File Properties dialog, select Print from the Medium drop-down, and specify the height or width for that image. Because you want to use the original size for the online output, you then select Web (Default) from the Medium drop-down. You can leave these settings as they are.
How to Resize an Image
- In the Capture Editor, double-click the image that you want to resize.
- In the File Properties dialog, select the Format tab. The settings on this tab allow you to specify the size or scale for an image.
- (Optional) From the Medium drop-down, select the medium whose size settings want to want to edit (i.e., print, web, custom). If necessary, select Enable Format to enable the medium.
-
Adjust any of the available fields.
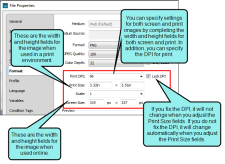
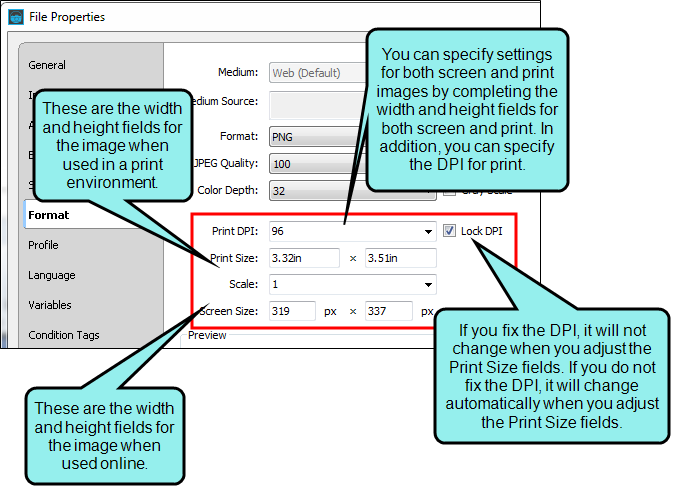
- Print DPI You can select or enter the resolution for the image in terms of DPI (dots per inch). As the name suggests, this setting determines how many dots are used per linear inch when printing an image. To ensure a better quality printout, you should specify a high DPI setting for printed output (say, 150 DPI).
- Lock DPI If you select this check box, your Print DPI setting will remain the same even when you change the size of the image. If you do not select this check box, your Print DPI setting will adjust automatically when you make changes to the size, and vice versa.
- Print Size In the first field, you can enter the width for the image; simply type the unit of measurement immediately after the number (e.g., if you want to use inches, you might type 5in). In the second field, you can enter the height for the image.
- Scale Specify the size of images by increasing or decreasing the scale number. You can select a value from the Scale drop-down, or you can manually enter a scale value in the field. For example, the number 1.0 means the images will be shown at 100% of their original size. The number .70 means the images will be shown at 70% of their original size. The number 1.25 means the images will be shown at 125% of their original size. The number 1.255 means the images will be shown at 125.5% of their original size.
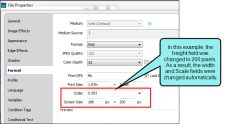
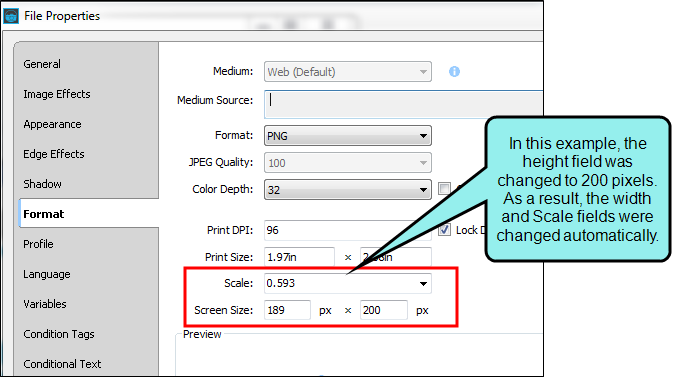
- Screen Size In the first field, you can enter the number of pixels wide that you want the images to be resized. In the second field, you can enter the number of pixels high. What you enter in one field might cause another field to be adjusted automatically.
- Click OK.
- Click
 to save your work.
More About the Format Tab
Use the Format tab to set the file format, JPEG quality, color depth, size settings, and DPI for an image. You can also apply gray scale to the image. When you have inserted a Capture image into a Flare project and produce output (Adobe PDF, Microsoft Word) from that project, Flare automatically uses the Format tab settings to display the image. What does this mean? This means you only have to worry about creating and maintaining one image for both online, printed, and custom outputs (i.e., those generated using a custom mediums) in Flare. The less attractive alternative is to create and maintain multiple separate images and then use condition tags in Flare to determine which image is to be included with which output.
Example You create a Flare project and you are using Capture to produce images for it. You want to generate two different outputs from that Flare project. Let's say the first output is an online Help system to be placed on a website, and the other output is a PDF document, which you will send to a printer.
When you edit the image properties in Capture, you select a medium from the Medium drop-down to specify the image settings (you may elect not to change any of the default settings). When you select the Web (Default) medium type, you can change the Screen Size or Scale settings to affect how the image will appear on the monitor in your web output. When you select the Print medium type, you can set the image's Print DPI. You can also manually enter print dimensions in the Print Size fields or change the image's Scale.
Note: Although some settings—like Print DPI—are irrelevant for certain medium types, you may want to fill them in regardless of the medium type you choose, just in case you need to use a medium for another type of output.
If you also have custom mediums available in your Flare project, you can choose these options from the Medium drop-down as well. The settings you define for a custom medium can be different than those you define for a Print or Web (Default) medium, so you can make changes specific to a medium's layout.
In Flare, you insert the Capture image. When you generate output for the website, Flare displays the settings you specified for the Web (Default) medium. When you generate the PDF output from the project, Flare displays the settings for the Print medium. When you generate the custom output, Flare displays the settings for the custom medium. However, if the custom medium is unavailable (or if it is disabled in Capture), Flare will use the Web (Default) or Print settings.
Note You can enable settings for different mediums (i.e., other than the Web (Default) medium) only if the image in question already exists in a MadCap Flare project.
Resizing Image Backgrounds
After you capture an image, you may want to enlarge or reduce its background size. This is easily done by setting the scale factor or by changing the width or height. The image background will be resized according to the values that you enter. Any objects on the image (e.g., callouts, shapes, lines) will remain their original sizes, but you can always modify individual objects as necessary.
You can resize image backgrounds using the File Properties dialog or the Profiles Editor. Use the File Properties dialog if you want to resize a single image only. Use the Profiles Editor if you want to add resizing specifications to a profile, which can be used when capturing future images.
How to Resize an Image Background
-
Do one of the following, depending on the part of the user interface you are using:
-
Capture Editor Double-click the image you want to resize. The File Properties dialog opens.
- Profile Select View > Profiles, and from the drop-down on the left side of the local toolbar, choose the profile.
-
- Select the Image Effects tab.
-
Resize the image by using any of the available fields.
-
Background Scale Resize the image background by increasing or decreasing the scale number. You can adjust the scale up to three decimal places. For example, the number 1.0 means the image will be shown at 100% of its original size. The number .70 means the image will be shown at 70% of its original size. The number 1.25 means the image will be shown at 125% of its original size. The number 1.255 means the image will be shown at 125.5% of its original size.
Note The background scale setting has a minimum value of 0.100 and a maximum value of 10.000.
Note If the background scale is set to anything other than 1.000, the canvas tools (magic wand, selection rectangle, color fill, pencil, eraser, and flatten) will not be available. Be sure to make changes to the canvas before making adjustments to the background scale.
Example
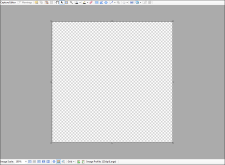
This is a blank Capture canvas. The background is shown at 1.0 scale.
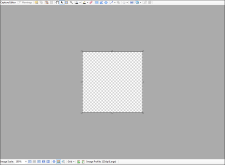
Here the background is shown at 0.5 scale.
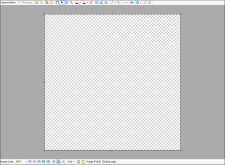
Here the background is shown at 1.125 scale.
- Scale Background To Resize the width and height of the image background by entering the number of pixels. The image will then be shrunk or stretched to that width or height.
- Blur Factor Set the amount of blurriness applied to the image. The blur effect will be seen if you have enabled the effect for an object in the properties dialog.
- Shade Factor Set the amount of shading applied to the image. The shade effect will be seen if you have enabled the effect for an object in the properties dialog.
- Preview Select the appropriate check box(es) to see a preview of the image with the blur and/or shading effect settings applied to it.
-
- Click OK.
- Click to save your work.

What’s Next?
If necessary, you can continue editing the image (e.g., adding objects, effects, a border, a callout; cropping the image; resizing the image). Otherwise, you can finalize the image by saving it. See Editing Images.