Inserting Variables Into Objects
After you create variables or link to existing variables in a MadCap Flare project, you can insert them into most objects that can be added to an image (e.g., callouts, rectangles).
[Menu Proxy — Headings — Online — Depth3 ]
How to Insert a Variable Into an Object
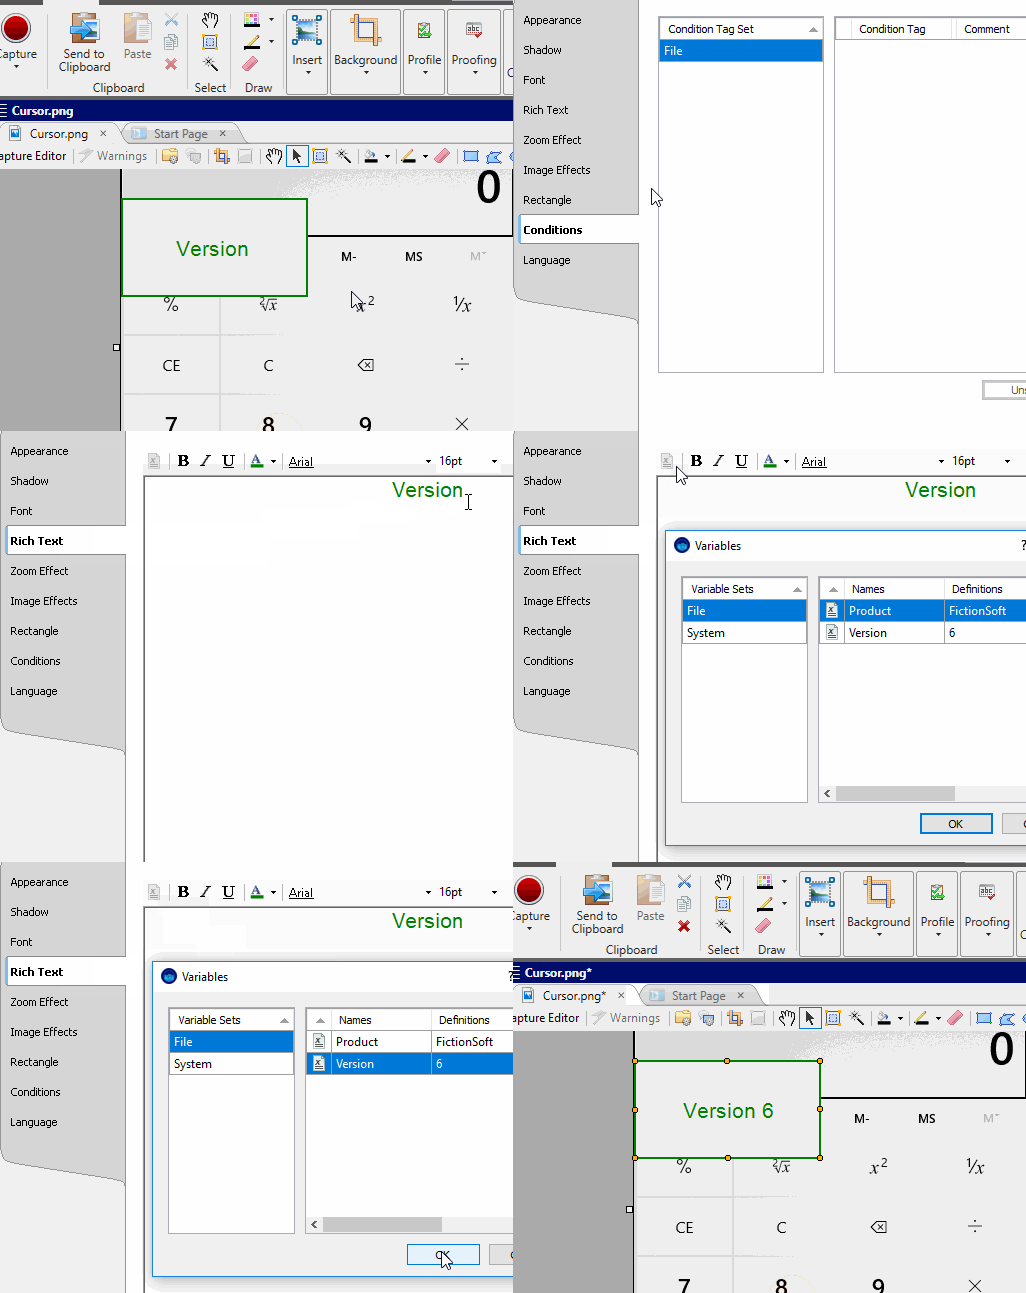
- Open the image and double-click an object that allows text (e.g., rectangle, bubble callout).
- In the dialog, select the Rich Text tab.
- Place your cursor at the location where you want to add a variable (e.g., before, between, or after any text you have typed).
-
Click the Insert a Variable button
 .
.The Variables dialog opens, with the variable sets (e.g., File, System, or name of variable set from Flare project) on the left and the variables associated with the selected set on the right.
-
On the left, select the appropriate variable set.
- File Variables These are variables that you create in Capture. A file variable is available only for the image for which it was created. See Creating Variables.
- System Variables These are variables provided by Capture, such as variables for your system date and time.
- Project Link Variables These are variables that were created in a MadCap Flare project, which has been linked to the Capture image. Therefore, any variables in that project can also be used in your image. You can link to a Flare project from an image manually. However, if the image is already contained within the folder structure of a Flare project, those variables are automatically available to the image (i.e., you do not need to link to the project manually). See Linking to Flare Projects.
-
On the right, select the variable you want to add, and click OK.
The variable syntax is added to the object. For example, if you insert a variable called "PhoneNumber" from a variable set named "MyVariables," you will see something like this:

- Click
 to save your work.

What’s Next?
If necessary, you can continue editing the image (e.g., adding objects, effects, a border, a callout; cropping the image; resizing the image). Otherwise, you can finalize the image by saving it. See Editing Images.
